Domestic Pricing
1. Login to the application
Login to the application

2. Access Business Menu
Click on Business menu
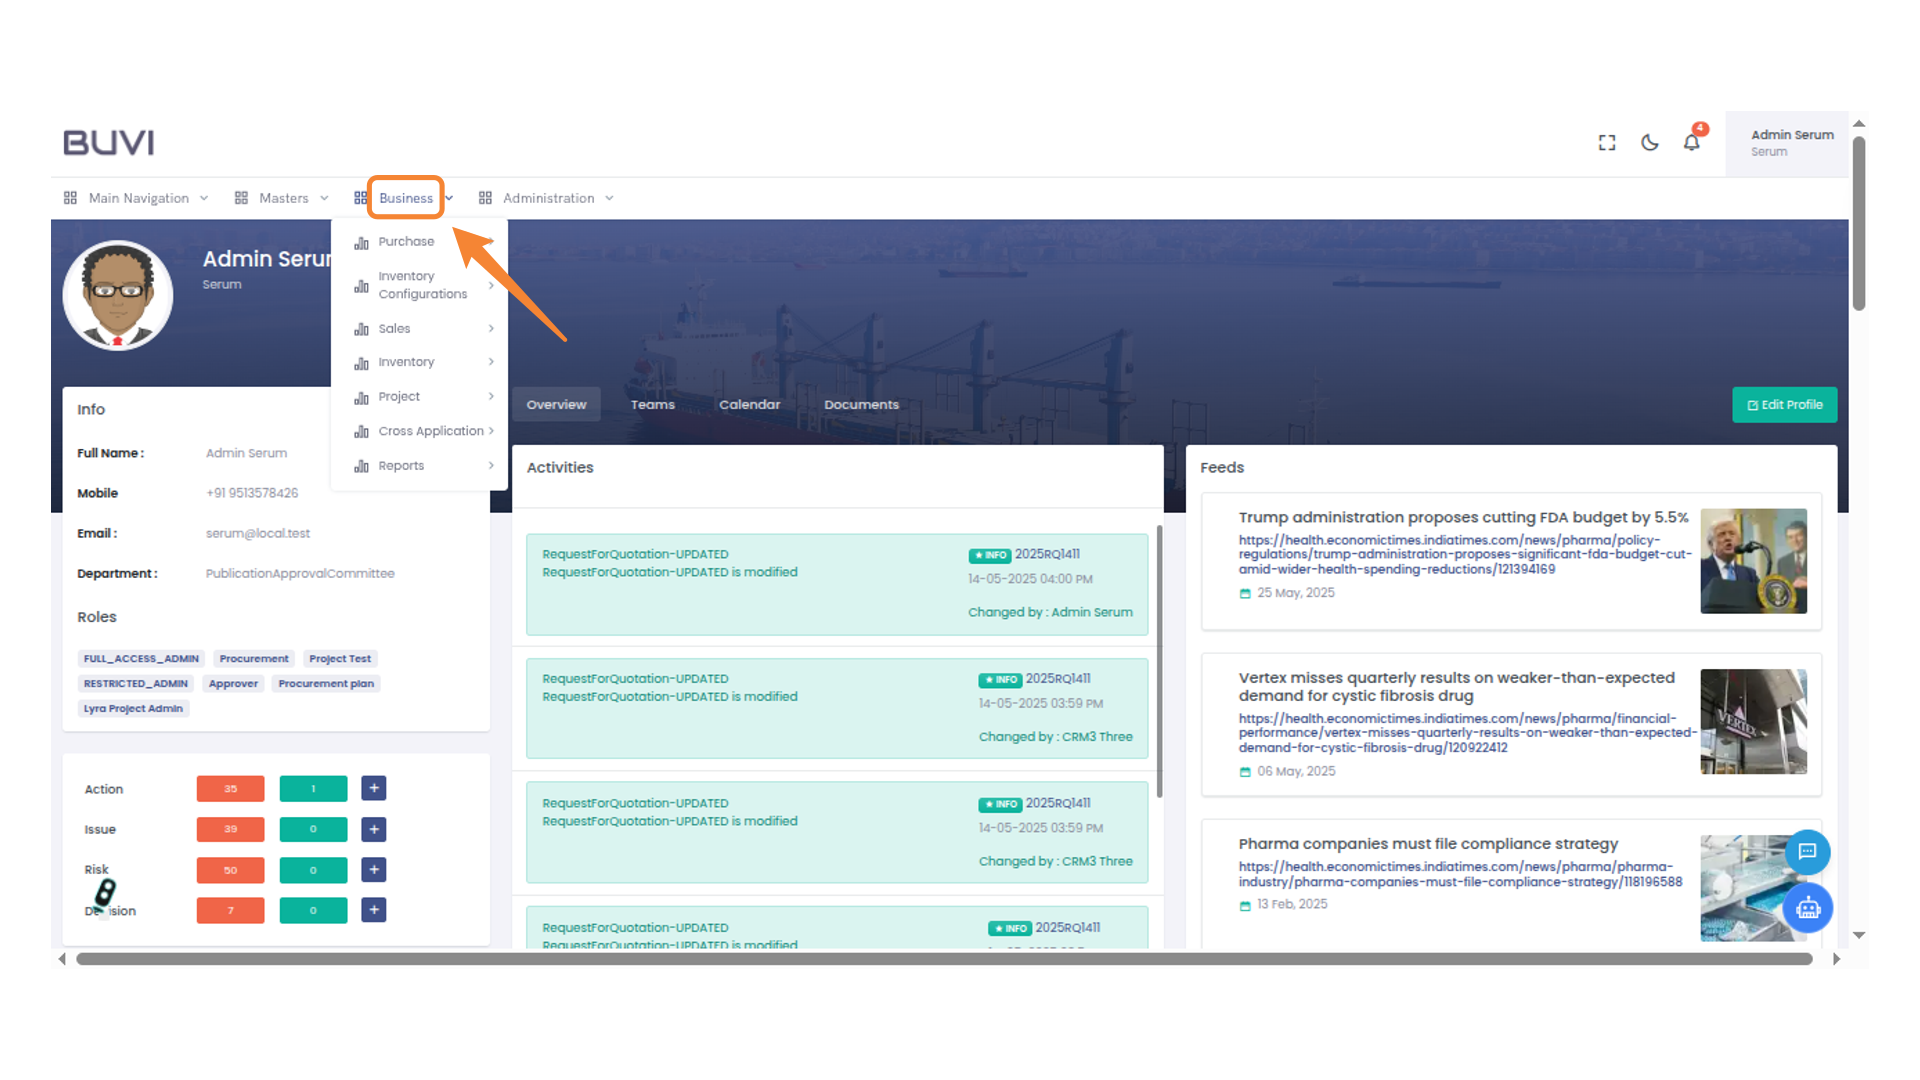
3. click on Request for proposal menu
click on Request for proposal menu

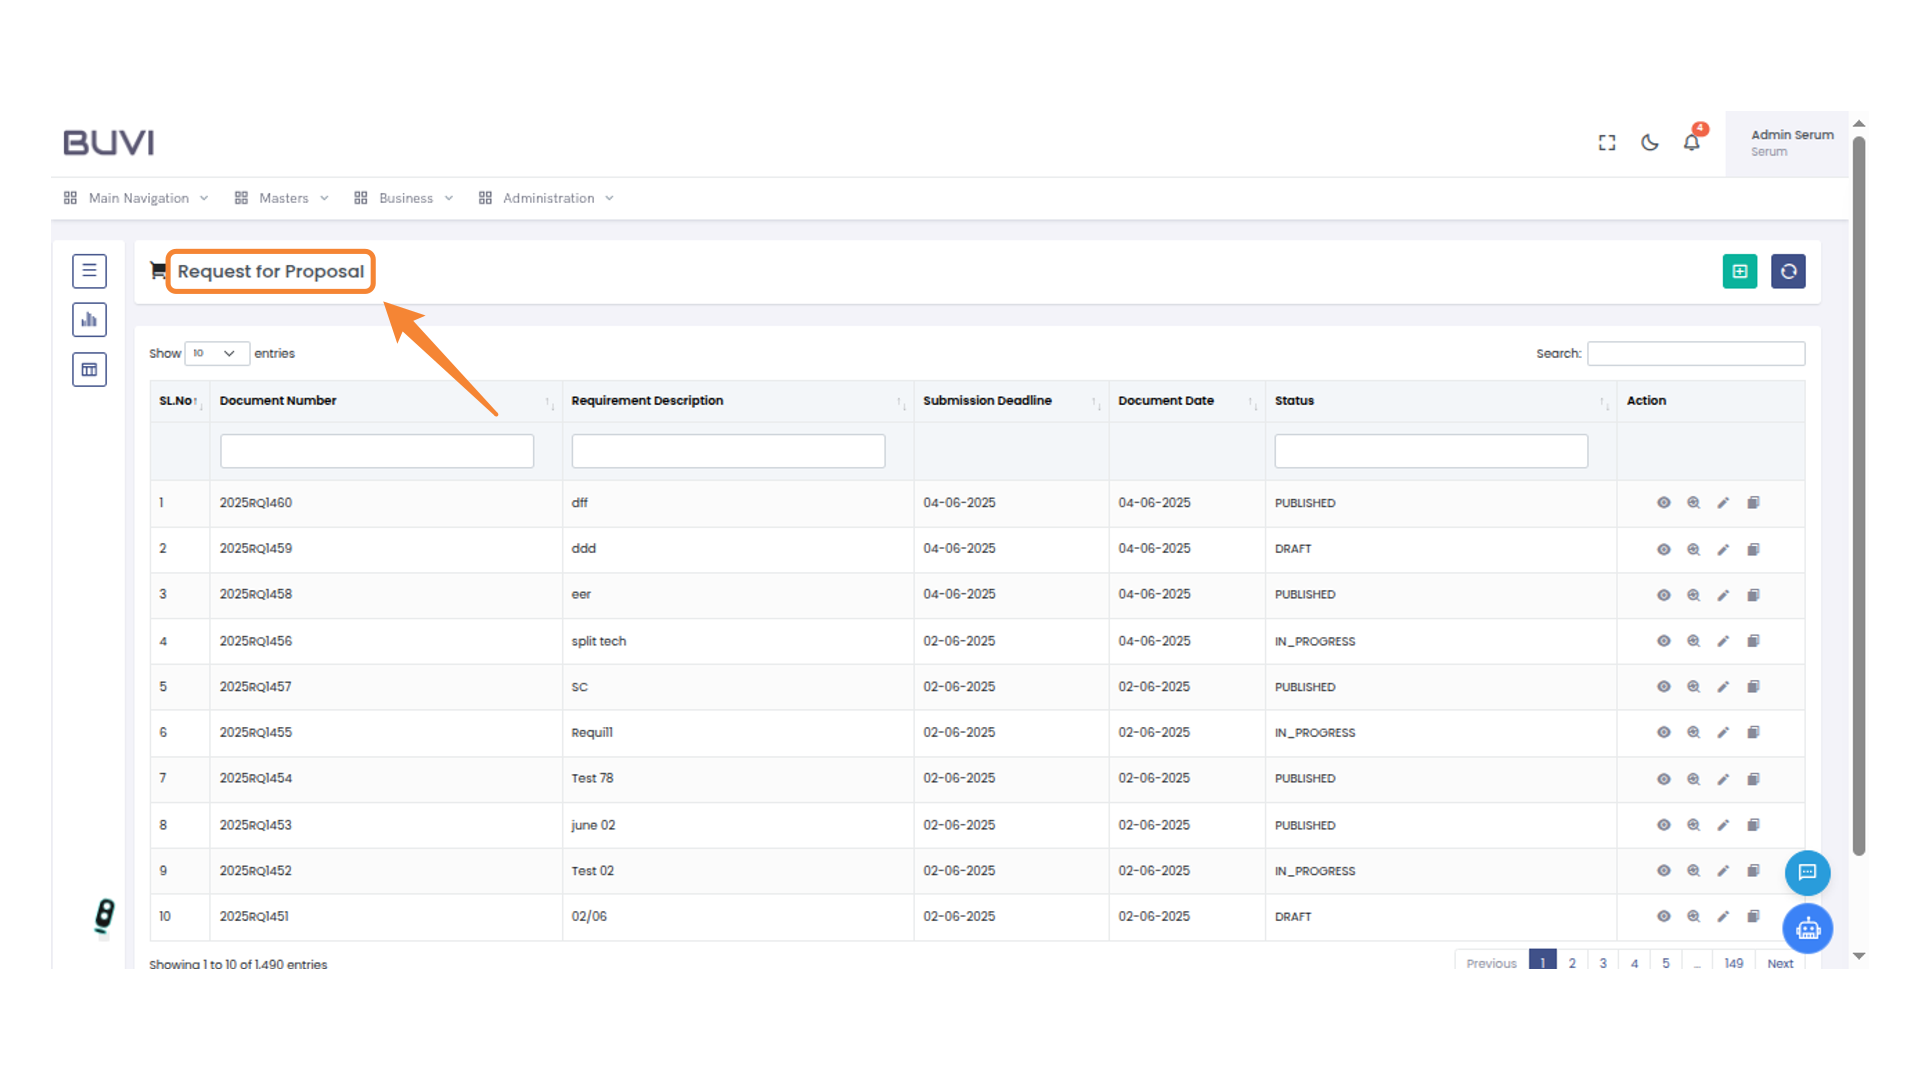
4. Initiate Proposal Process
Access the 'Request for Proposal' section to begin creating and managing proposals for upcoming projects.
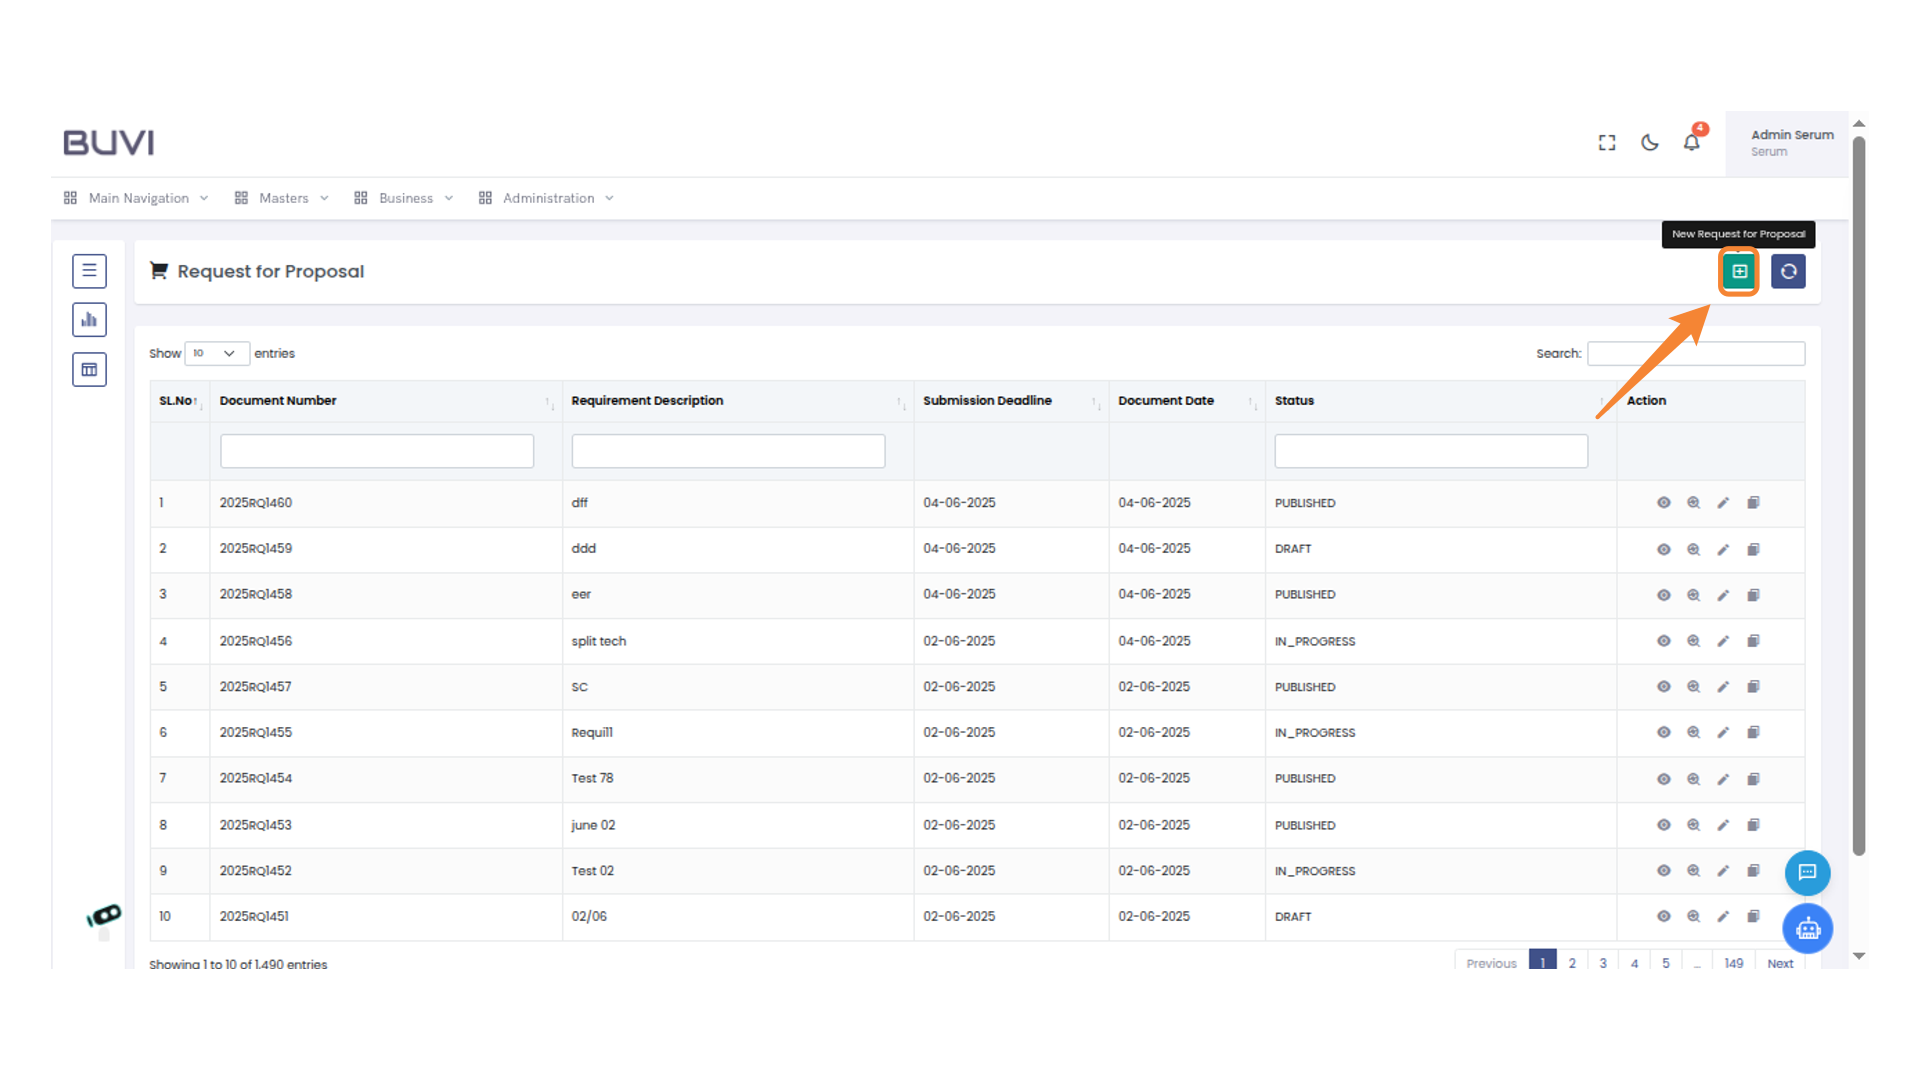
5. Create New Proposal
Click the icon to initiate a new request for proposal.
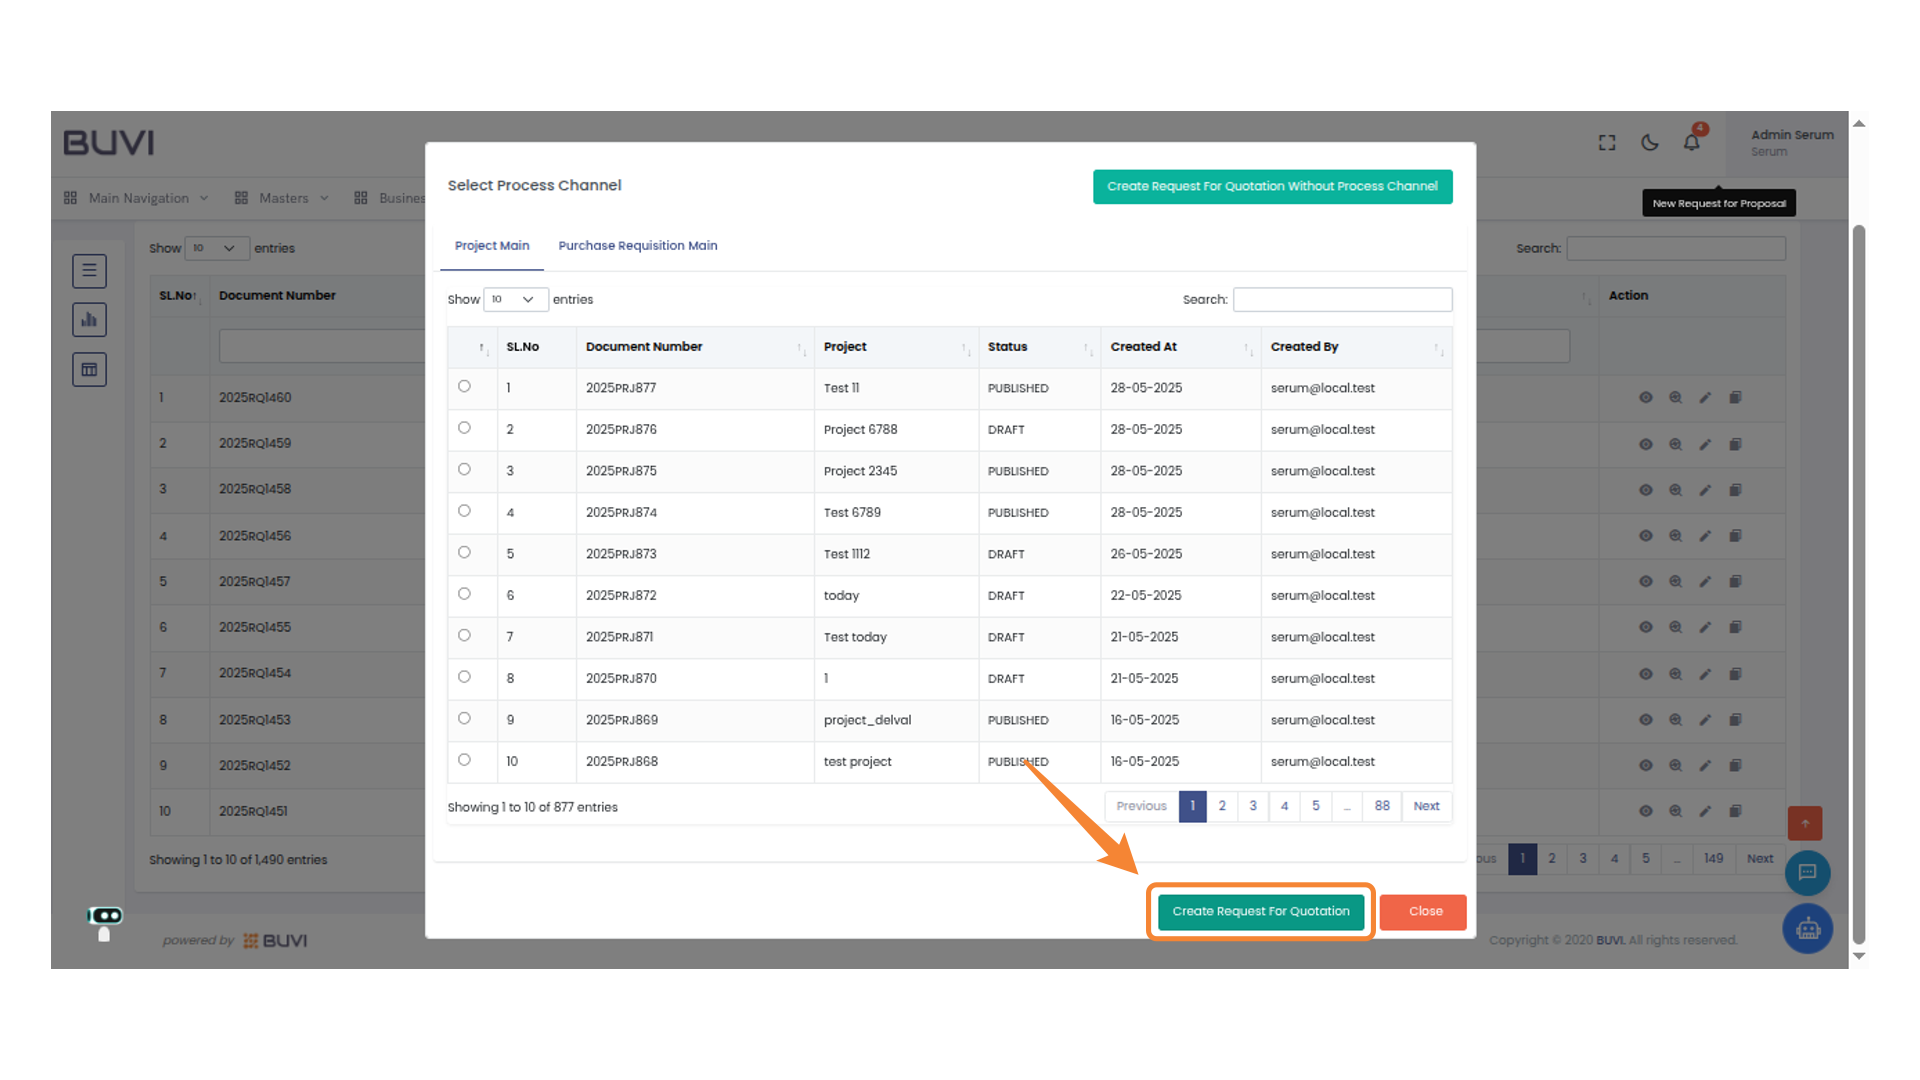
6. Initiate Quotation Request
Click "Create Request For Quotation" to begin the process of generating a quotation request.
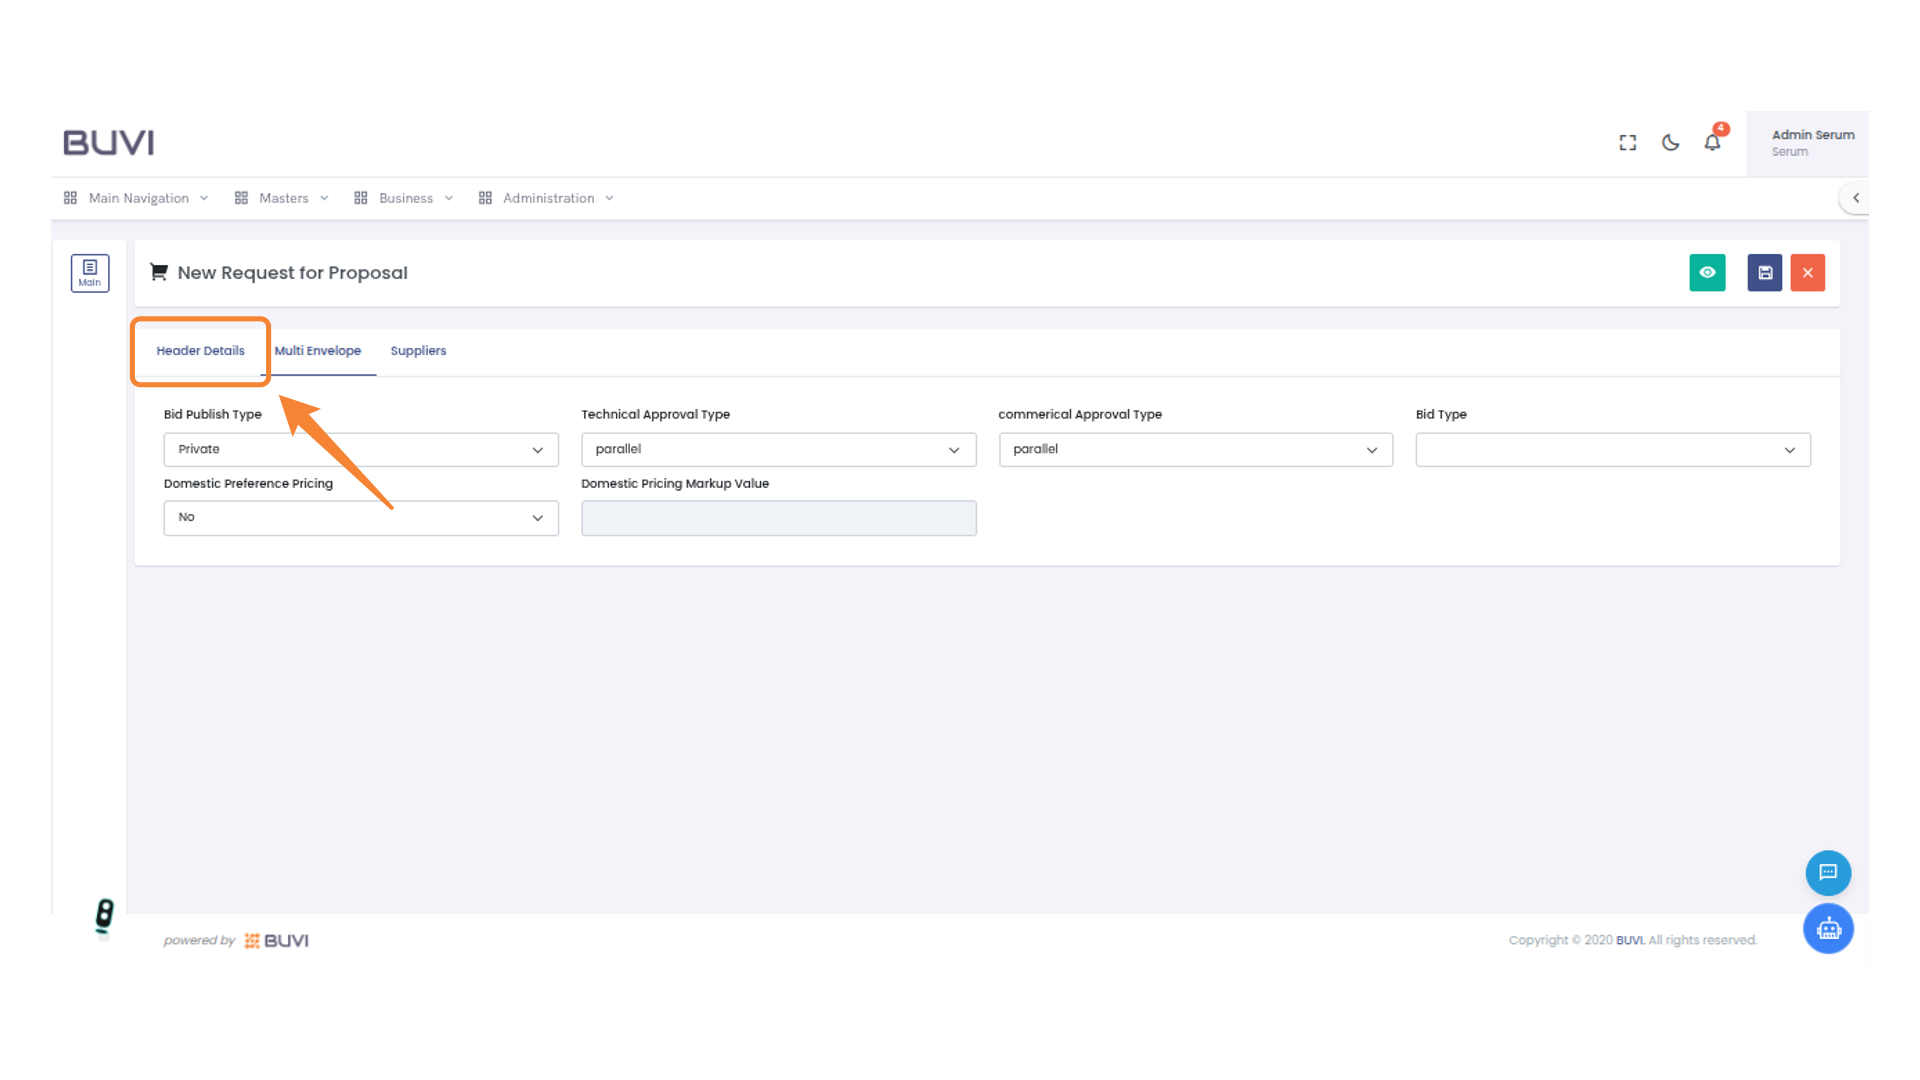
7. Select Header Details
Click on 'Header Details' to view and edit the main proposal information.
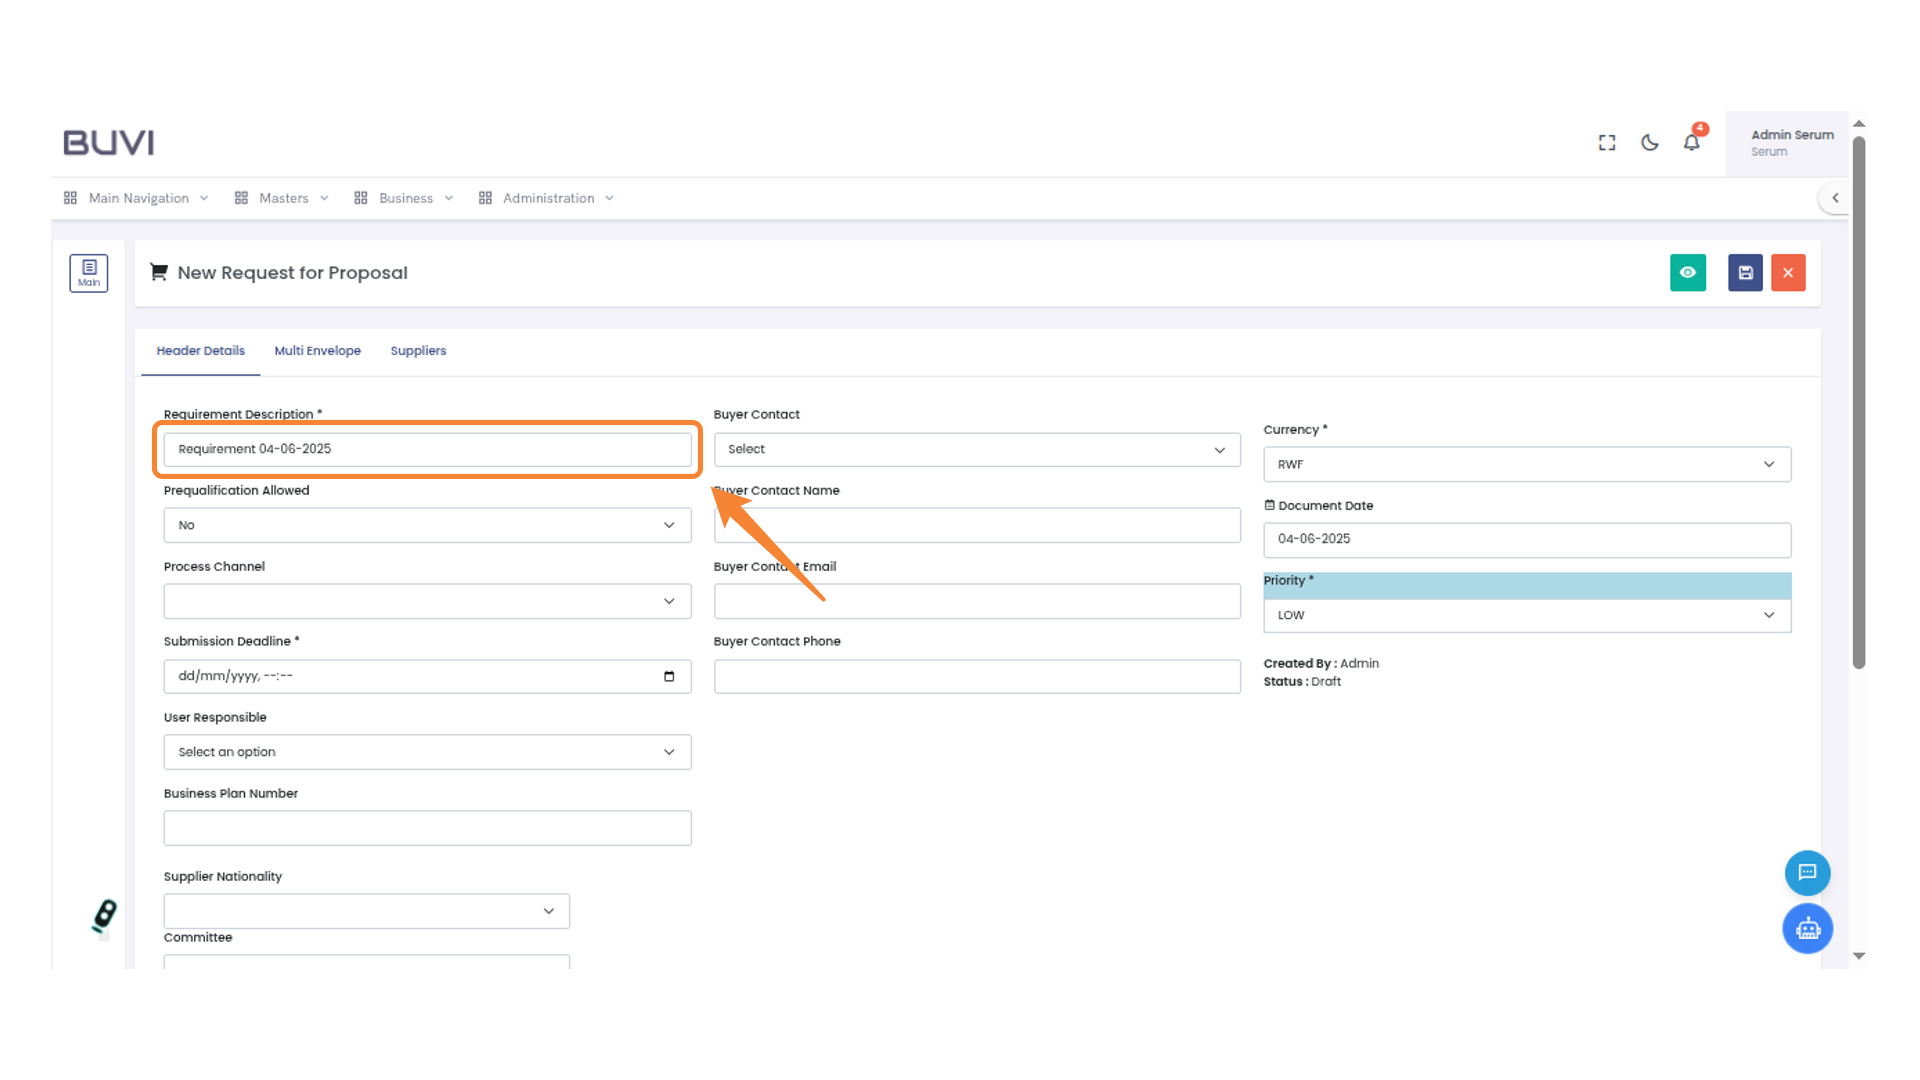
8. Enter Requirement description
Input the requirement description
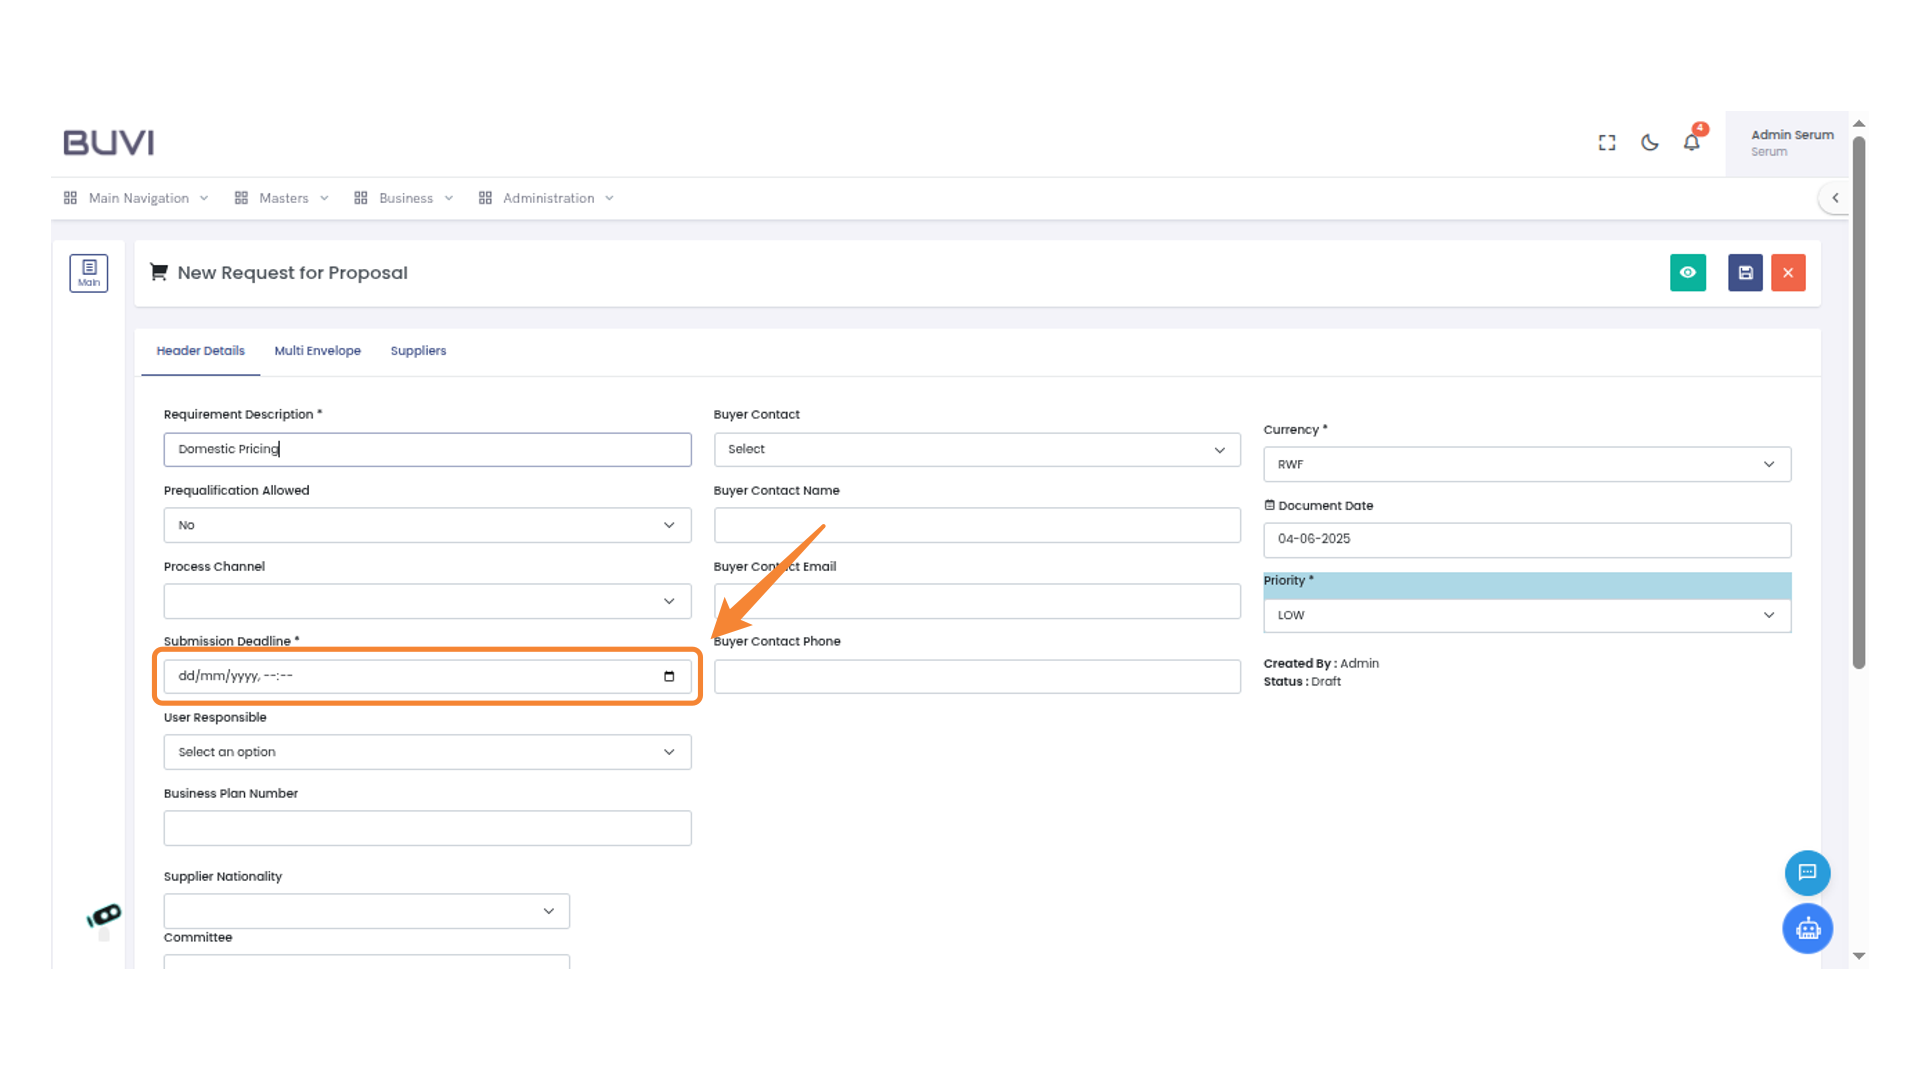
9. Set Submission Deadline
Enter the submission deadline
10. Select Multi Envelope Option
Select the 'Multi Envelope' tab to access related options and configurations.

11. Select Bid Type
Choose from the dropdown menu labeled 'Bid Type' to specify the desired category.

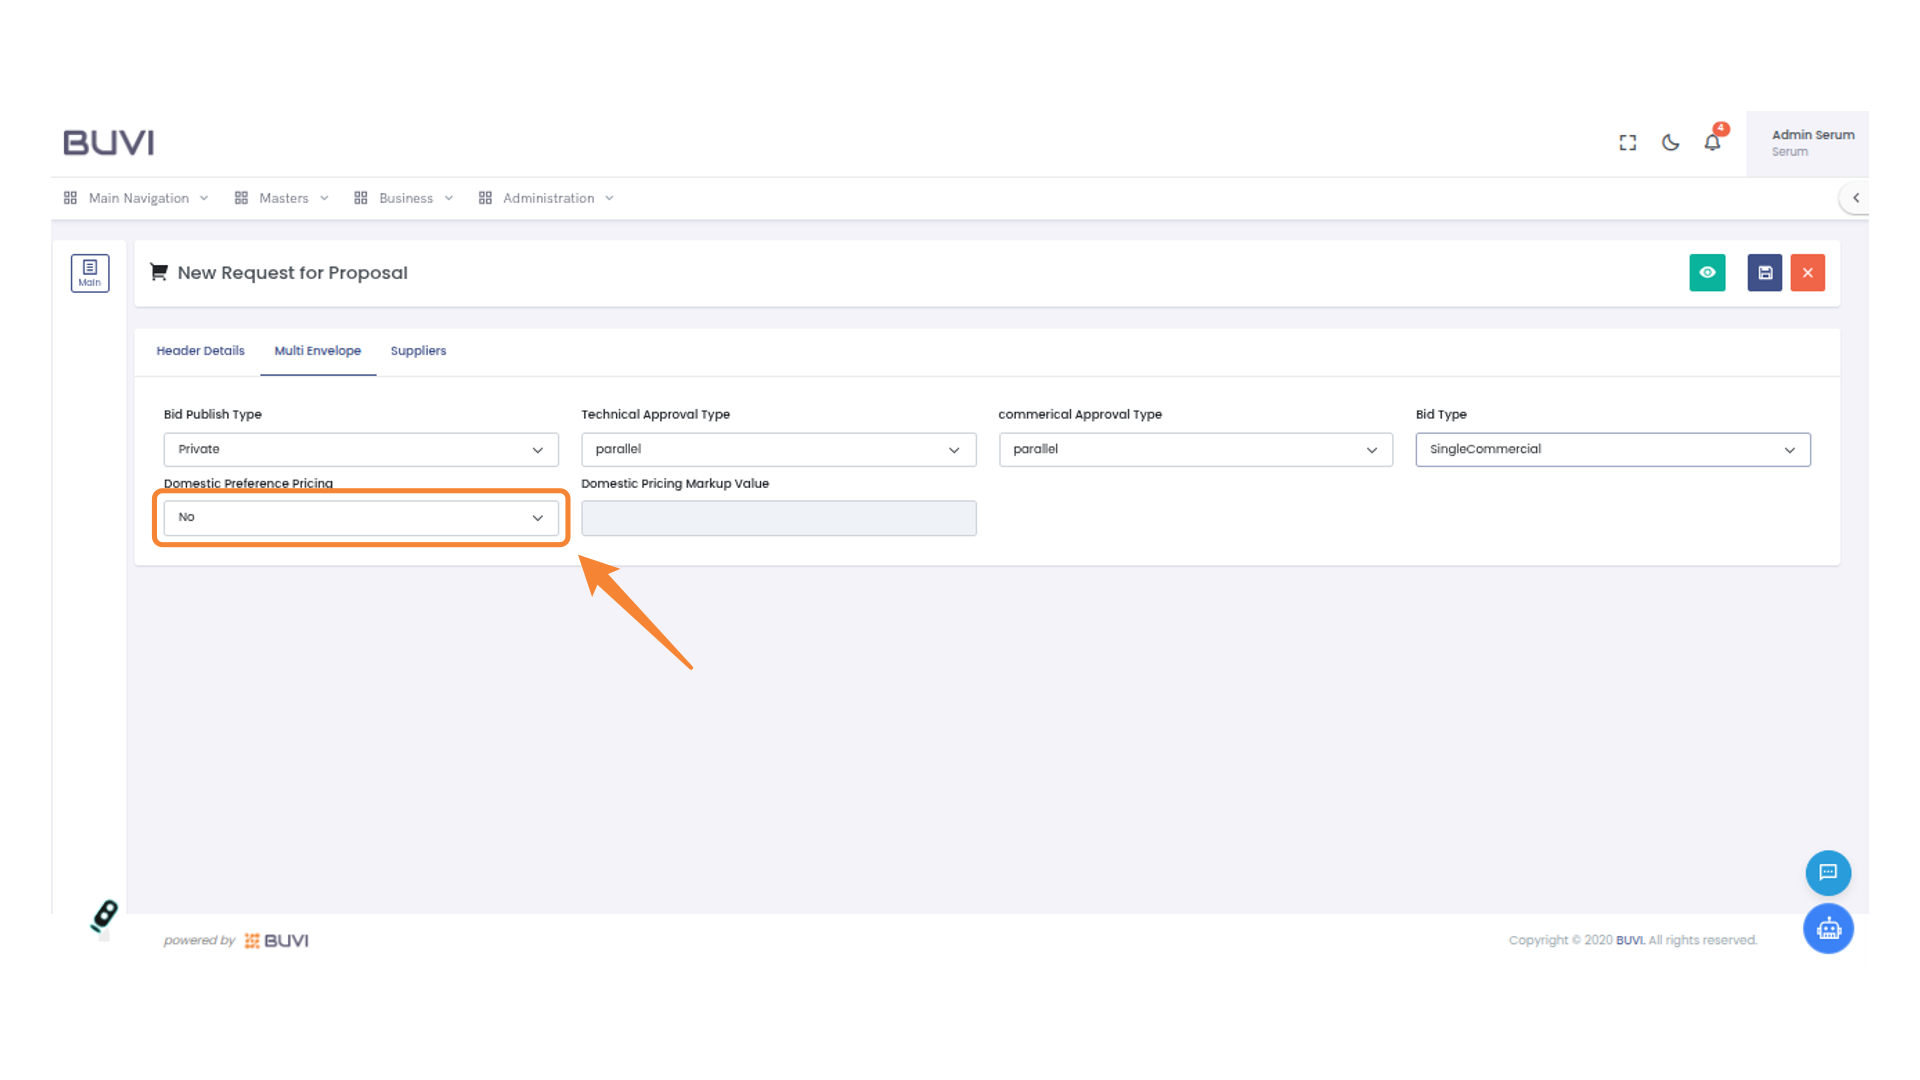
12. Select Domestic Preference Pricing
Choose an option for Domestic Preference Pricing from the dropdown menu.
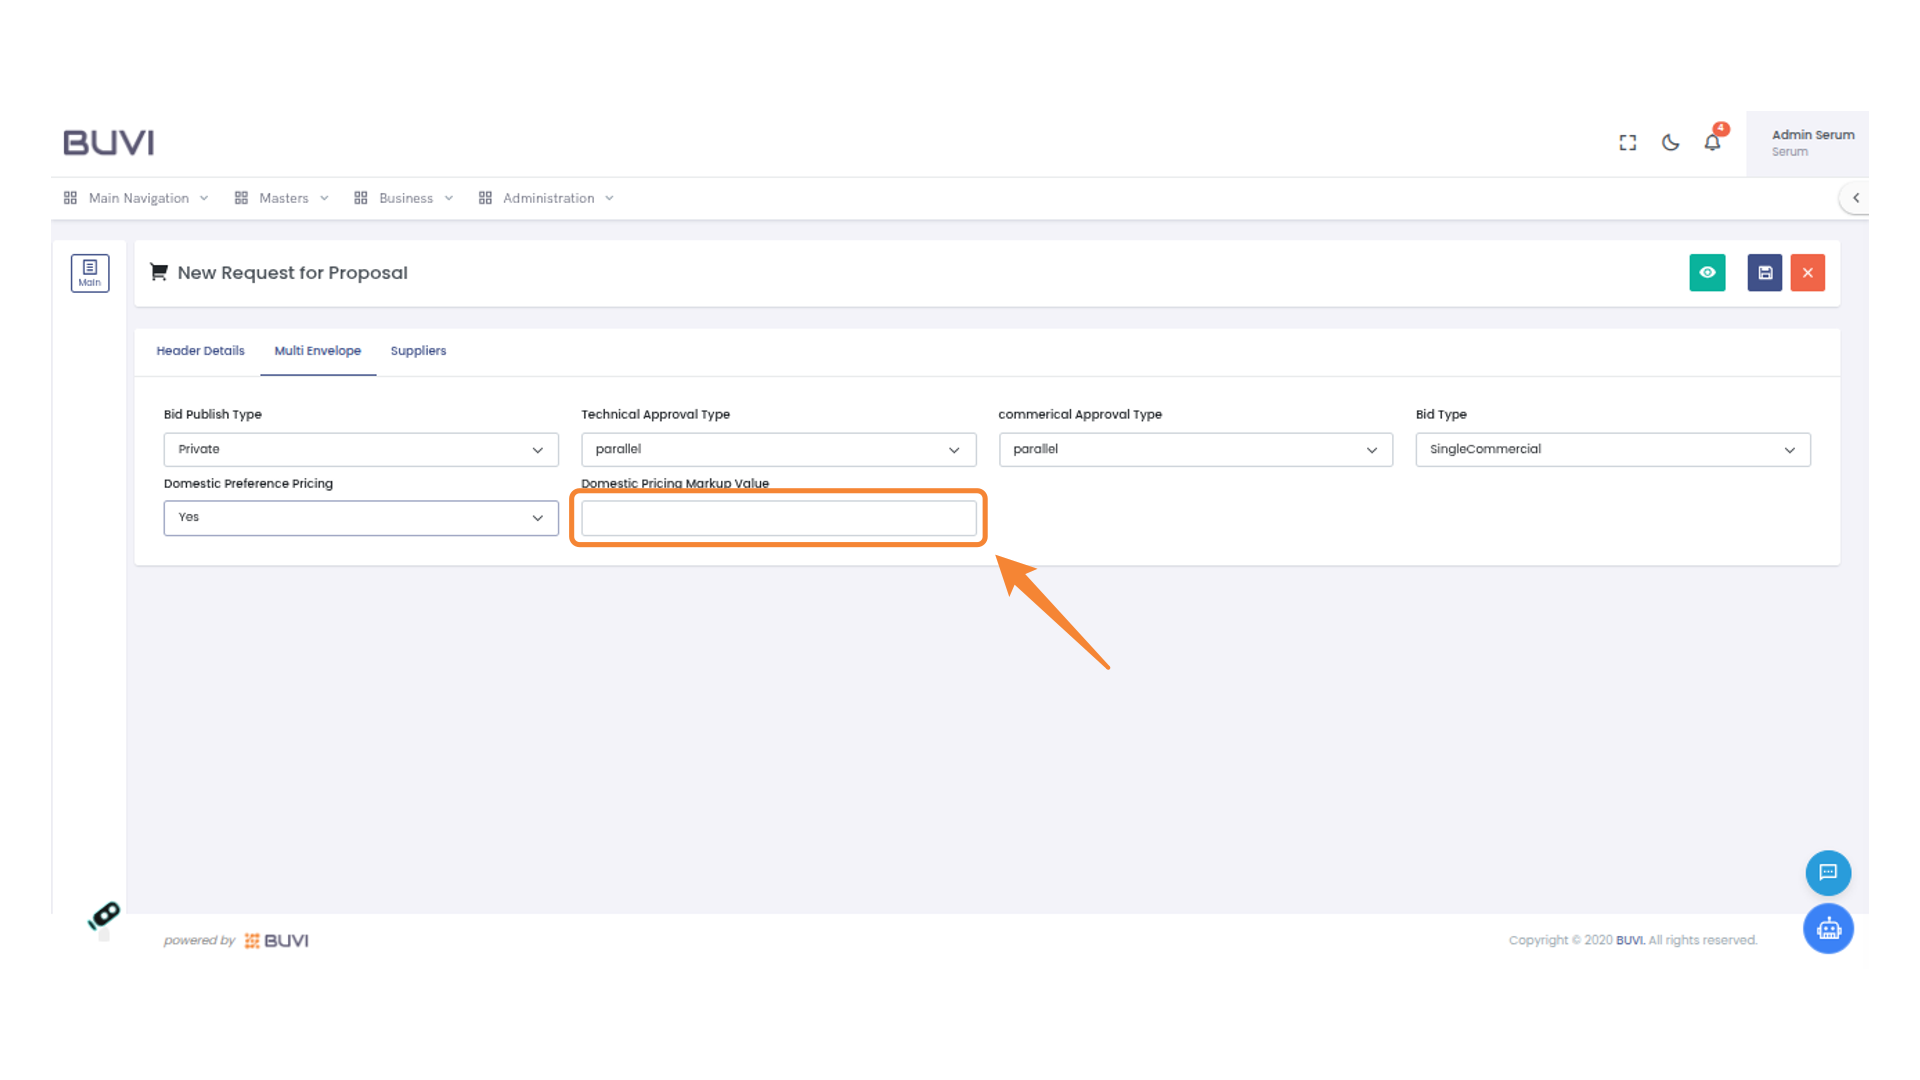
13. Enter Domestic Pricing Markup Value
Input the value for domestic pricing markup in the designated field to enhance cost calculations.
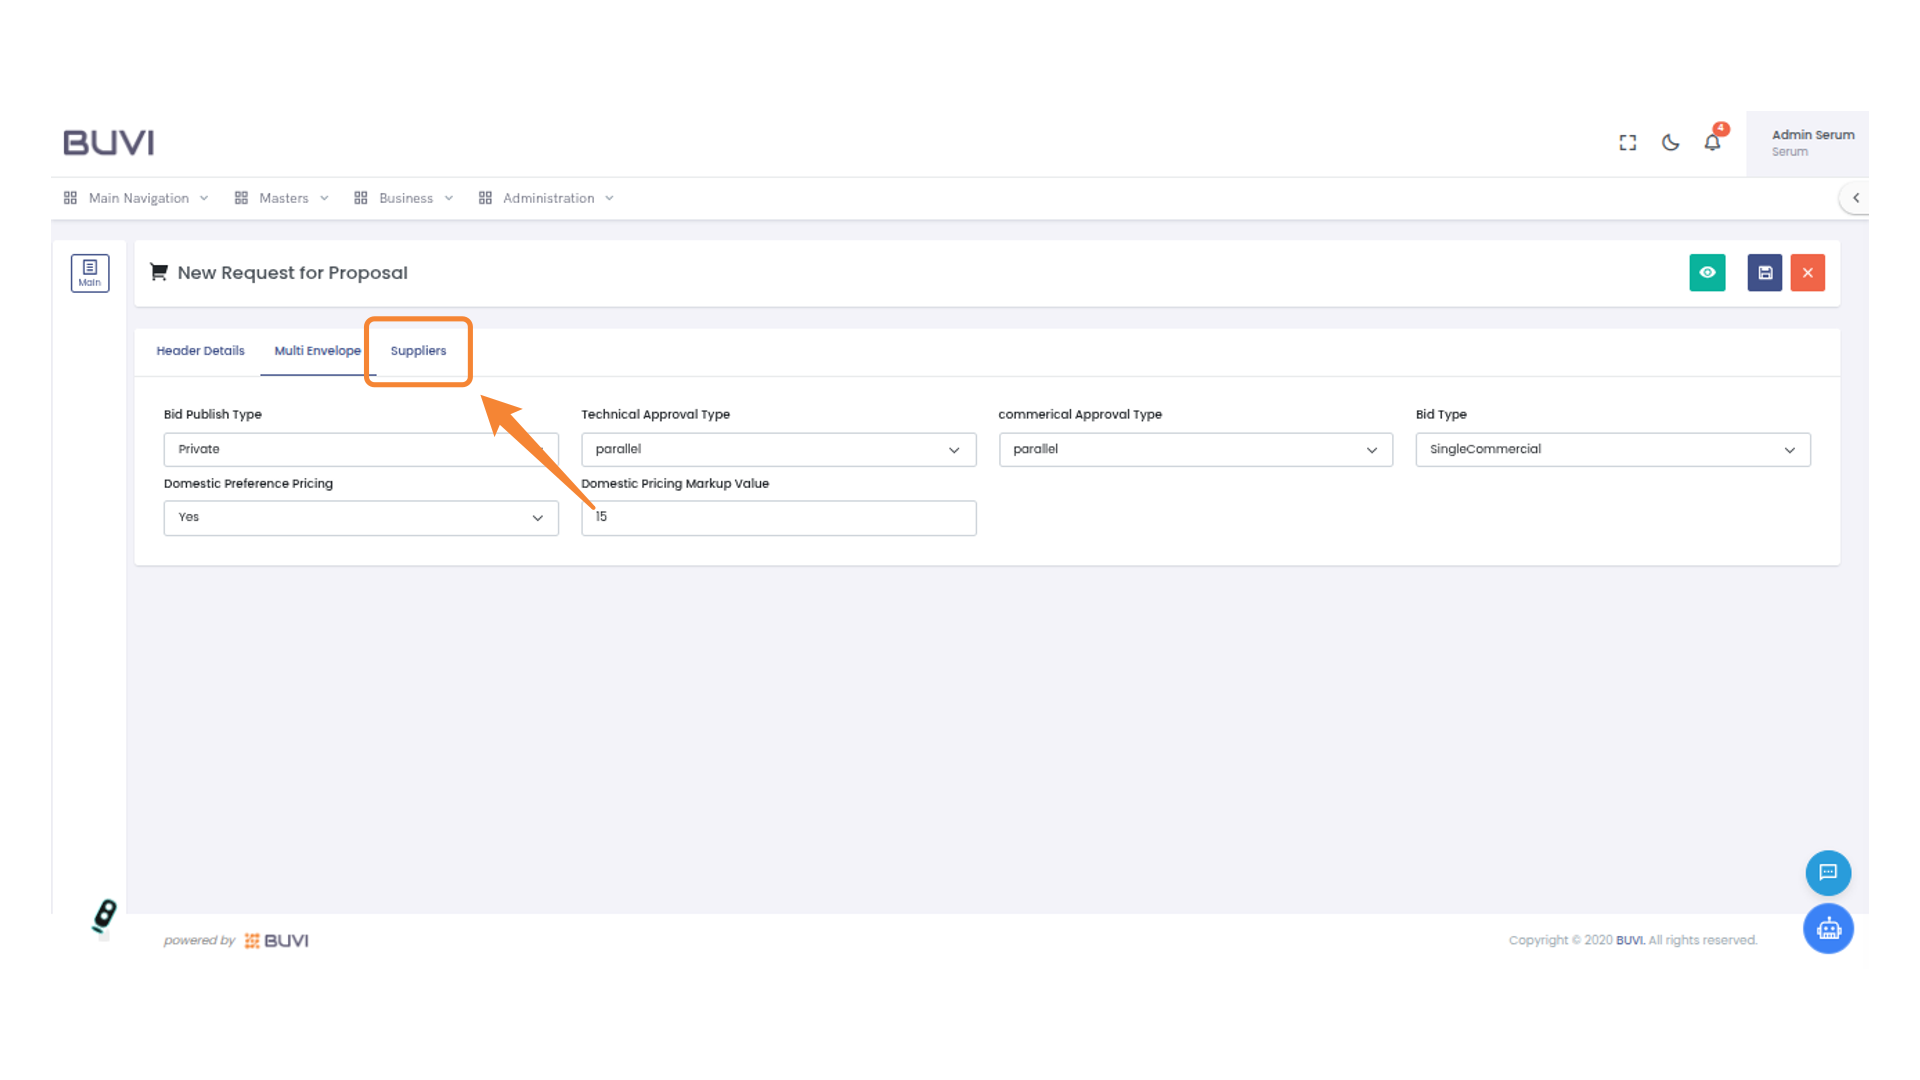
14. Access Suppliers Tab
Select the 'Suppliers' tab to proceed with supplier management tasks.
15. Add a New Supplier
Click on 'Add Supplier' to include a new supplier into the system.

16. Select Supplier
Choose supplier
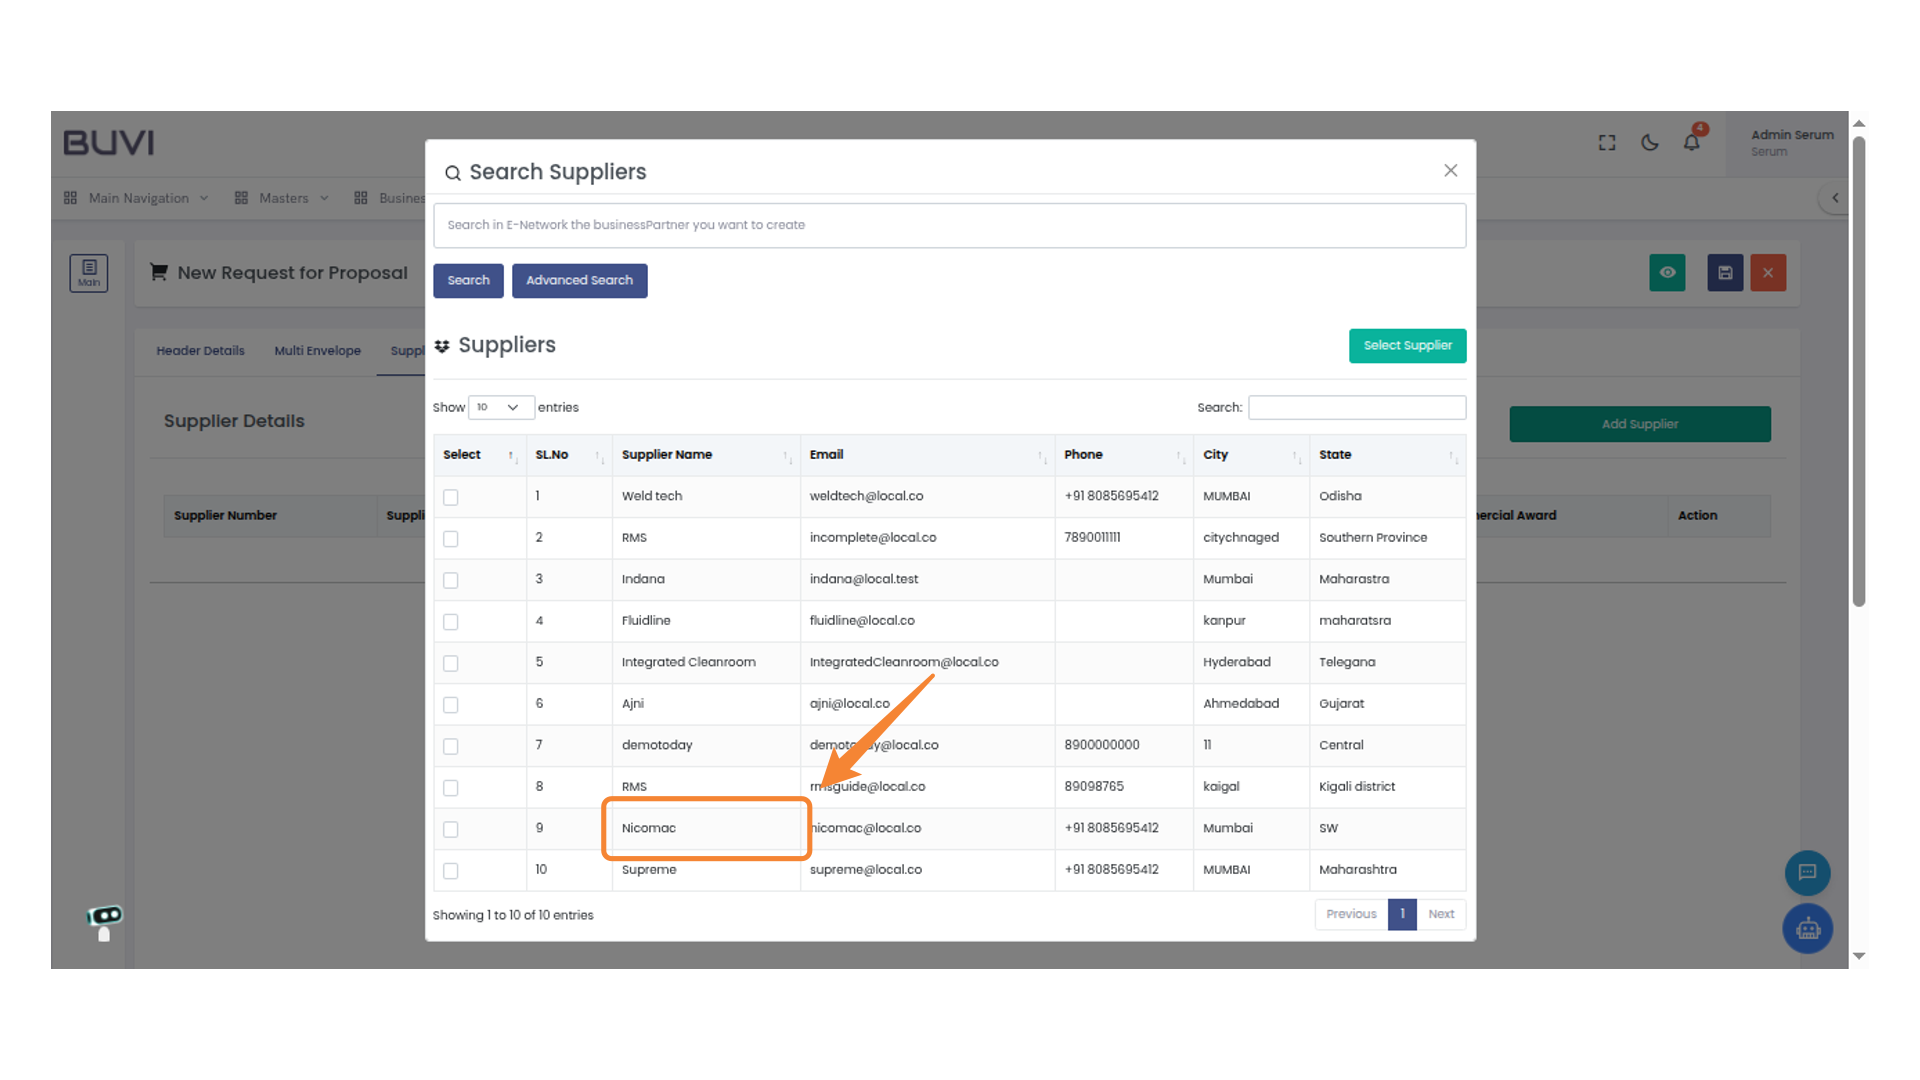
17. Select a Supplier
Click the 'Select Supplier' button to confirm your choice of supplier from the list.

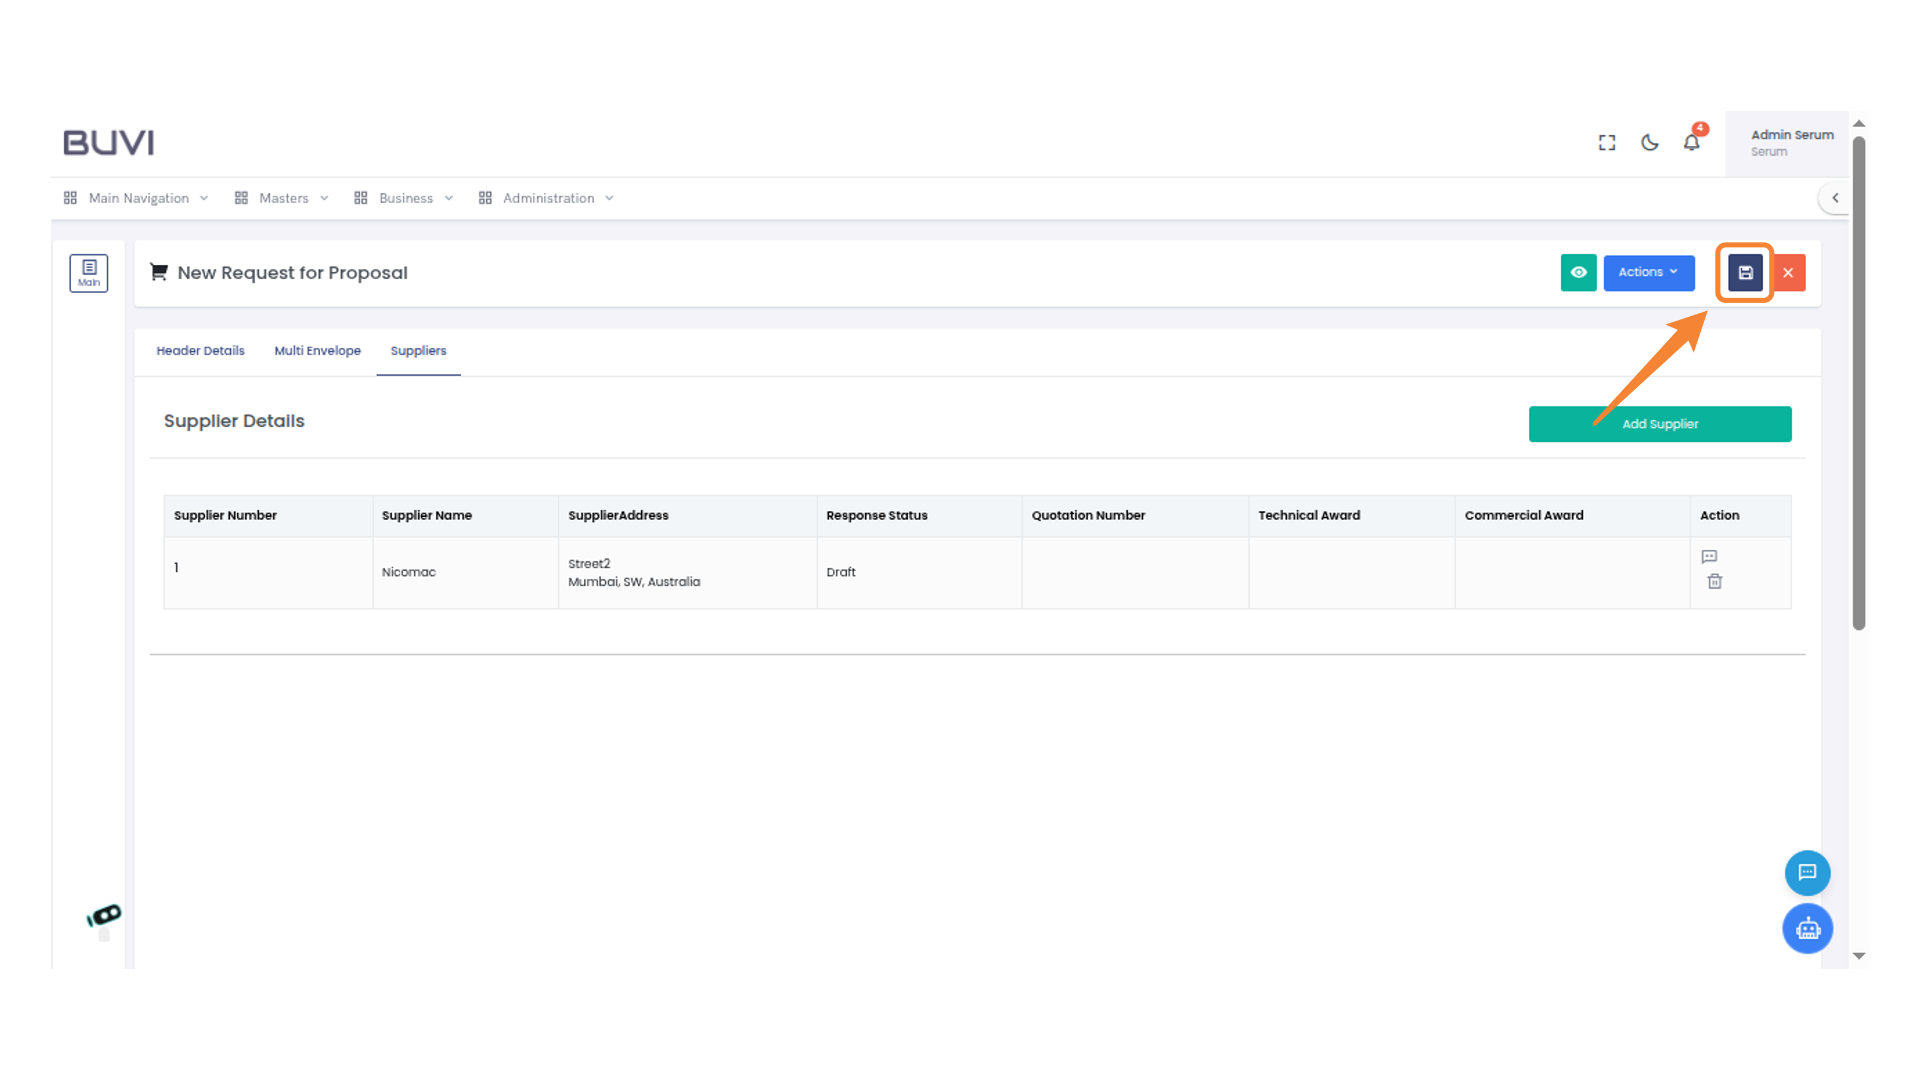
18. Save Your Work
Click the save icon to store your progress.
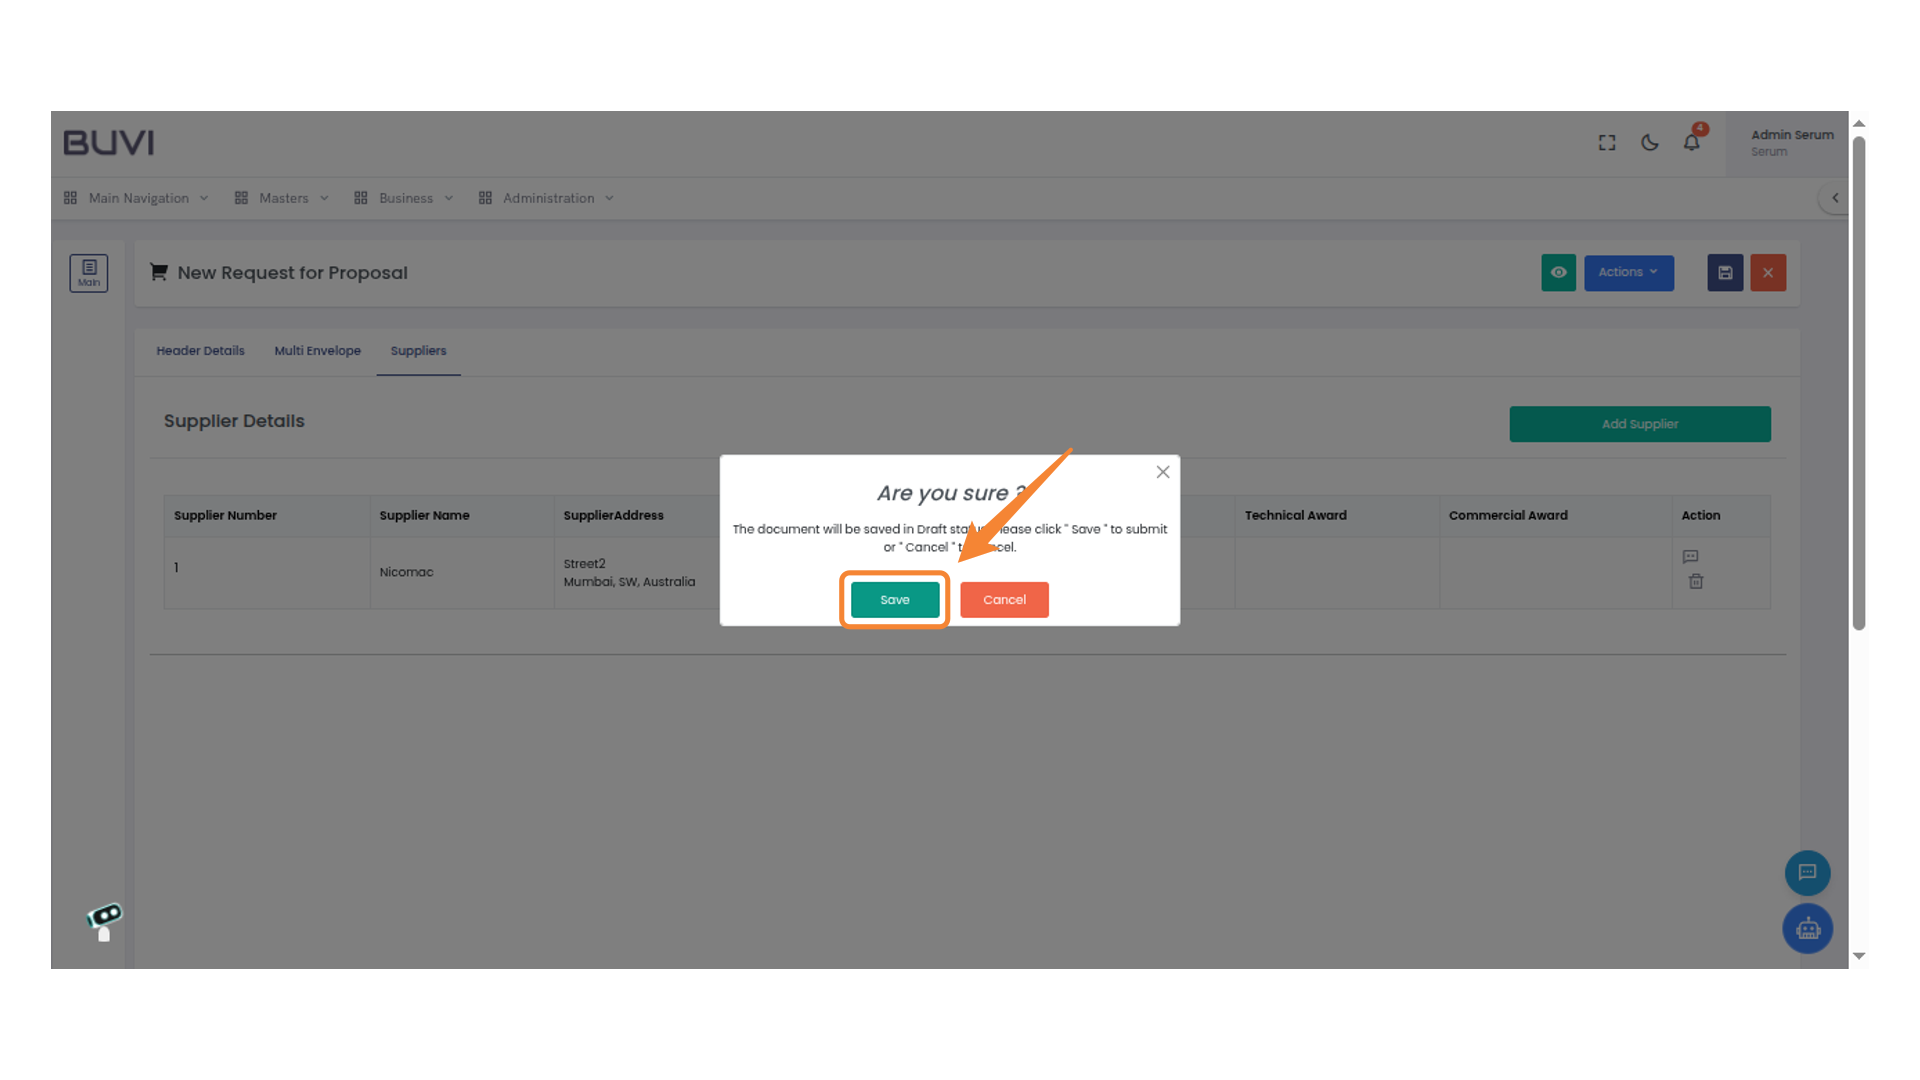
19. Confirm Document Save
Click 'Save' to store the document as a draft or select 'Cancel' to abort the action.
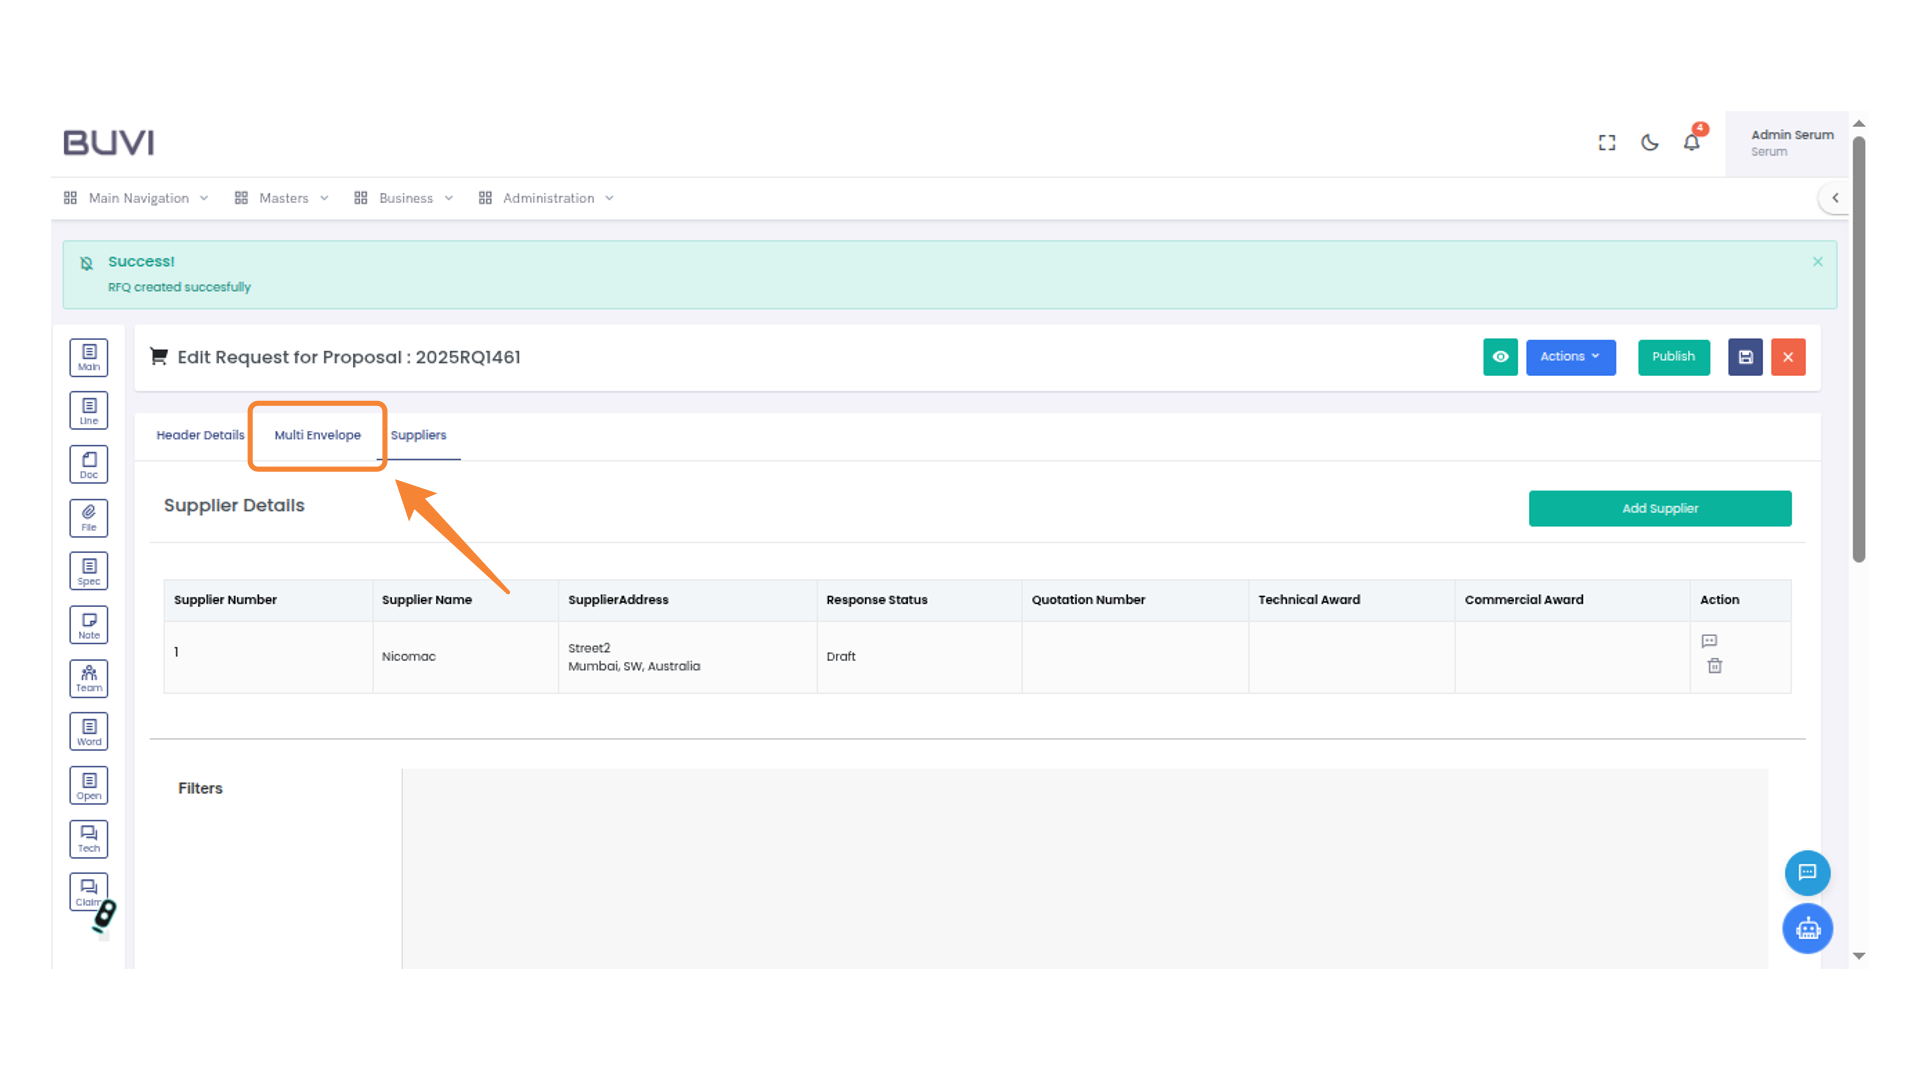
20. Select Multi Envelope Tab
Click on 'Multi Envelope' to view related content or information.
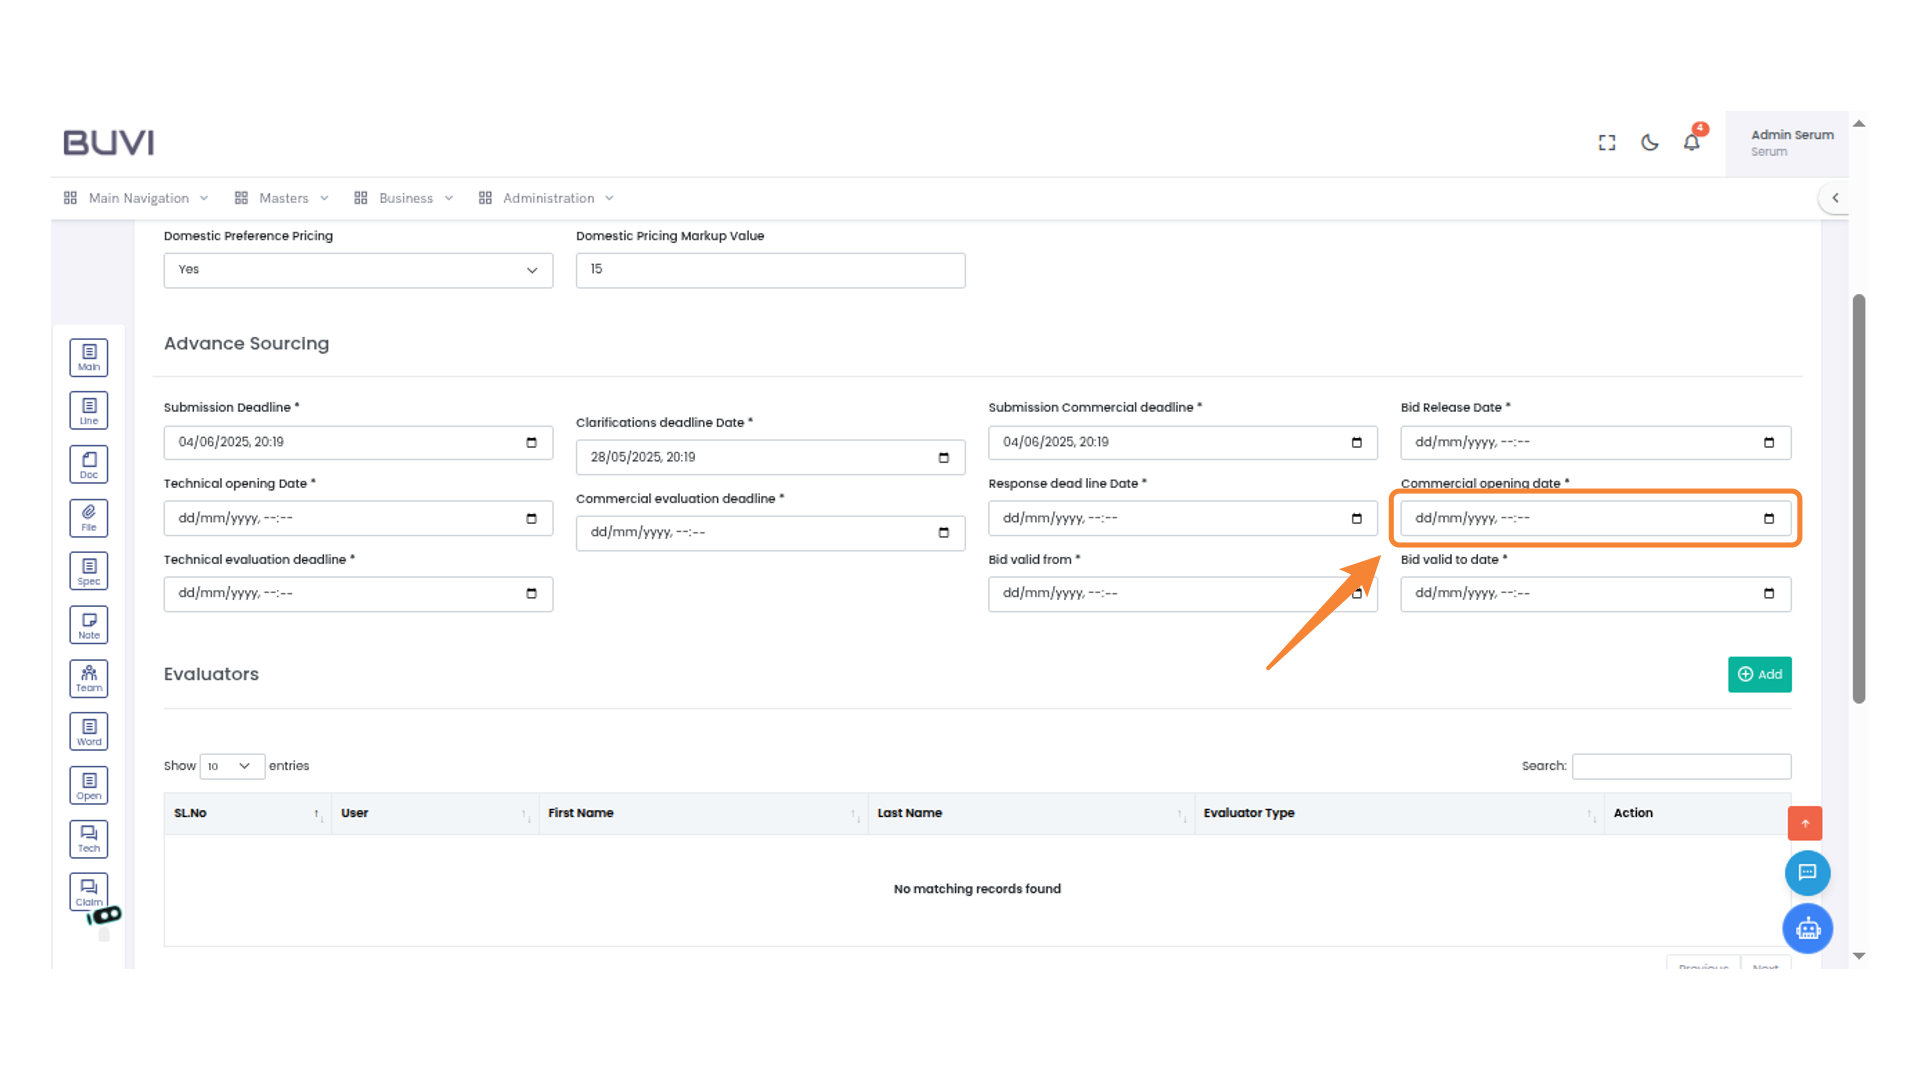
21. Enter Commercial Opening Date
Fill in the Commercial Opening Date field by selecting the appropriate date using the calendar icon.
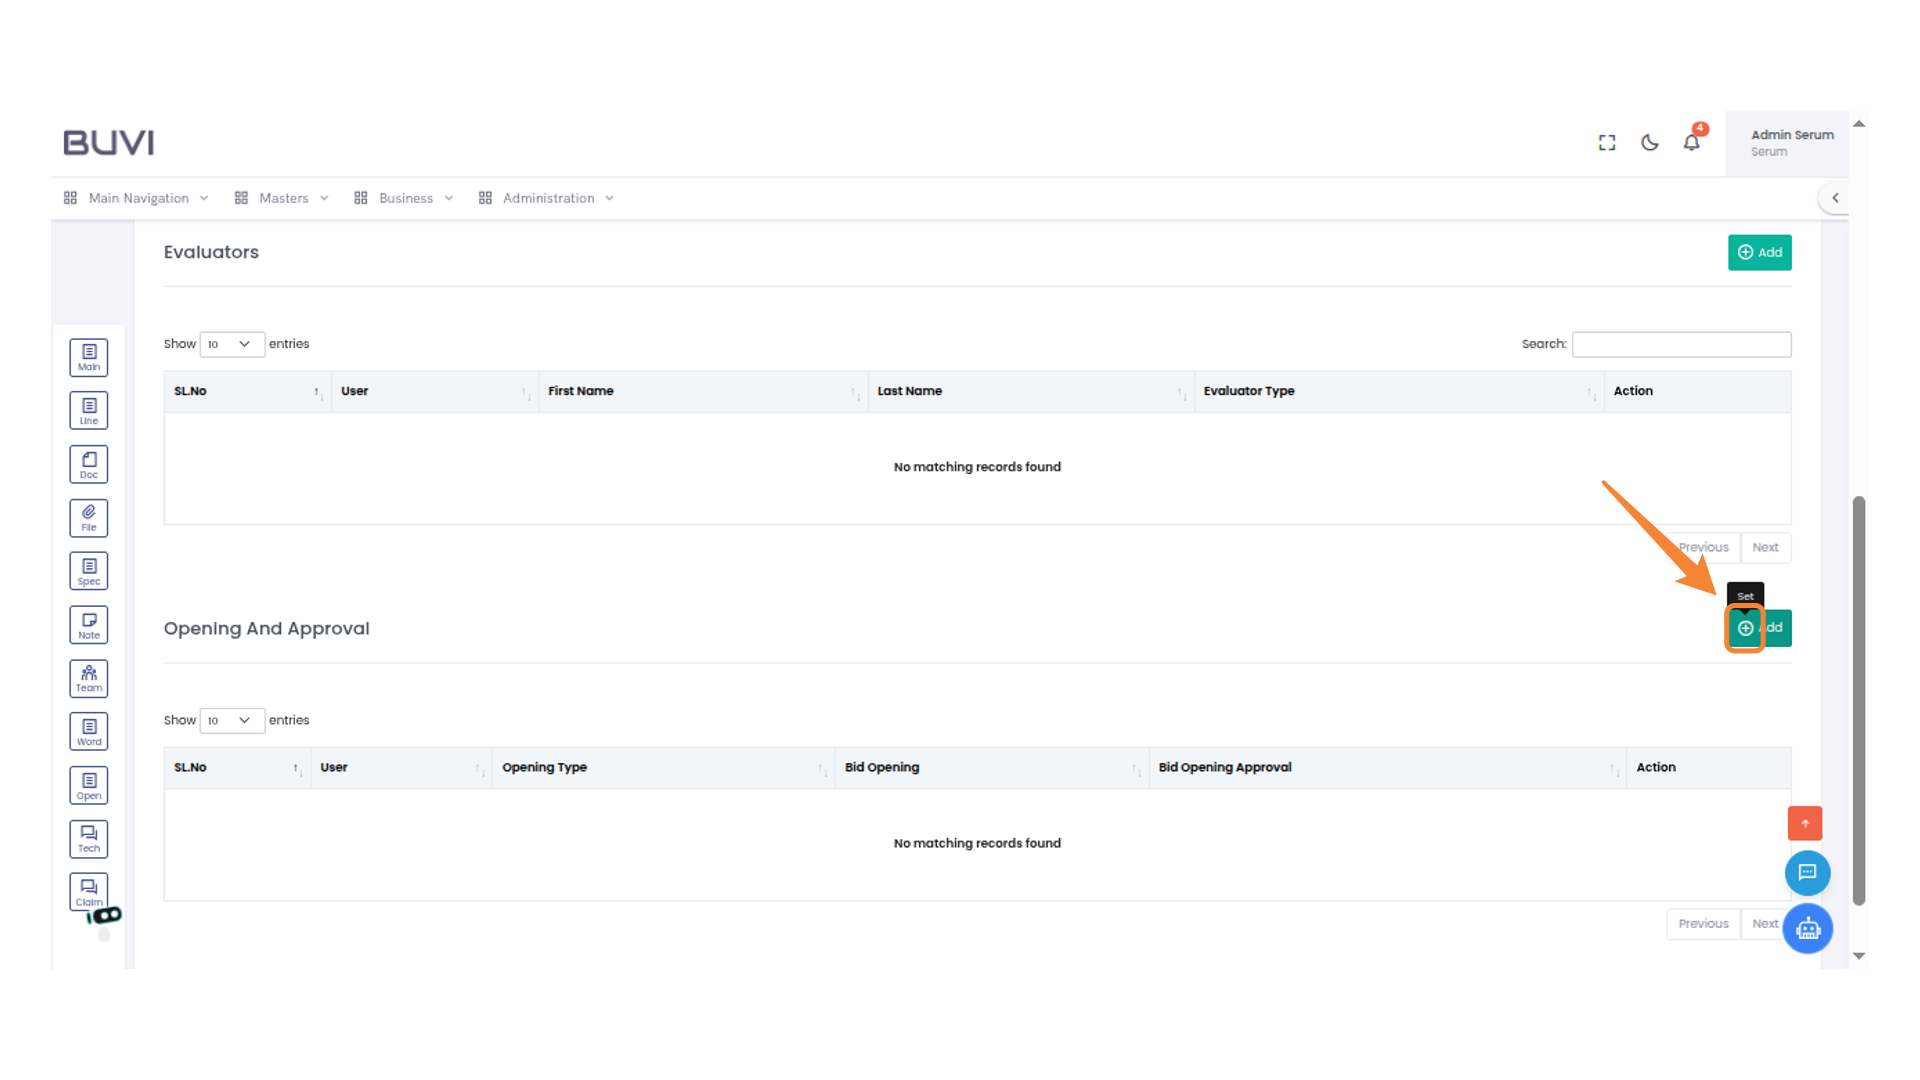
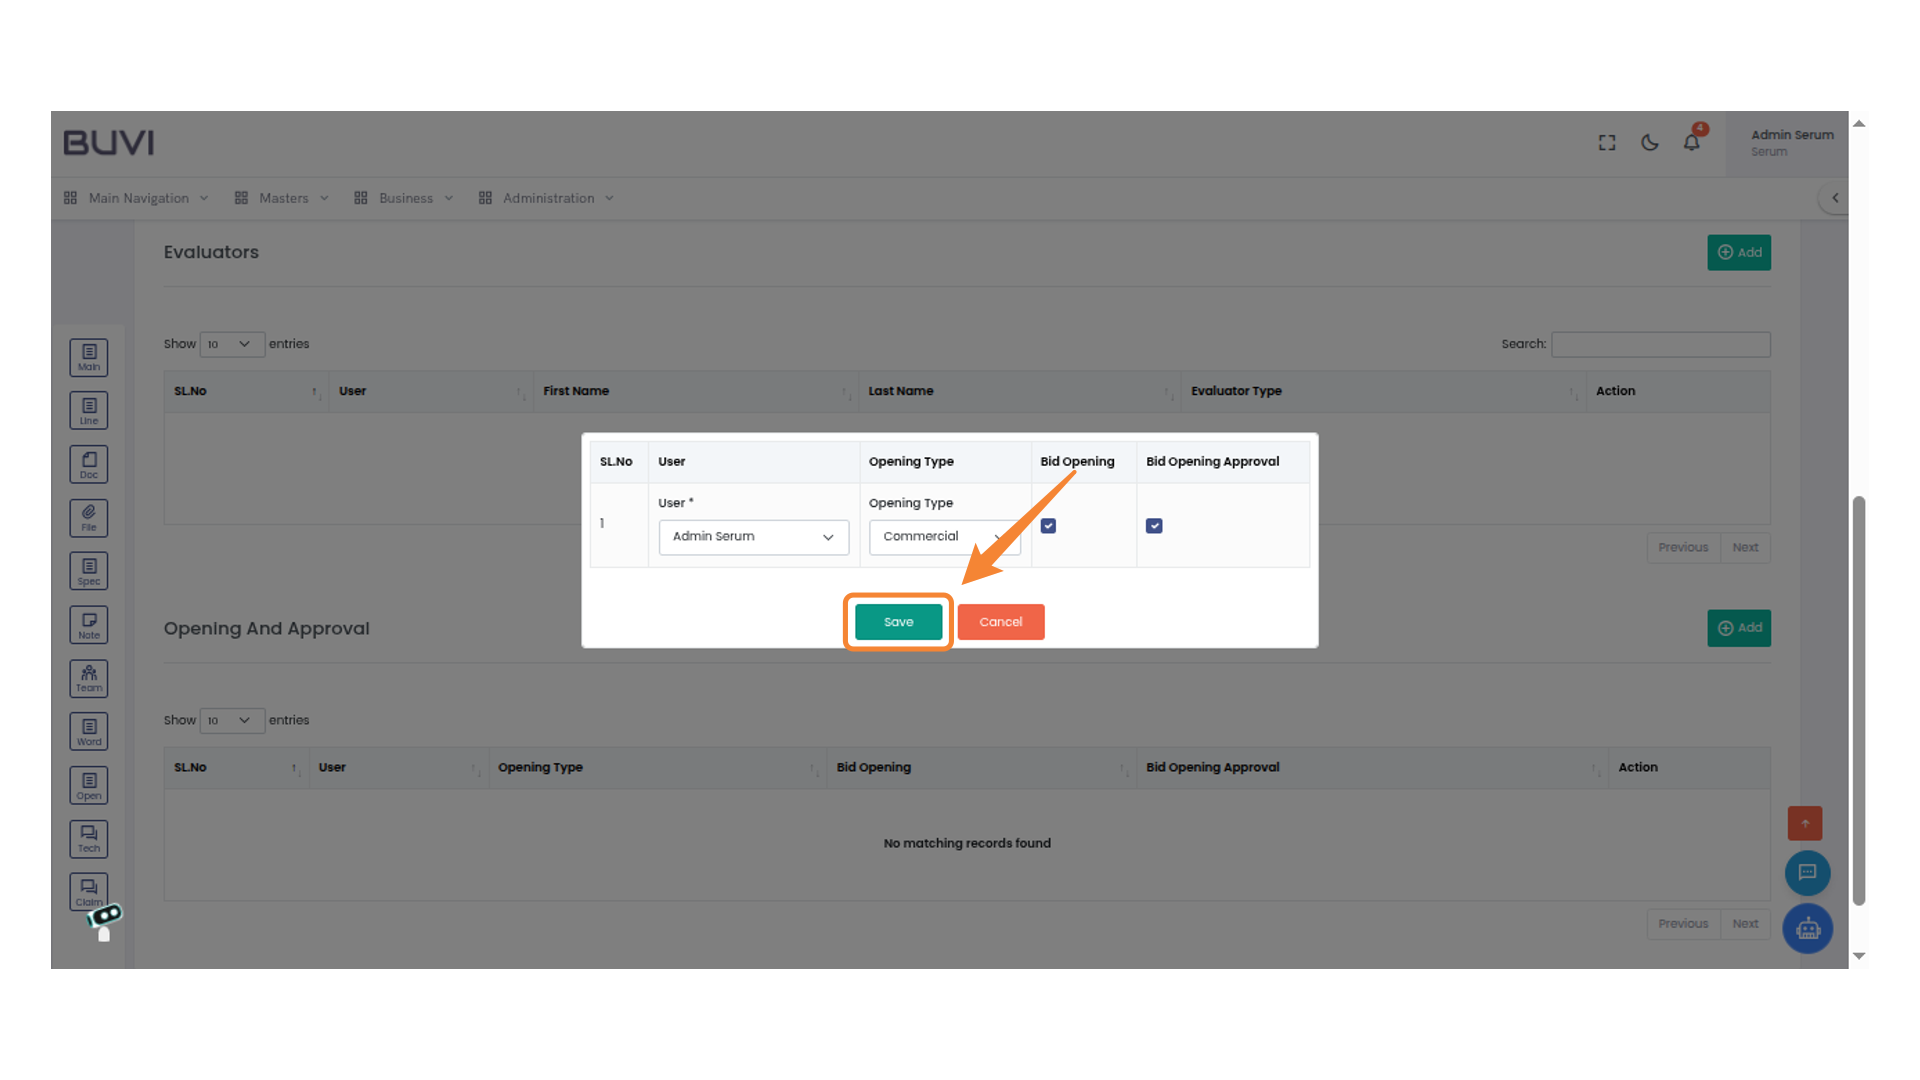
22. Add New Entry Button
Click the 'Add' button to initiate the creation of a new entry or record.
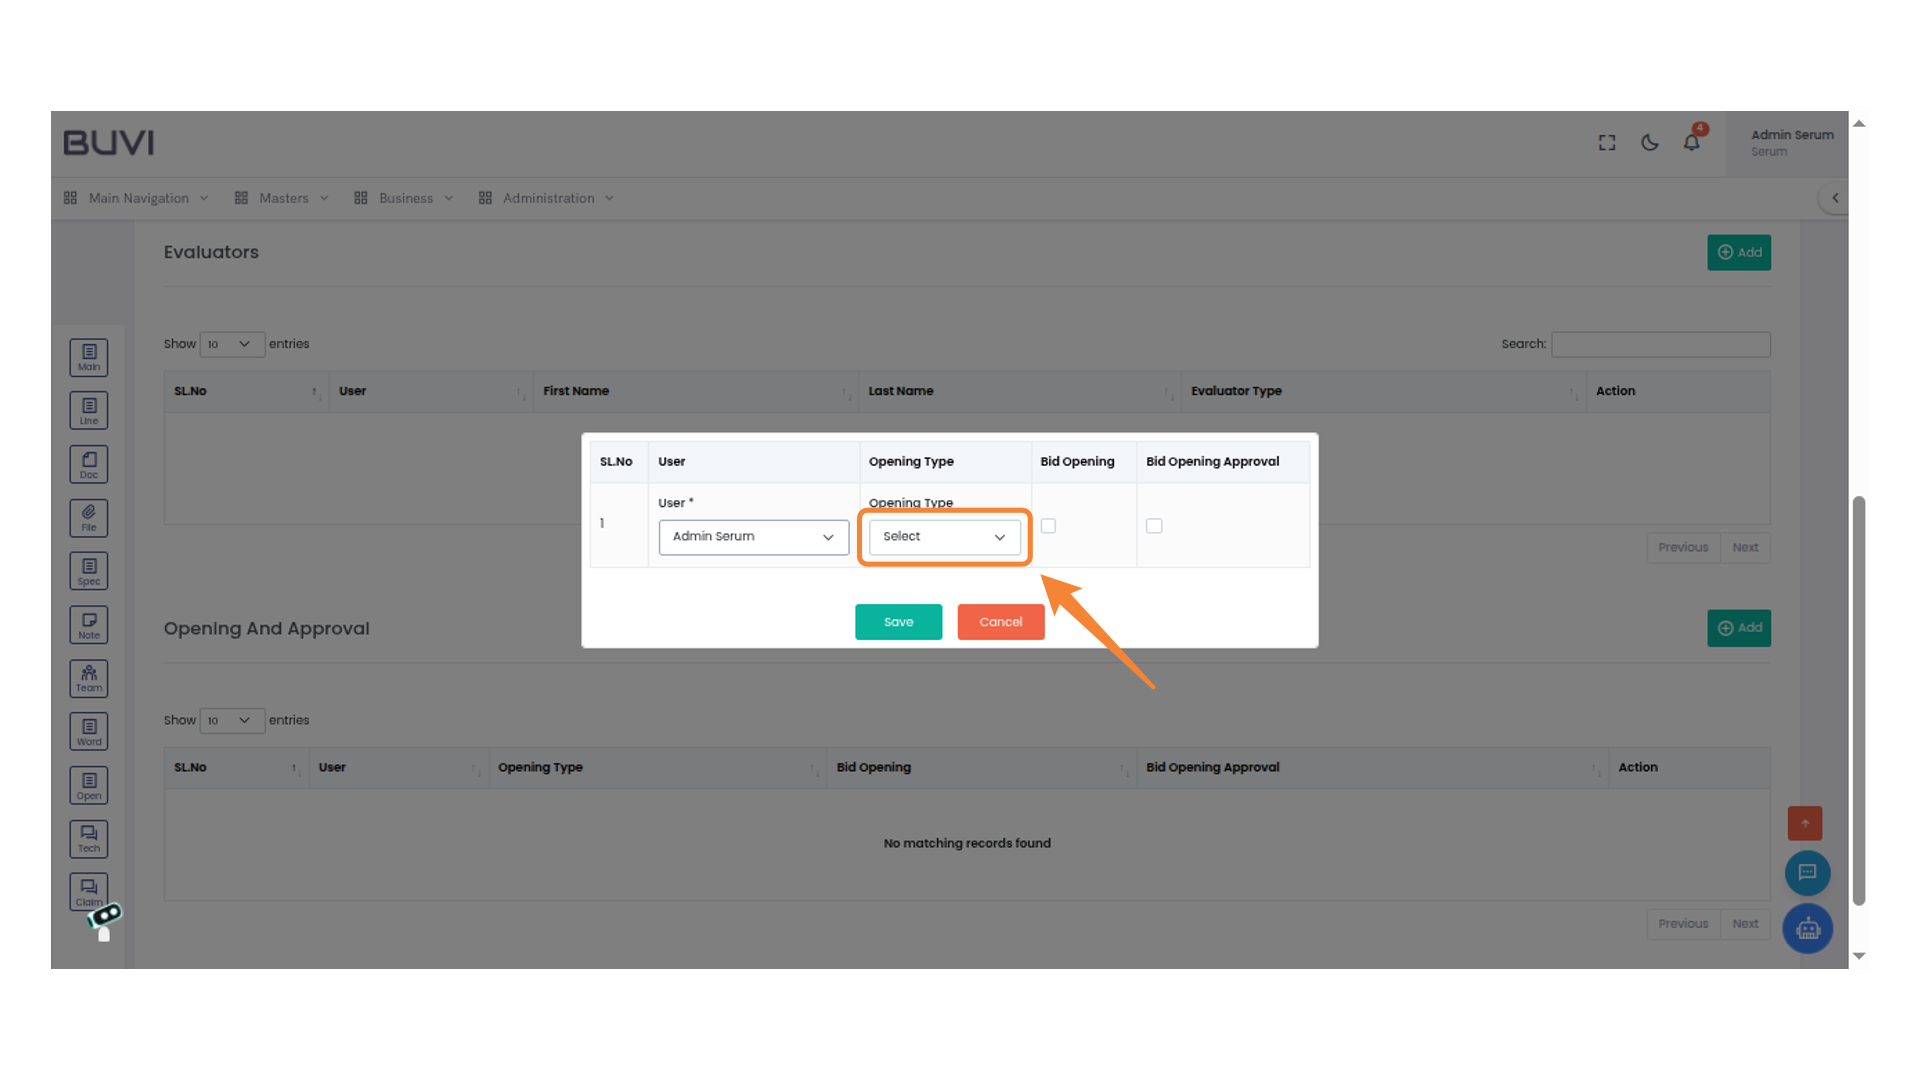
23. Select an Option
Choose an option from the dropdown menu labeled 'Select' to assign a user.

24. Select Opening Type
Choose an option from the dropdown menu labeled 'Opening Type' to proceed with the evaluation process.
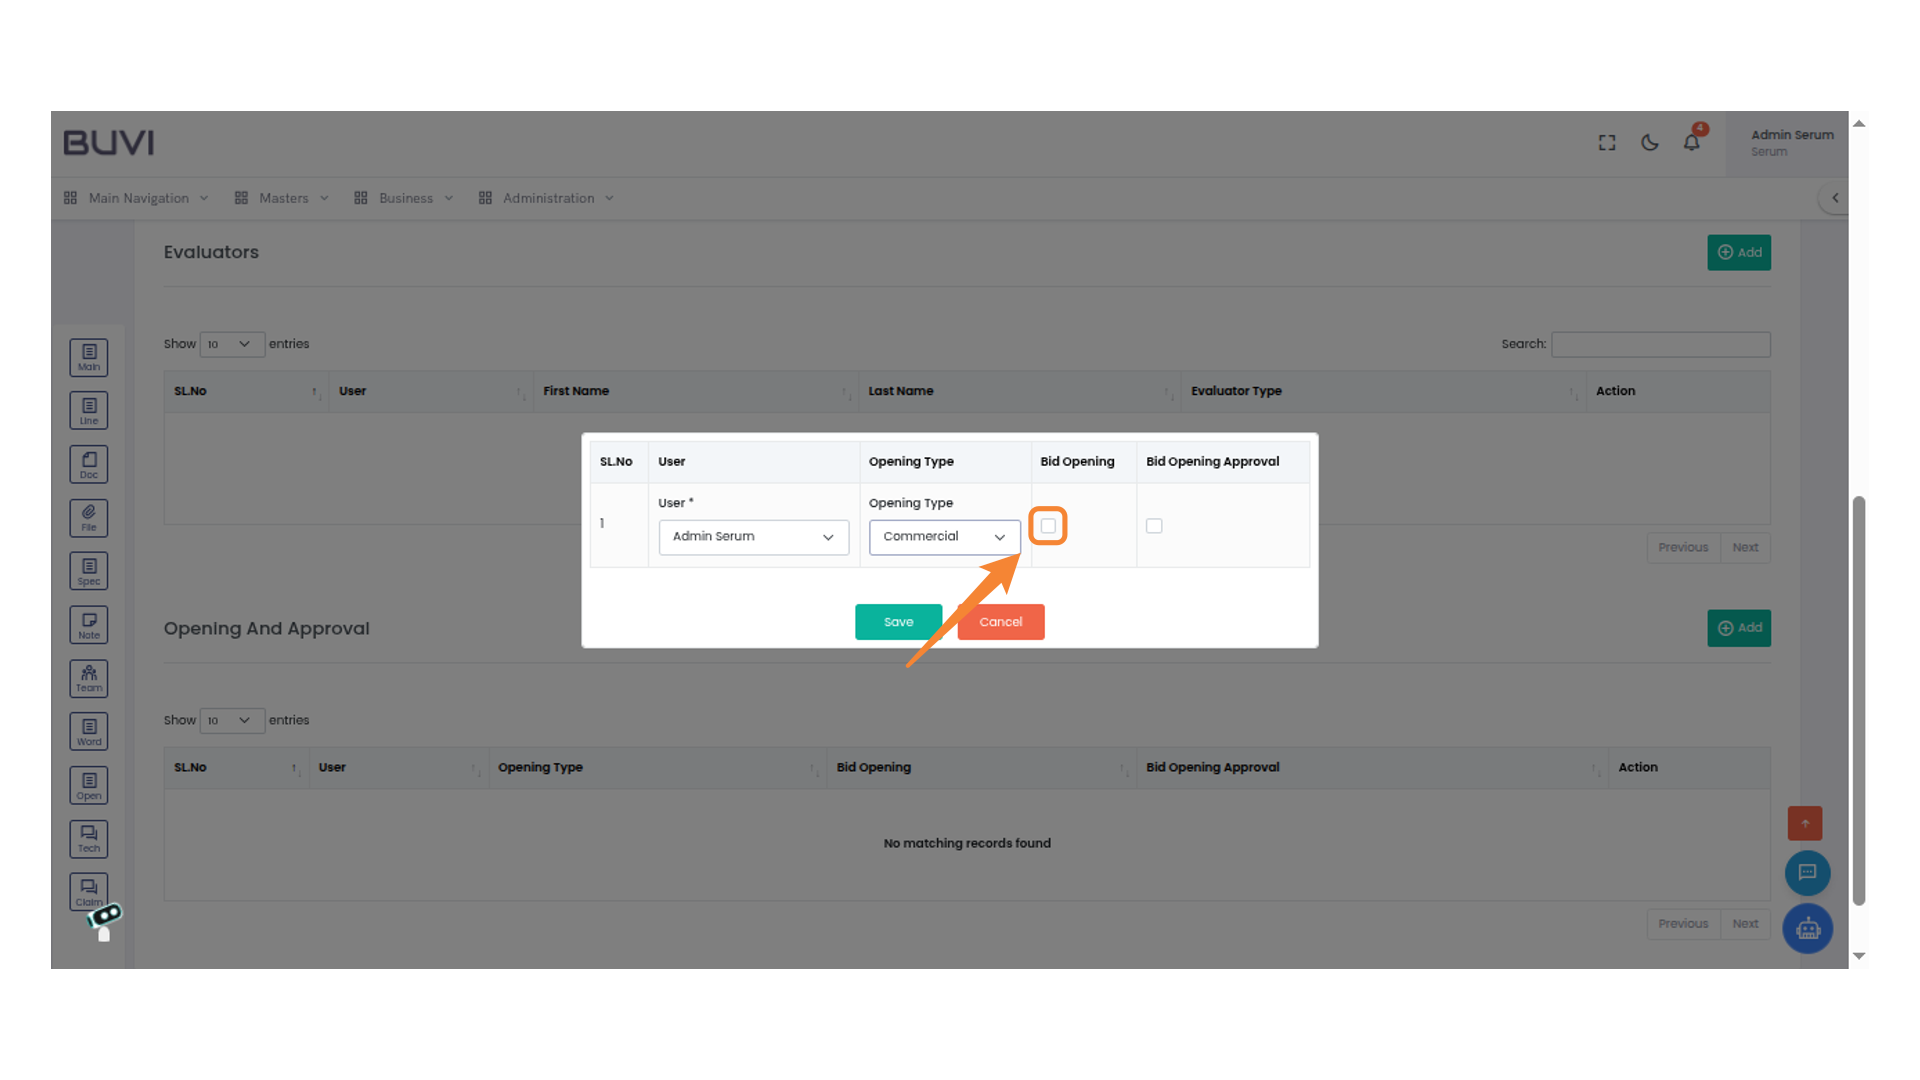
25. Select Bid Opening
Check the box to enable the 'Bid Opening' option for the selected user.
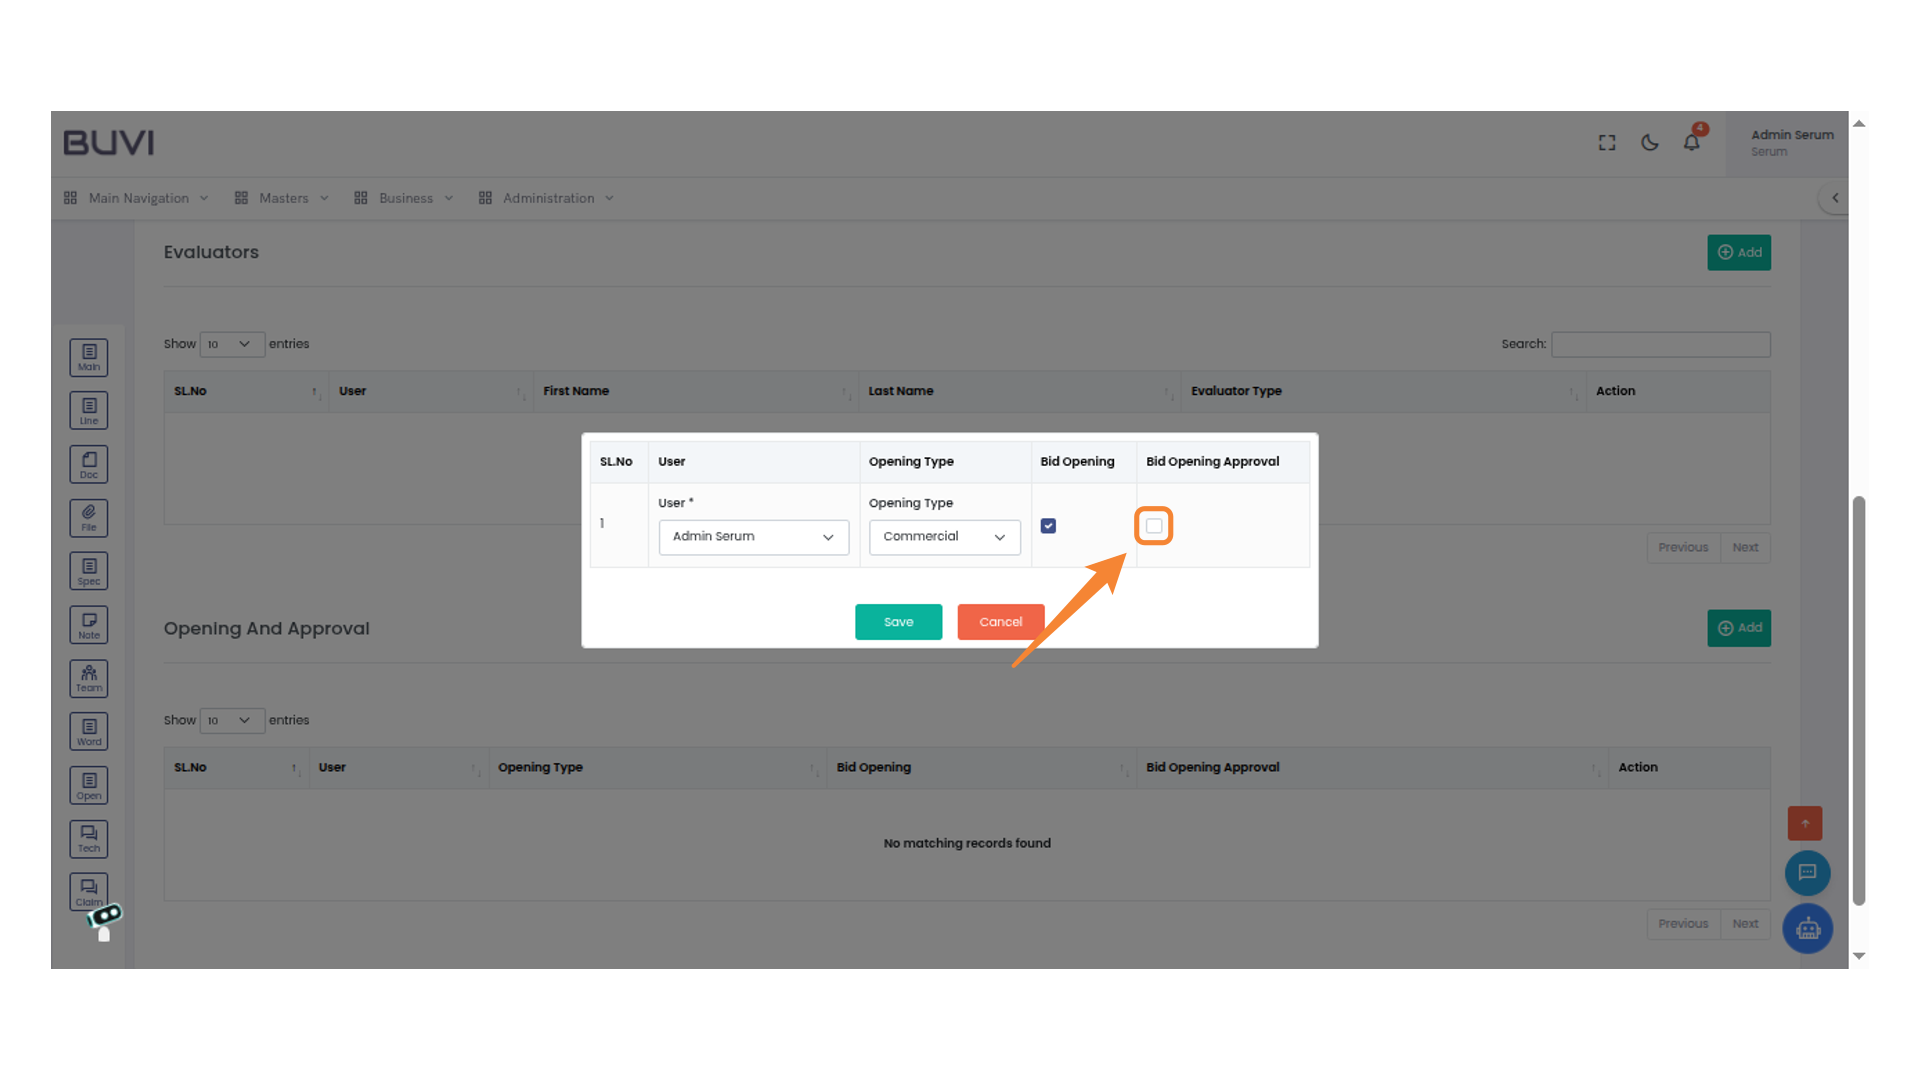
26. Activate Approval
Check the box to approve the bid opening process.
27. Save Changes
Click 'Save' to confirm the selections and proceed with the chosen settings.
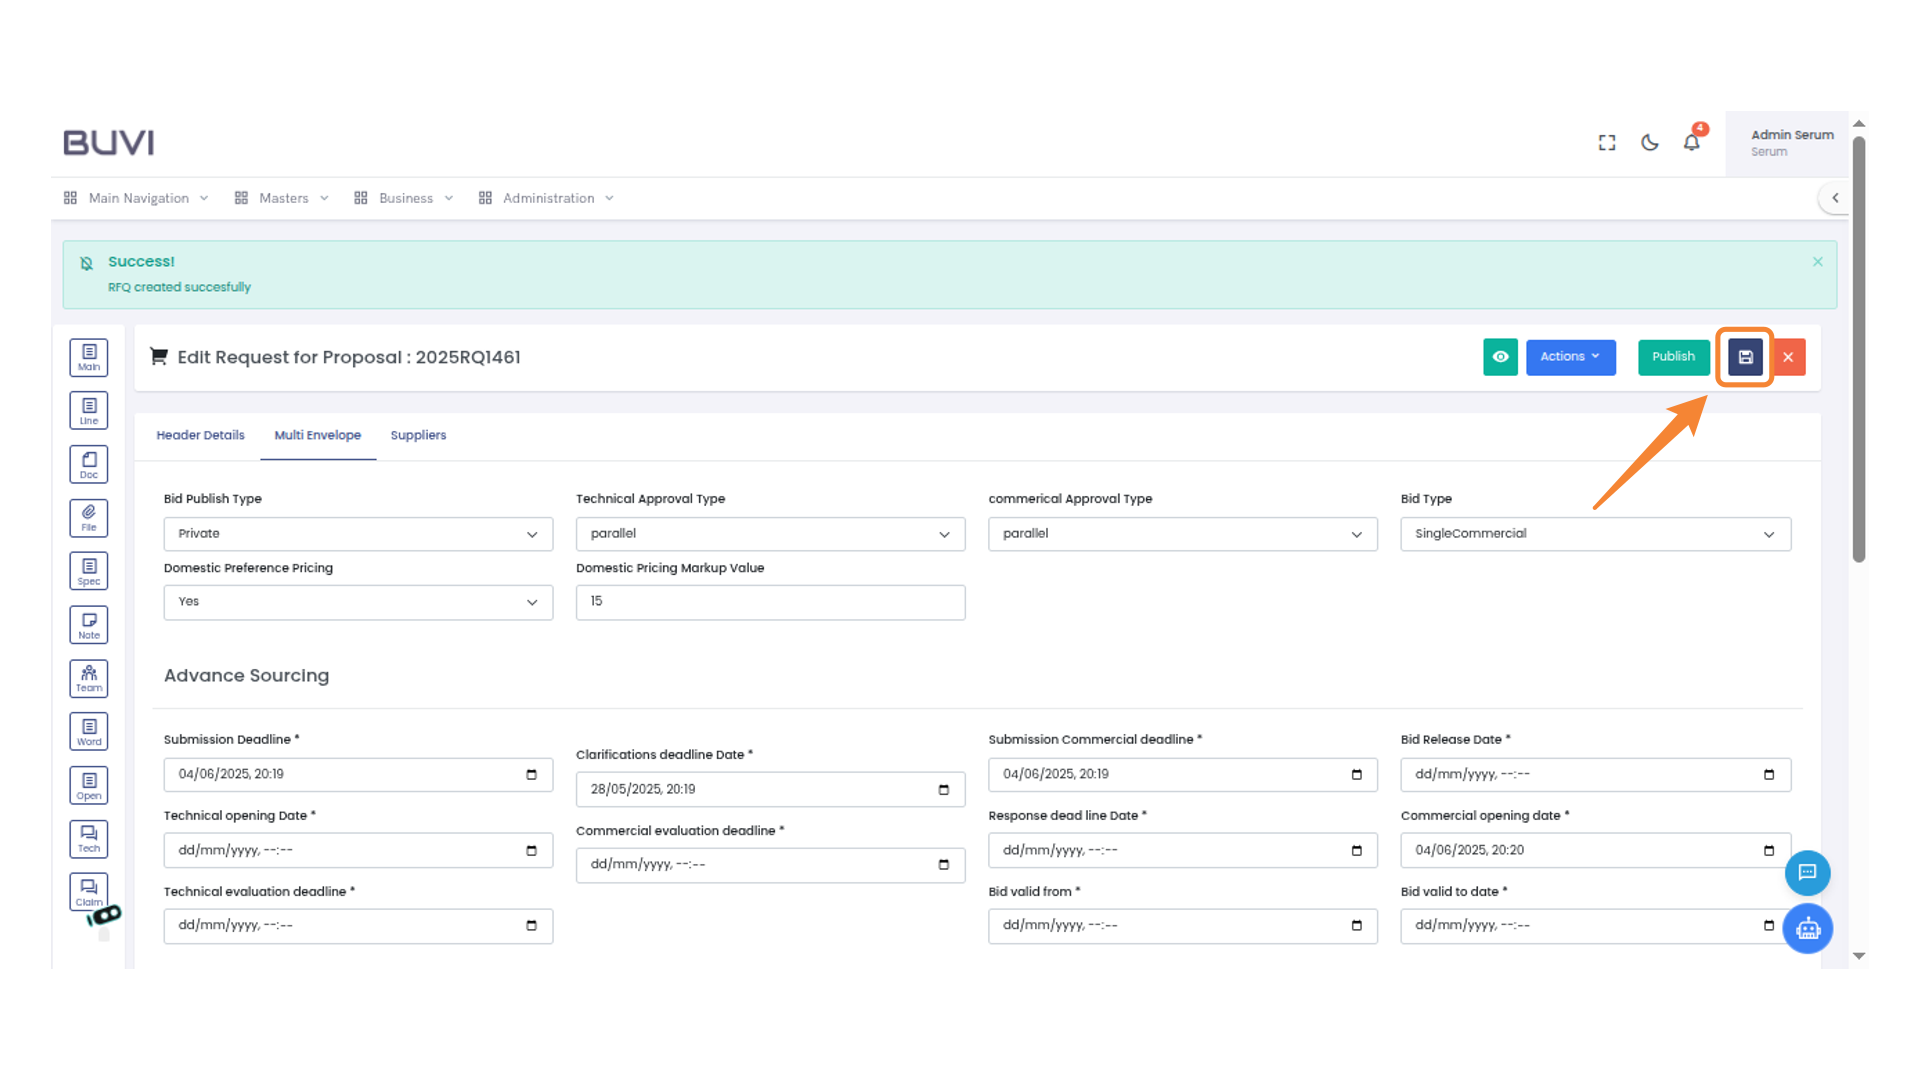
28. Save Changes
Click the save icon to store the current changes made to the proposal.
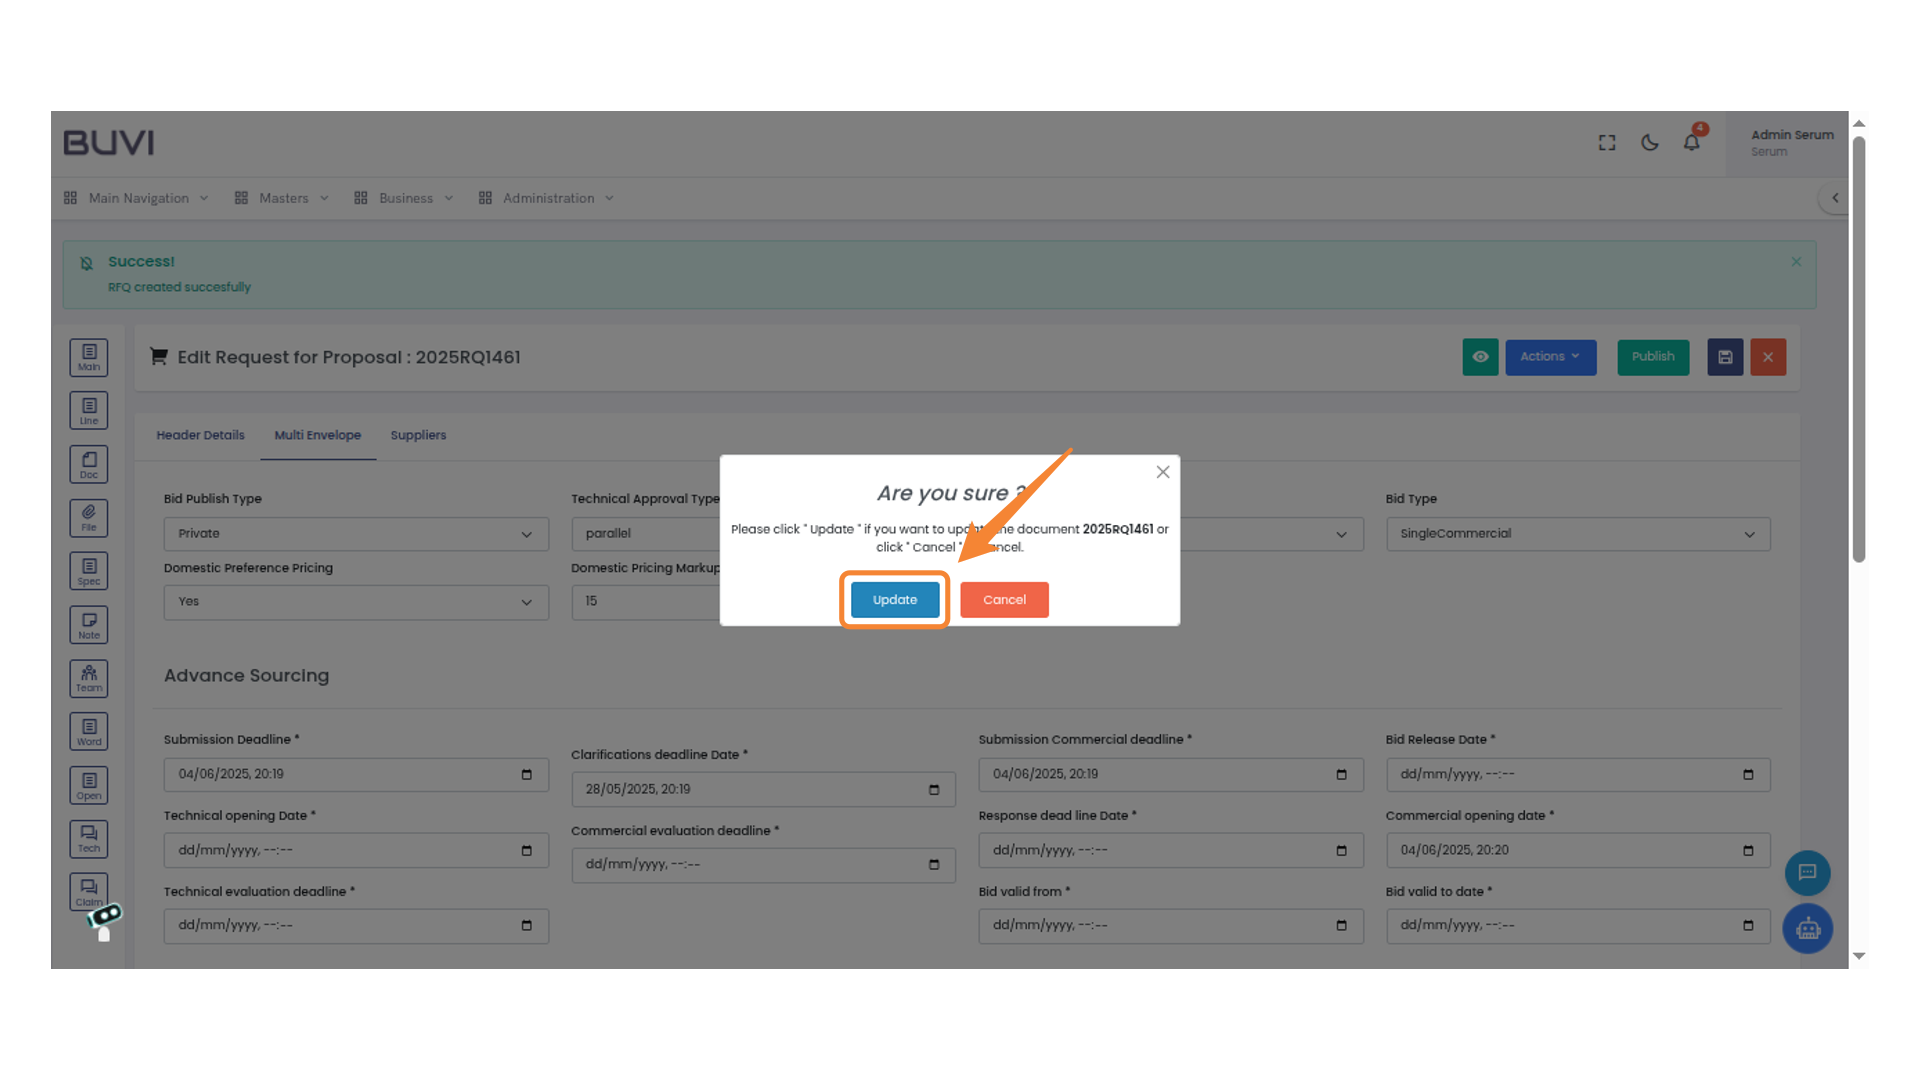
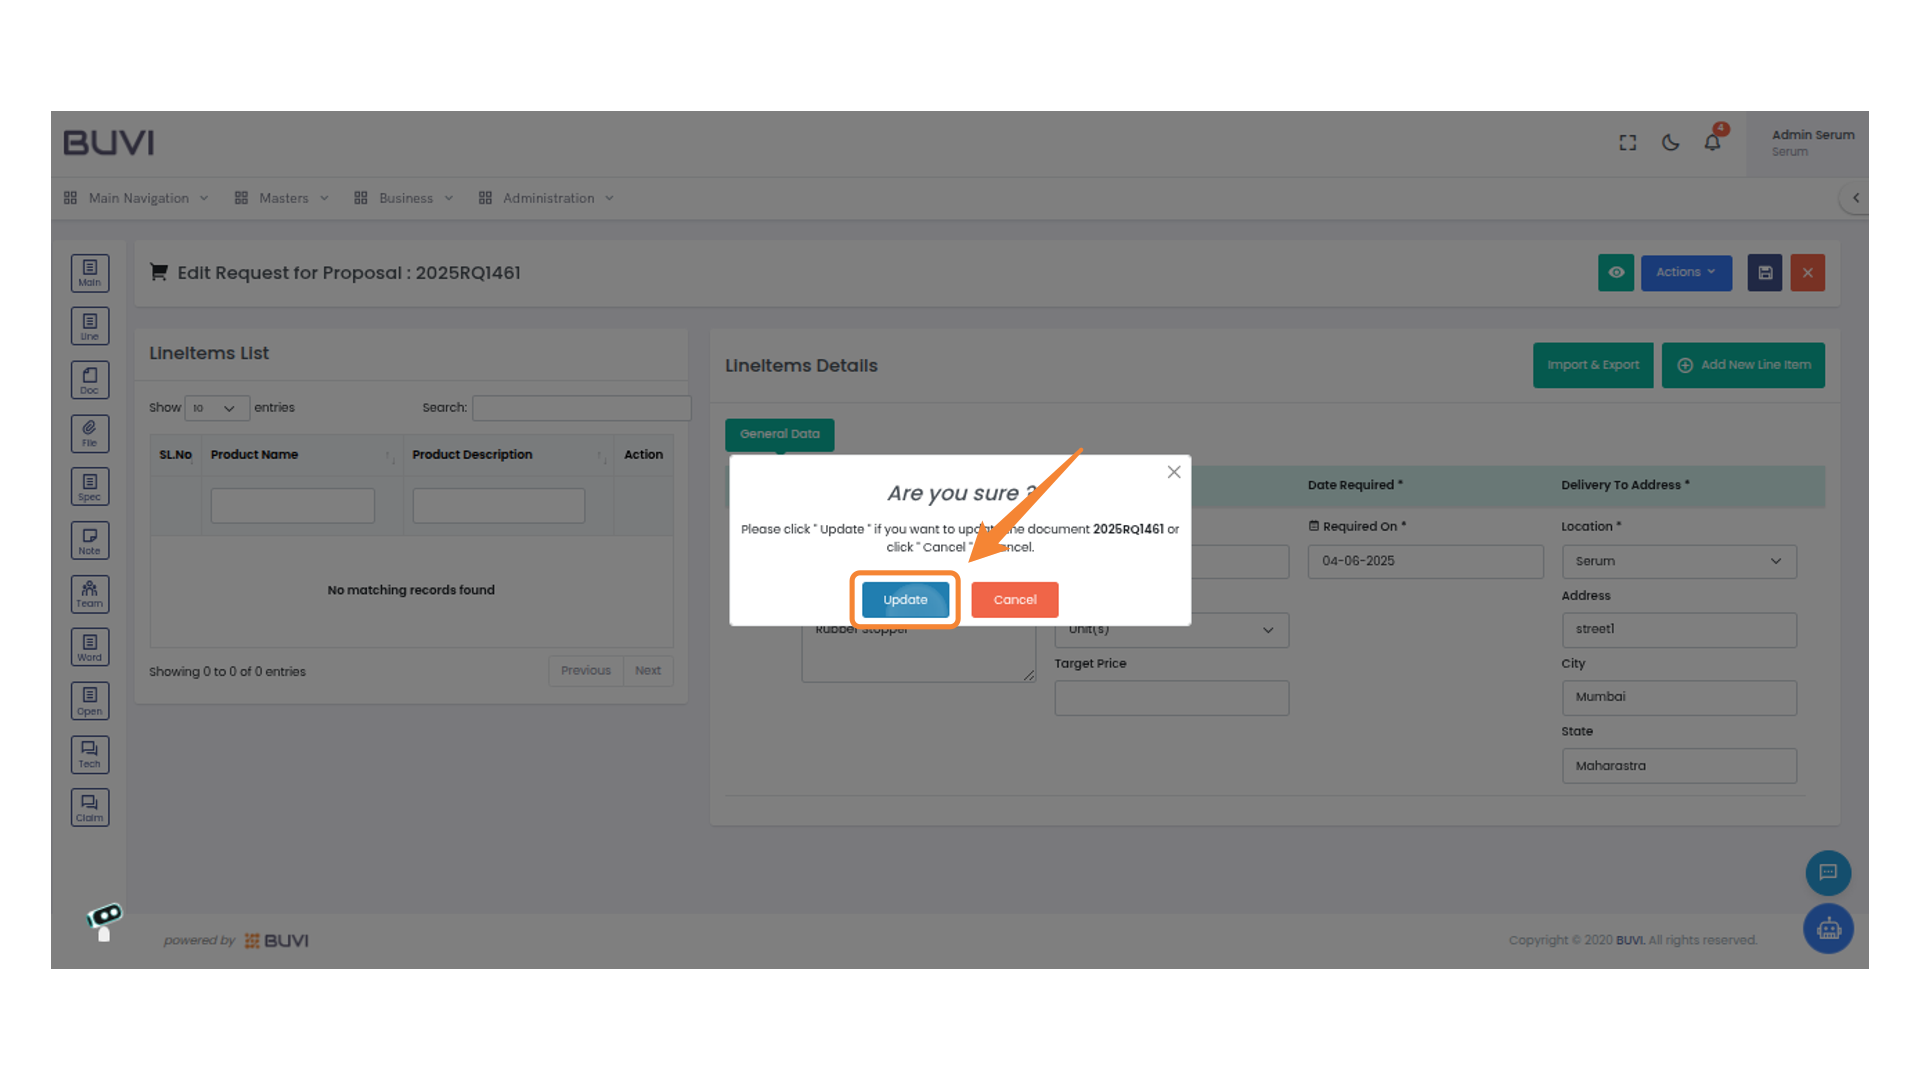
29. Confirm Update
Click "Update" to confirm changes to the document or choose "Cancel" to abort.
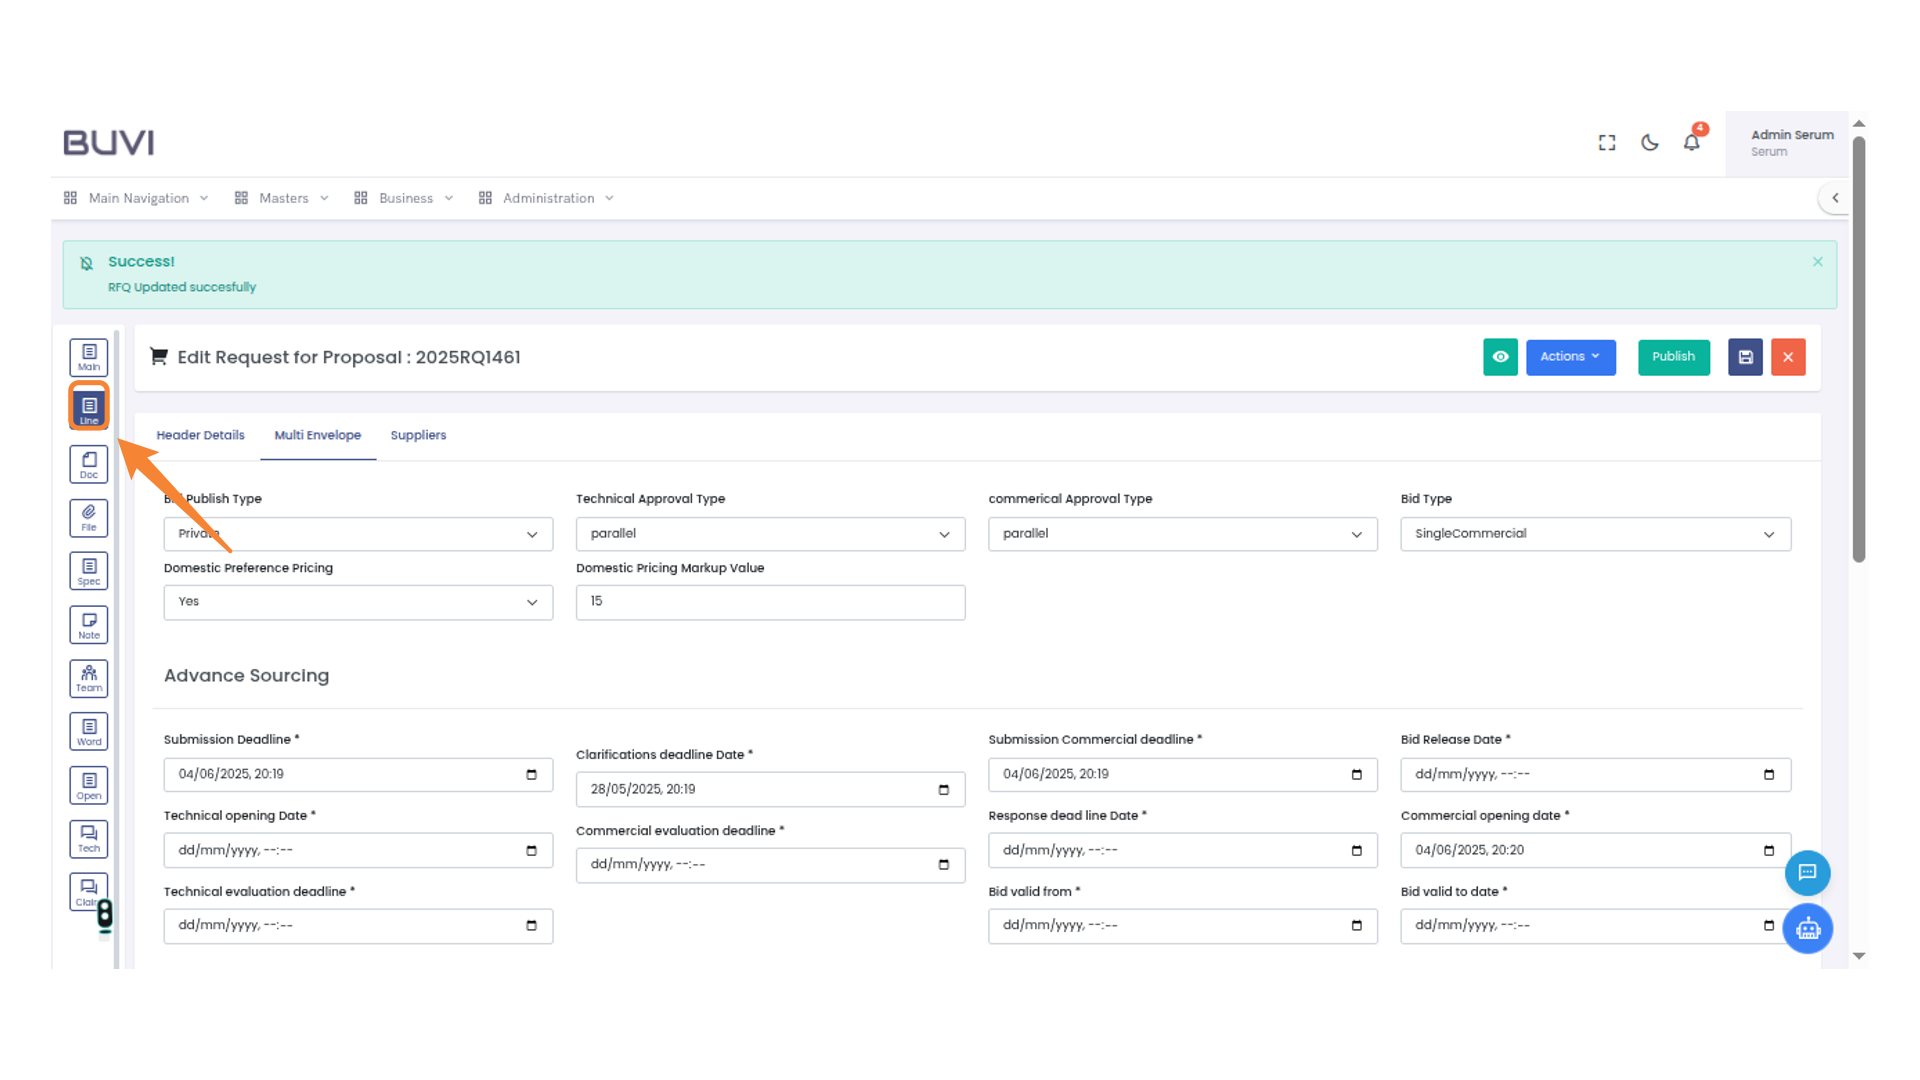
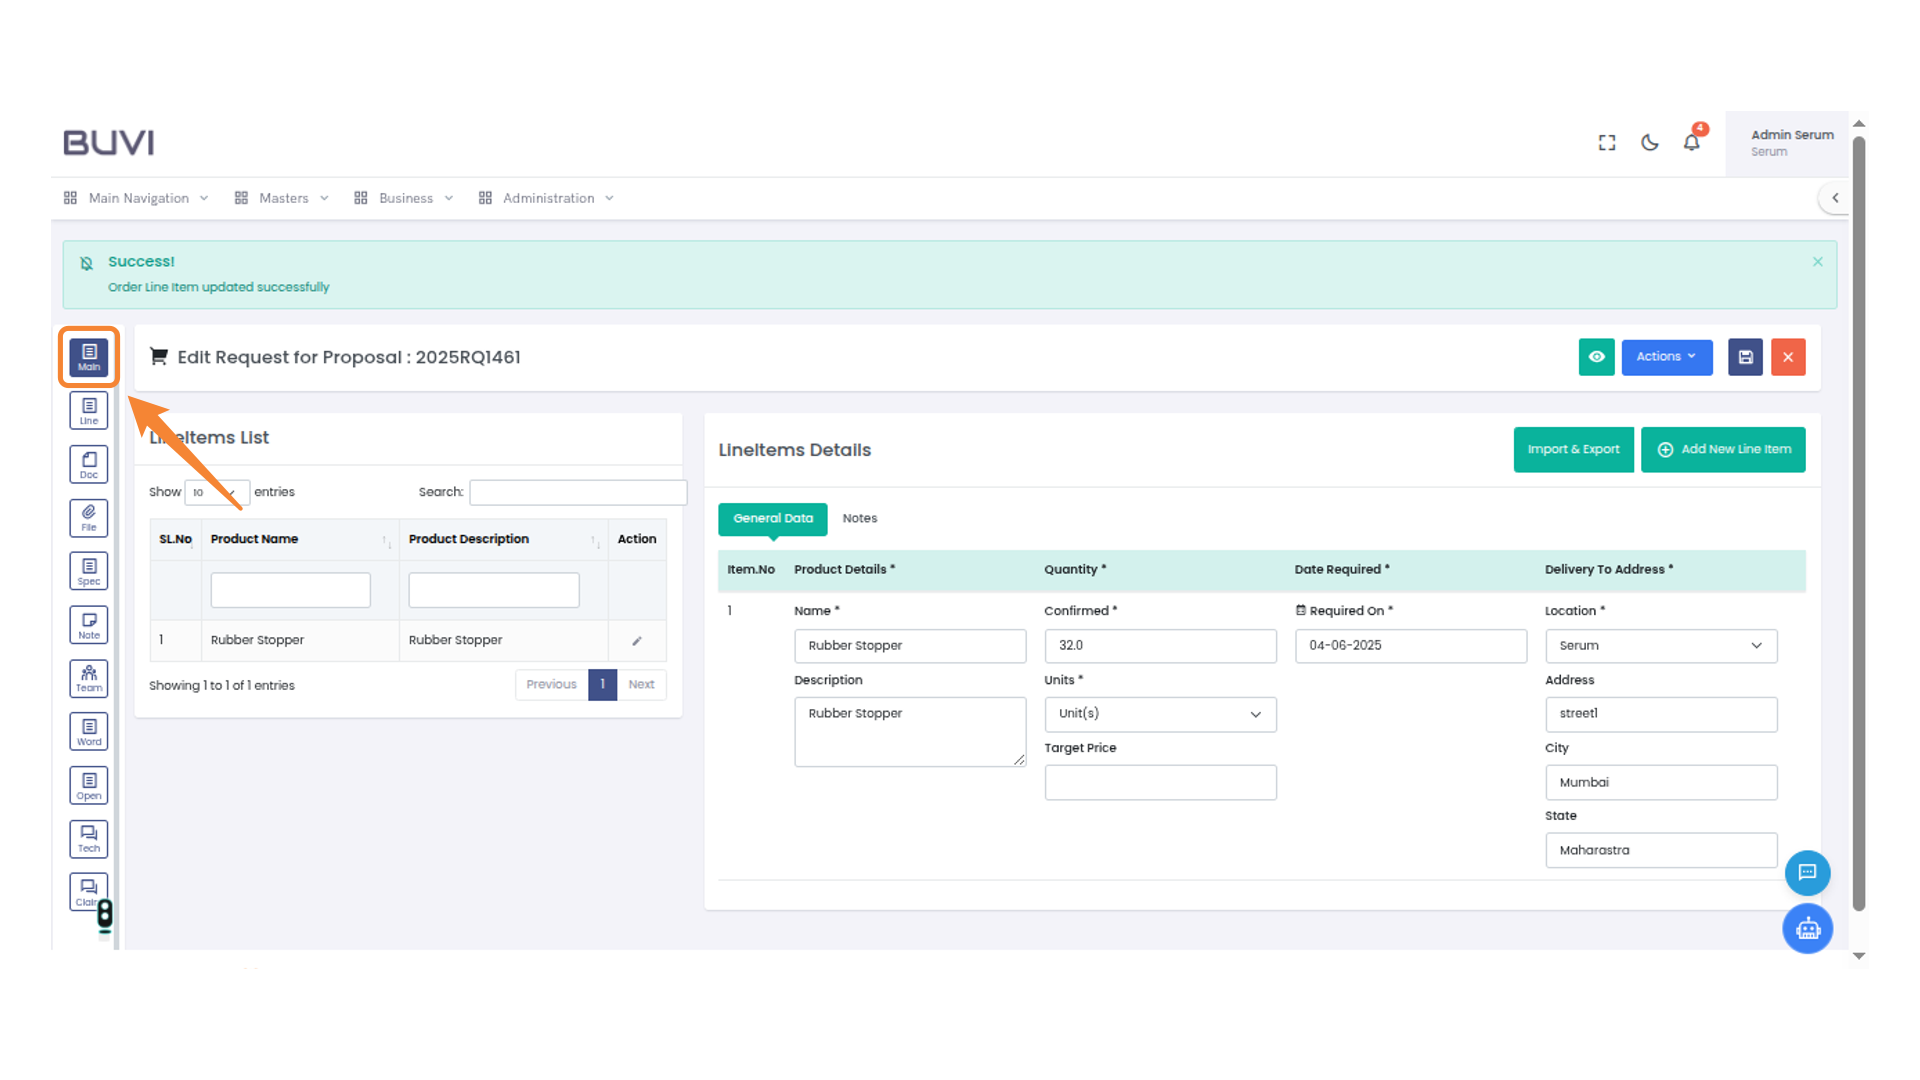
30. Identify the Line Menu
Select the 'Line' option from the menu on the left side of the interface.
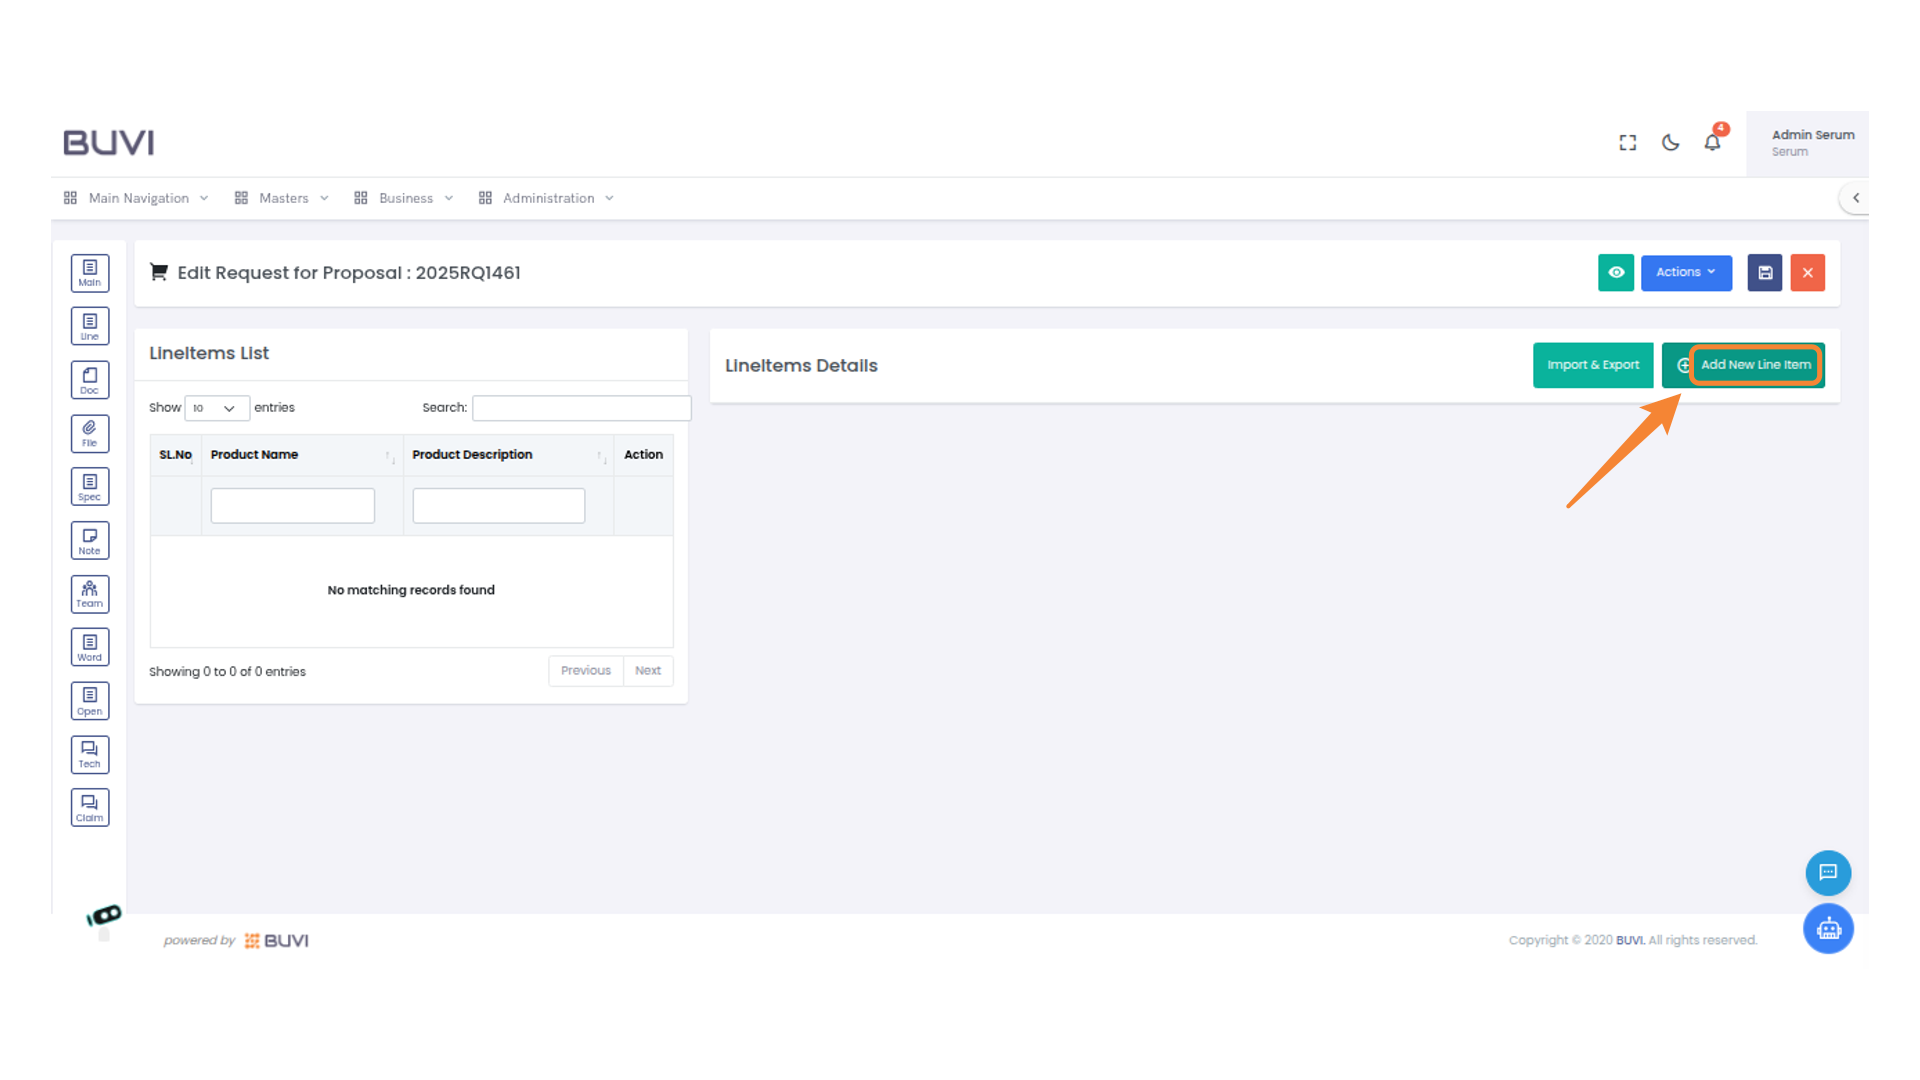
31. Add a New Line Item
Click 'Add New Line Item' to include a new entry in the Linetems List.
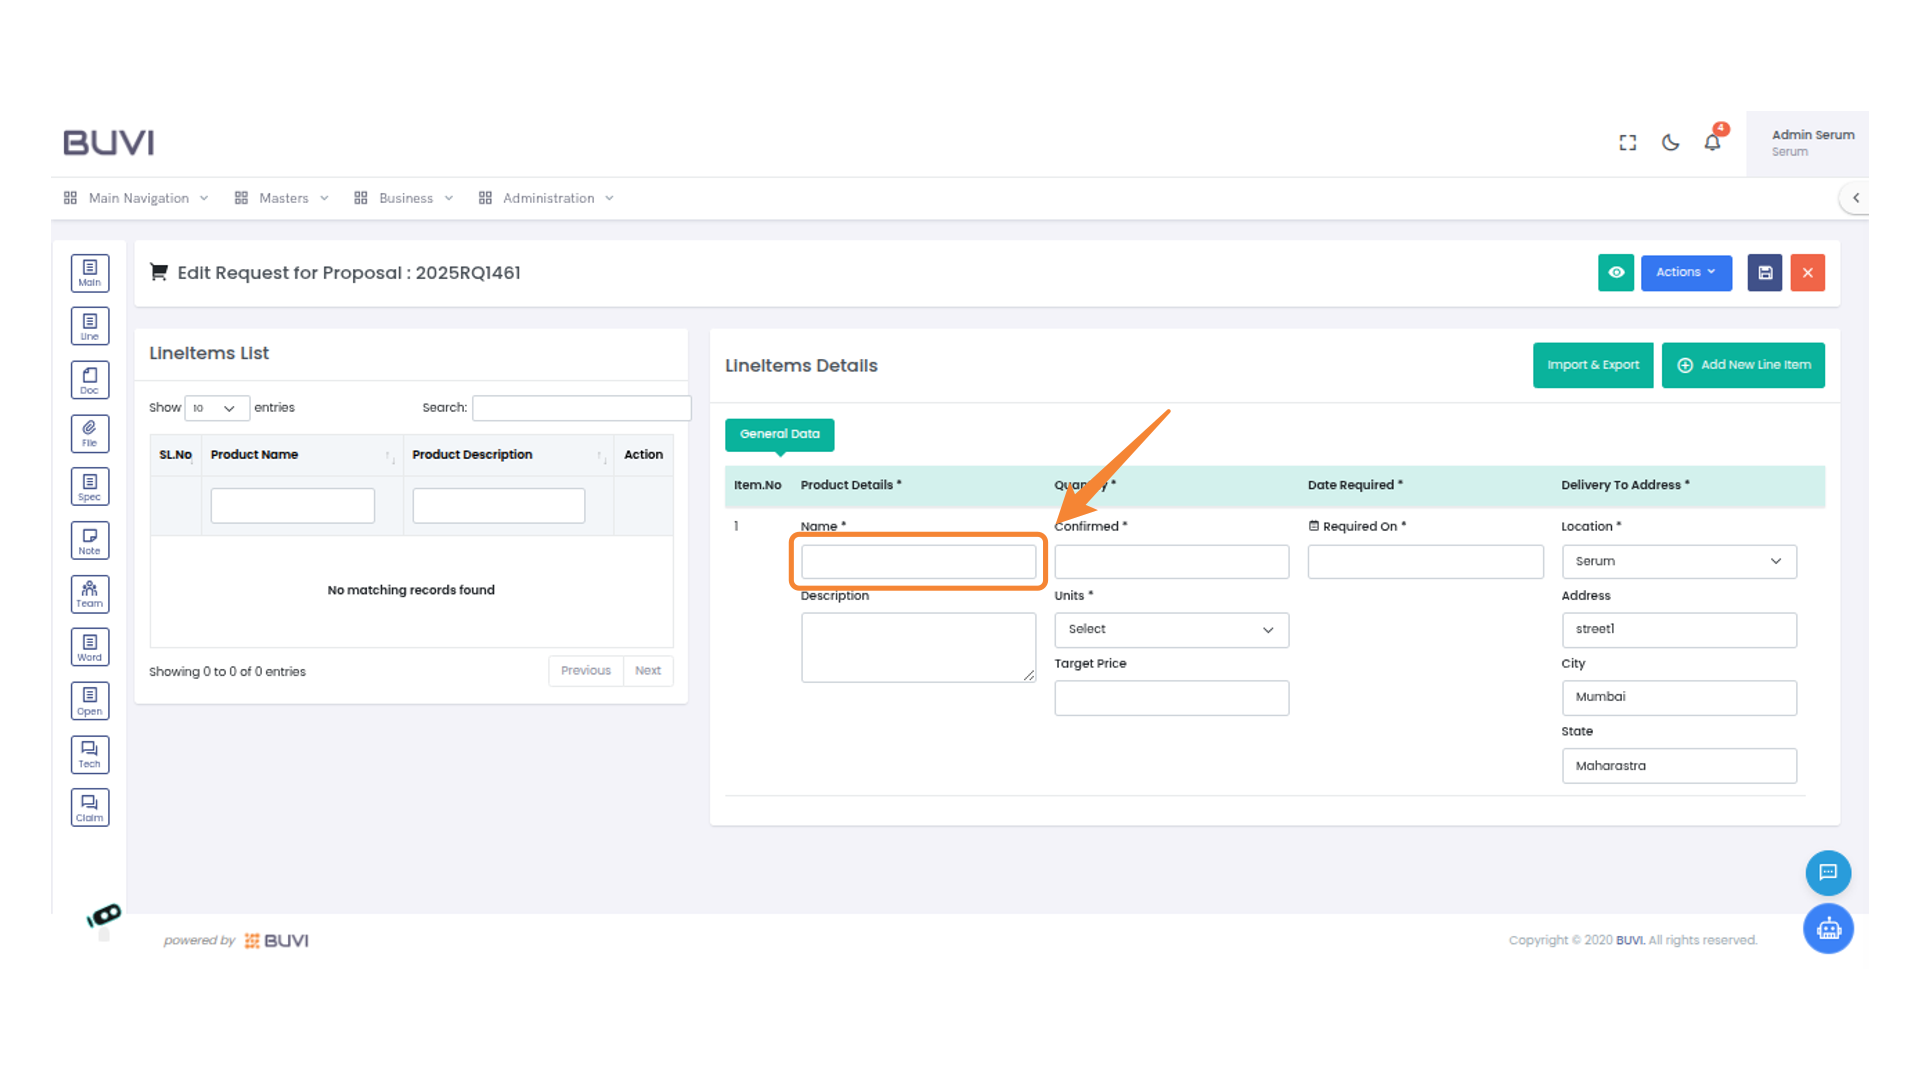
32. Enter Product Name
Input the product name into the field provided.
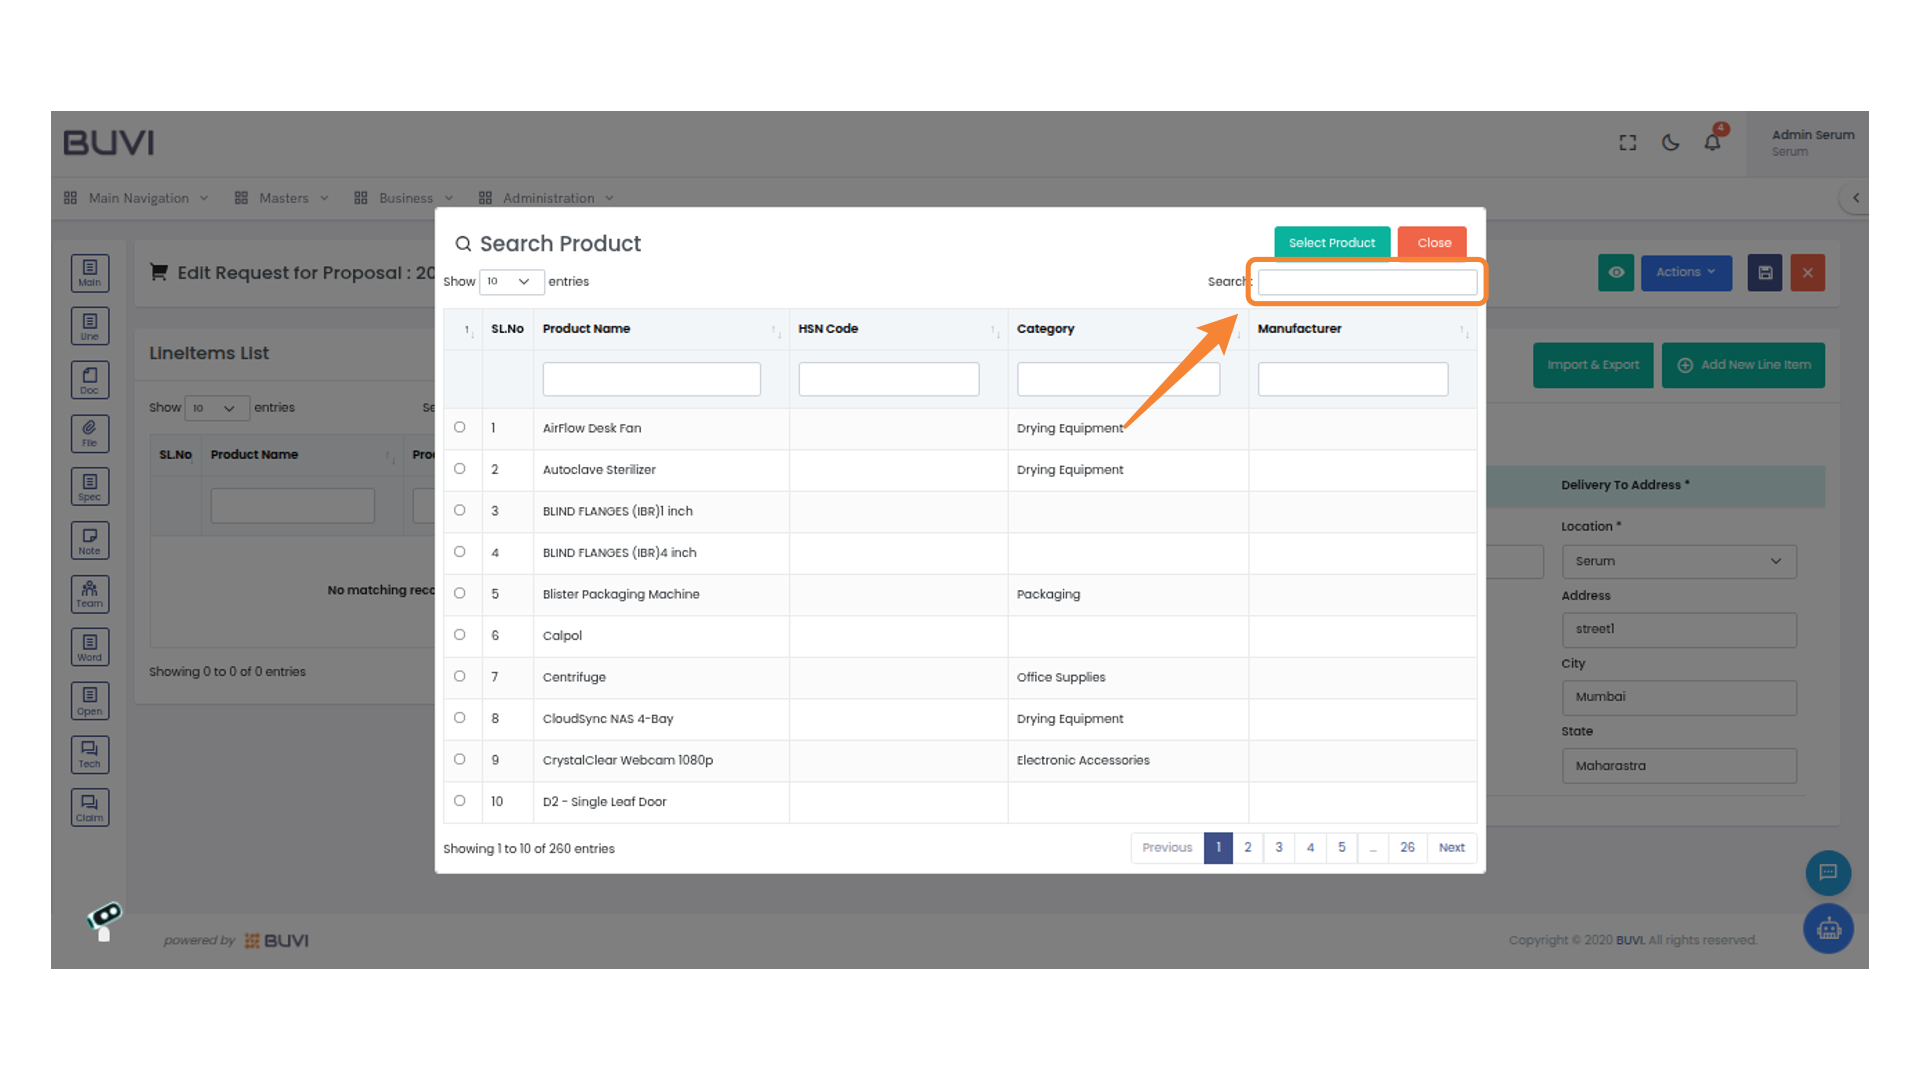
33. Initiate a Product Search
Enter your query into the search field to filter products by name, category, or manufacturer.
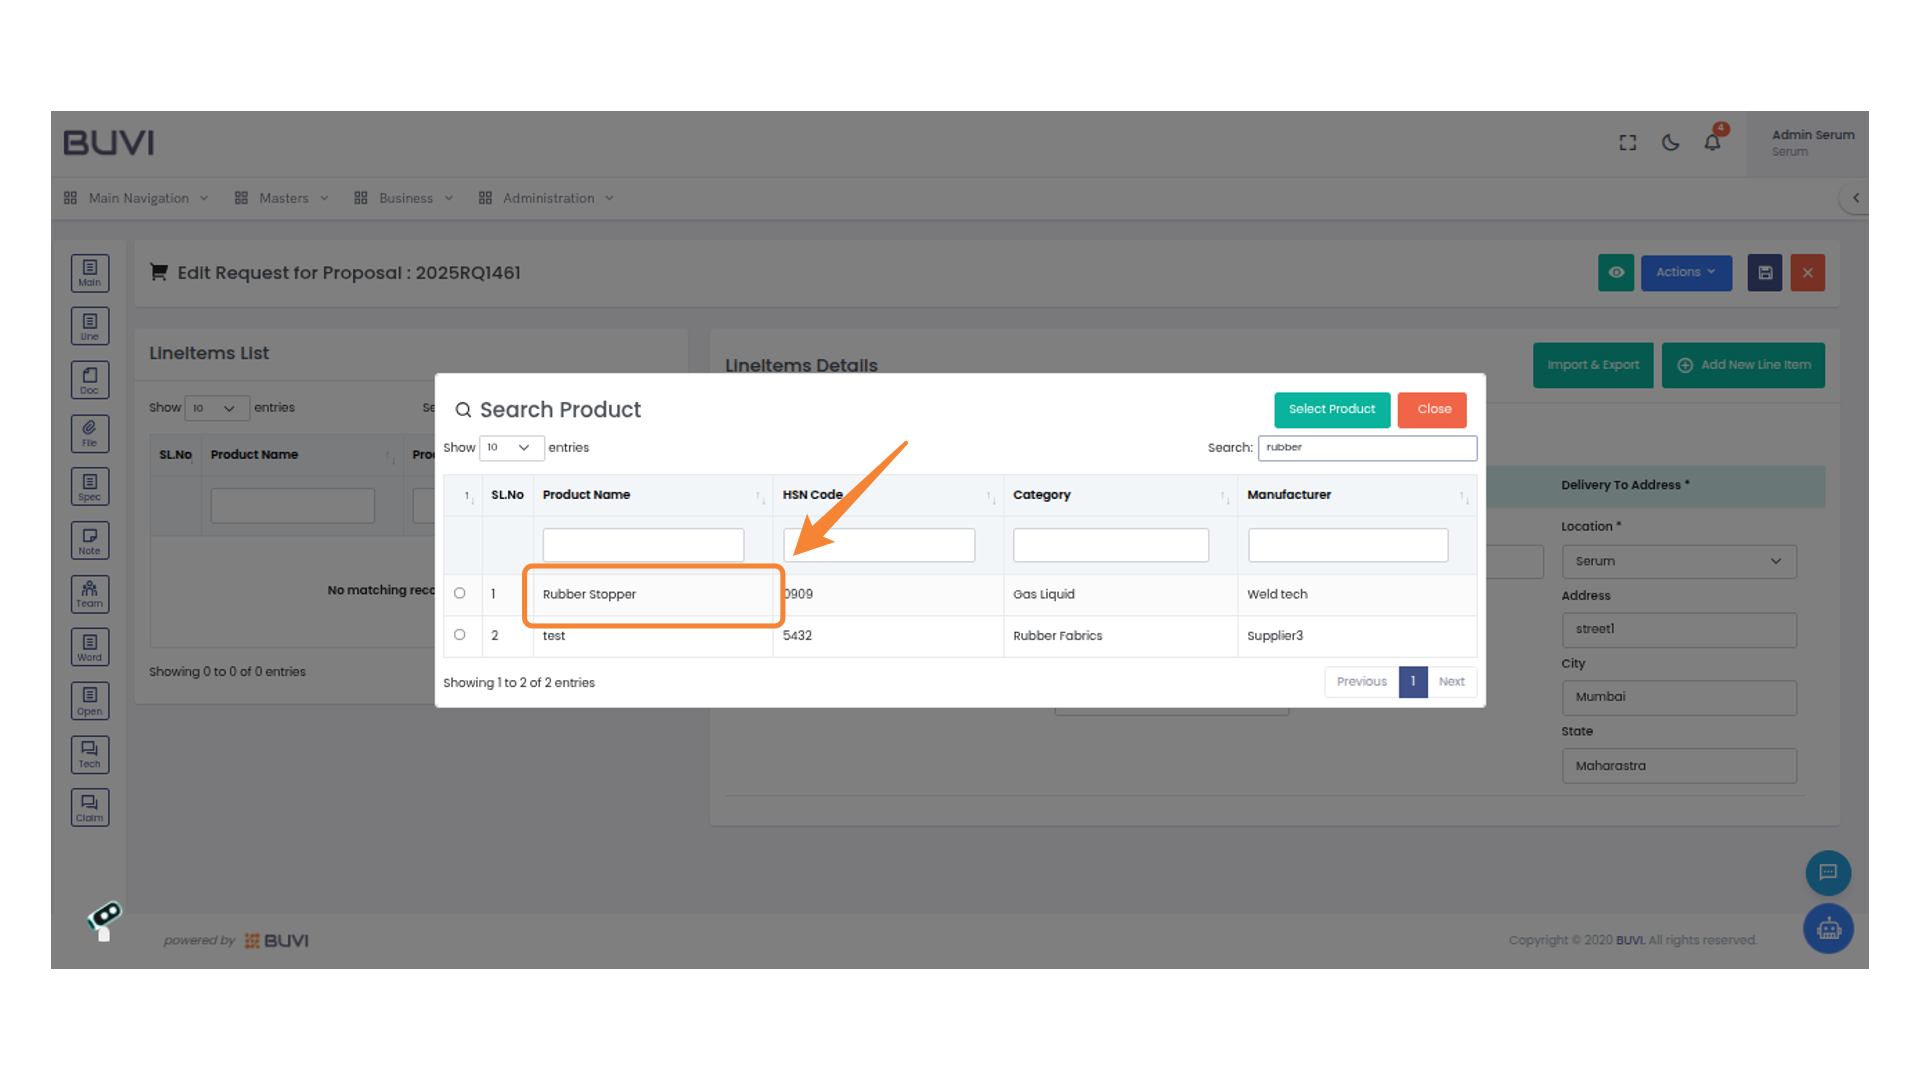
34. Select the Rubber Stopper Product
Choose the 'Rubber Stopper' from the product selection list to add it to your request.
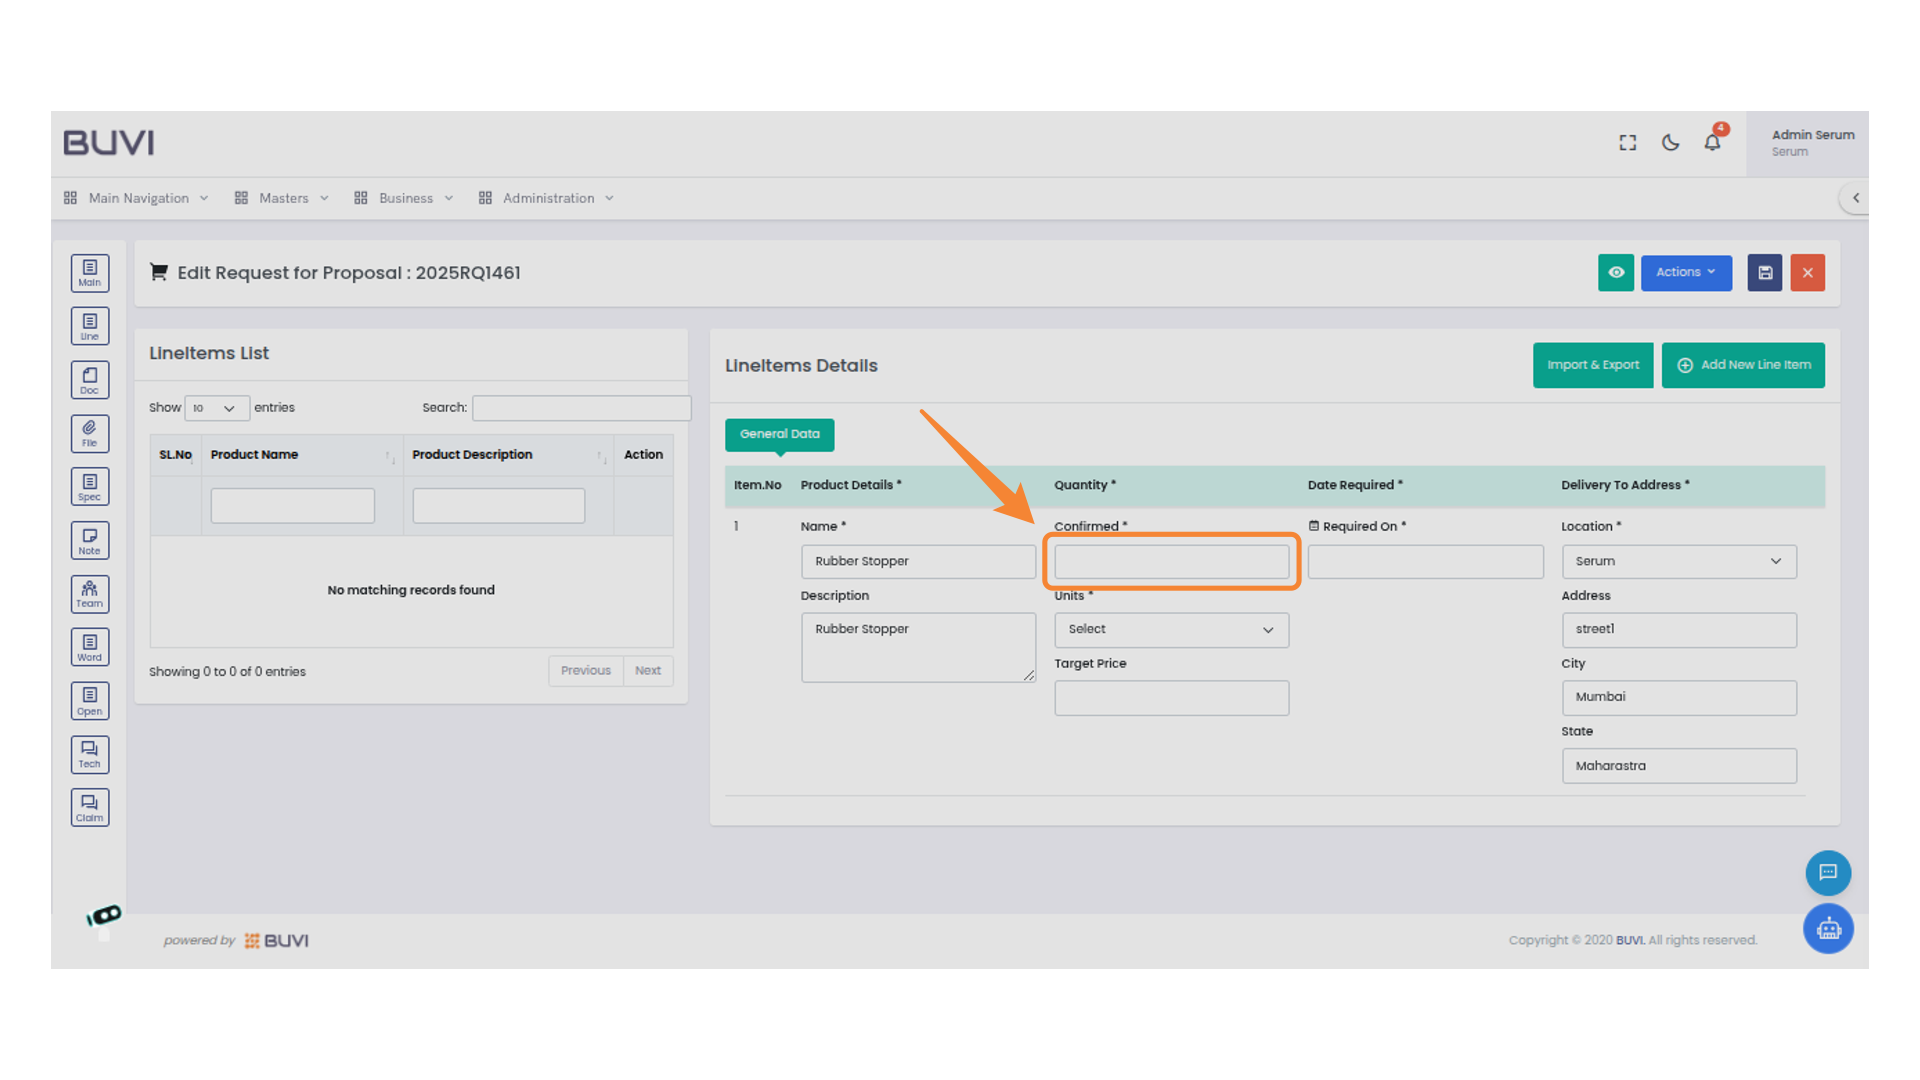
35. Select Item Confirmation
Enter the number of confirmed items in the provided field to indicate the quantity available.
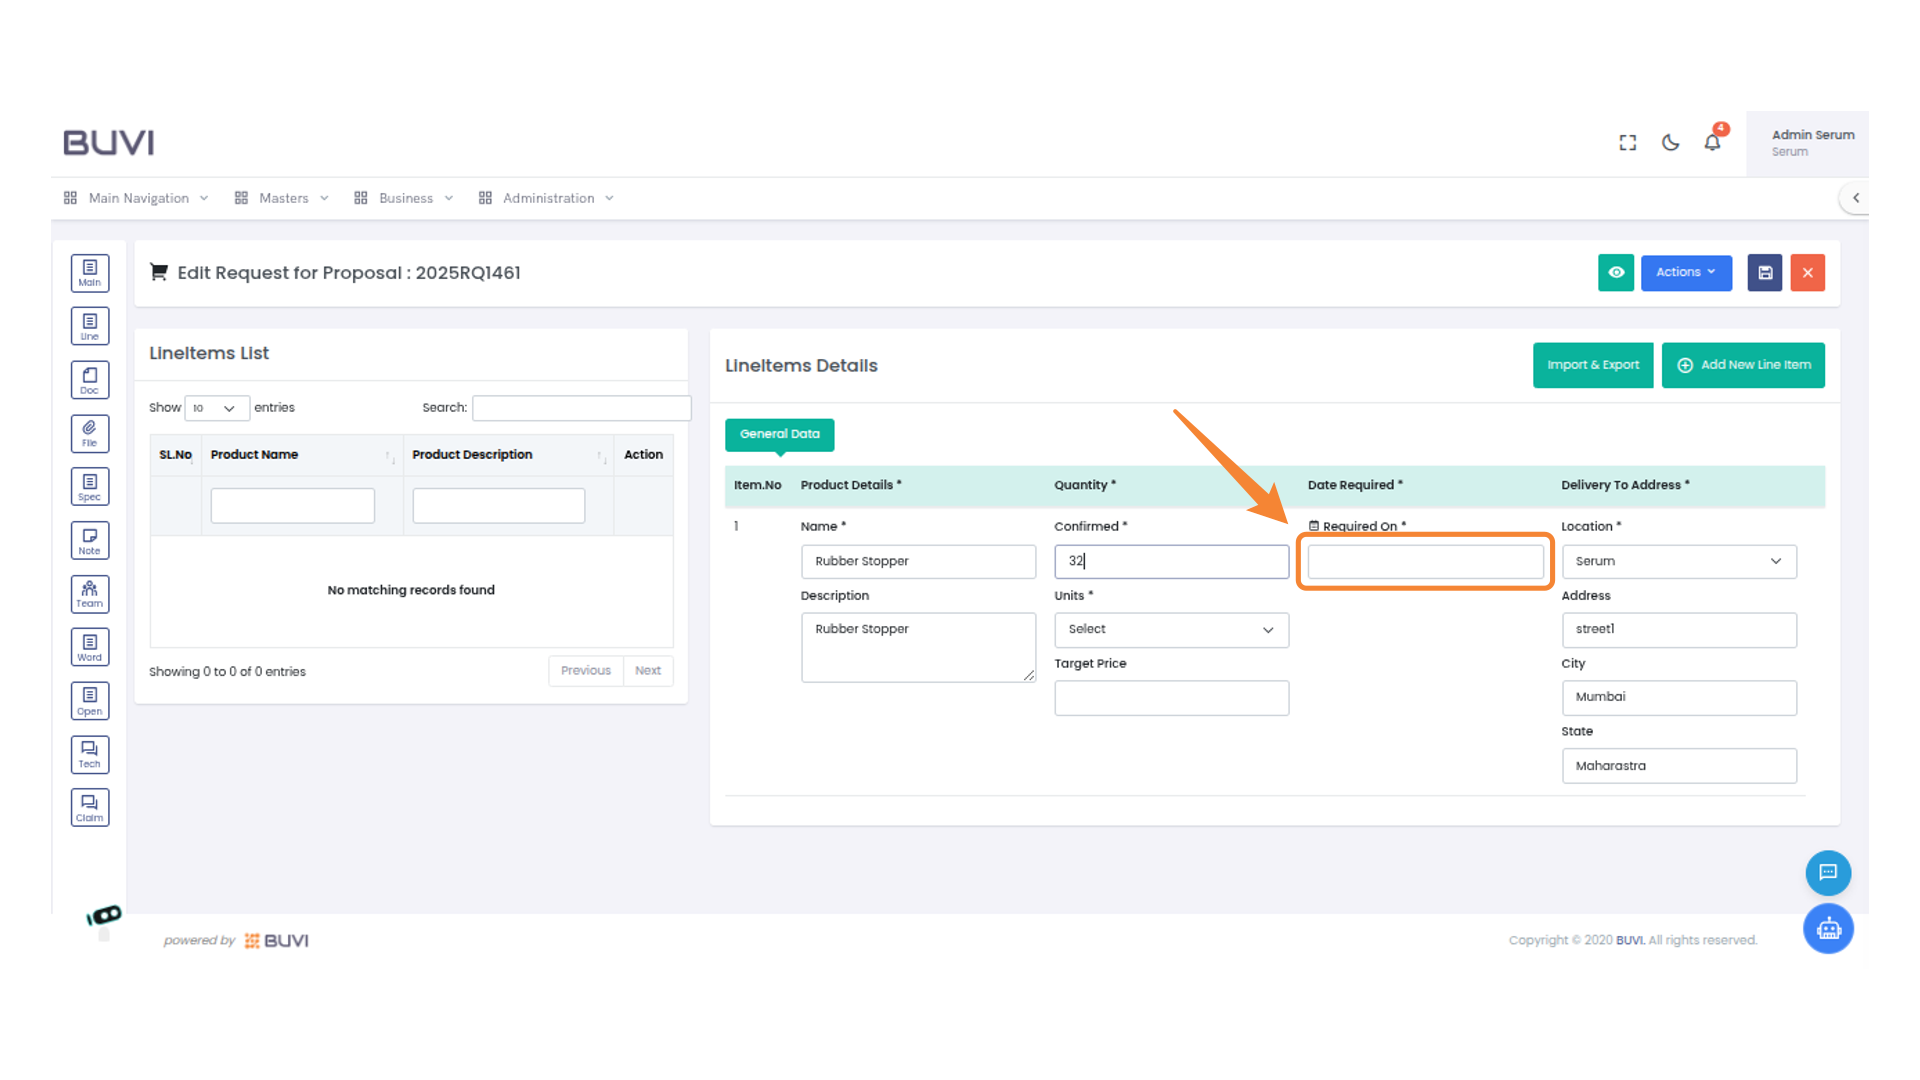
36. Specify Required Date
Enter the date needed for the delivery of the item in the provided field.
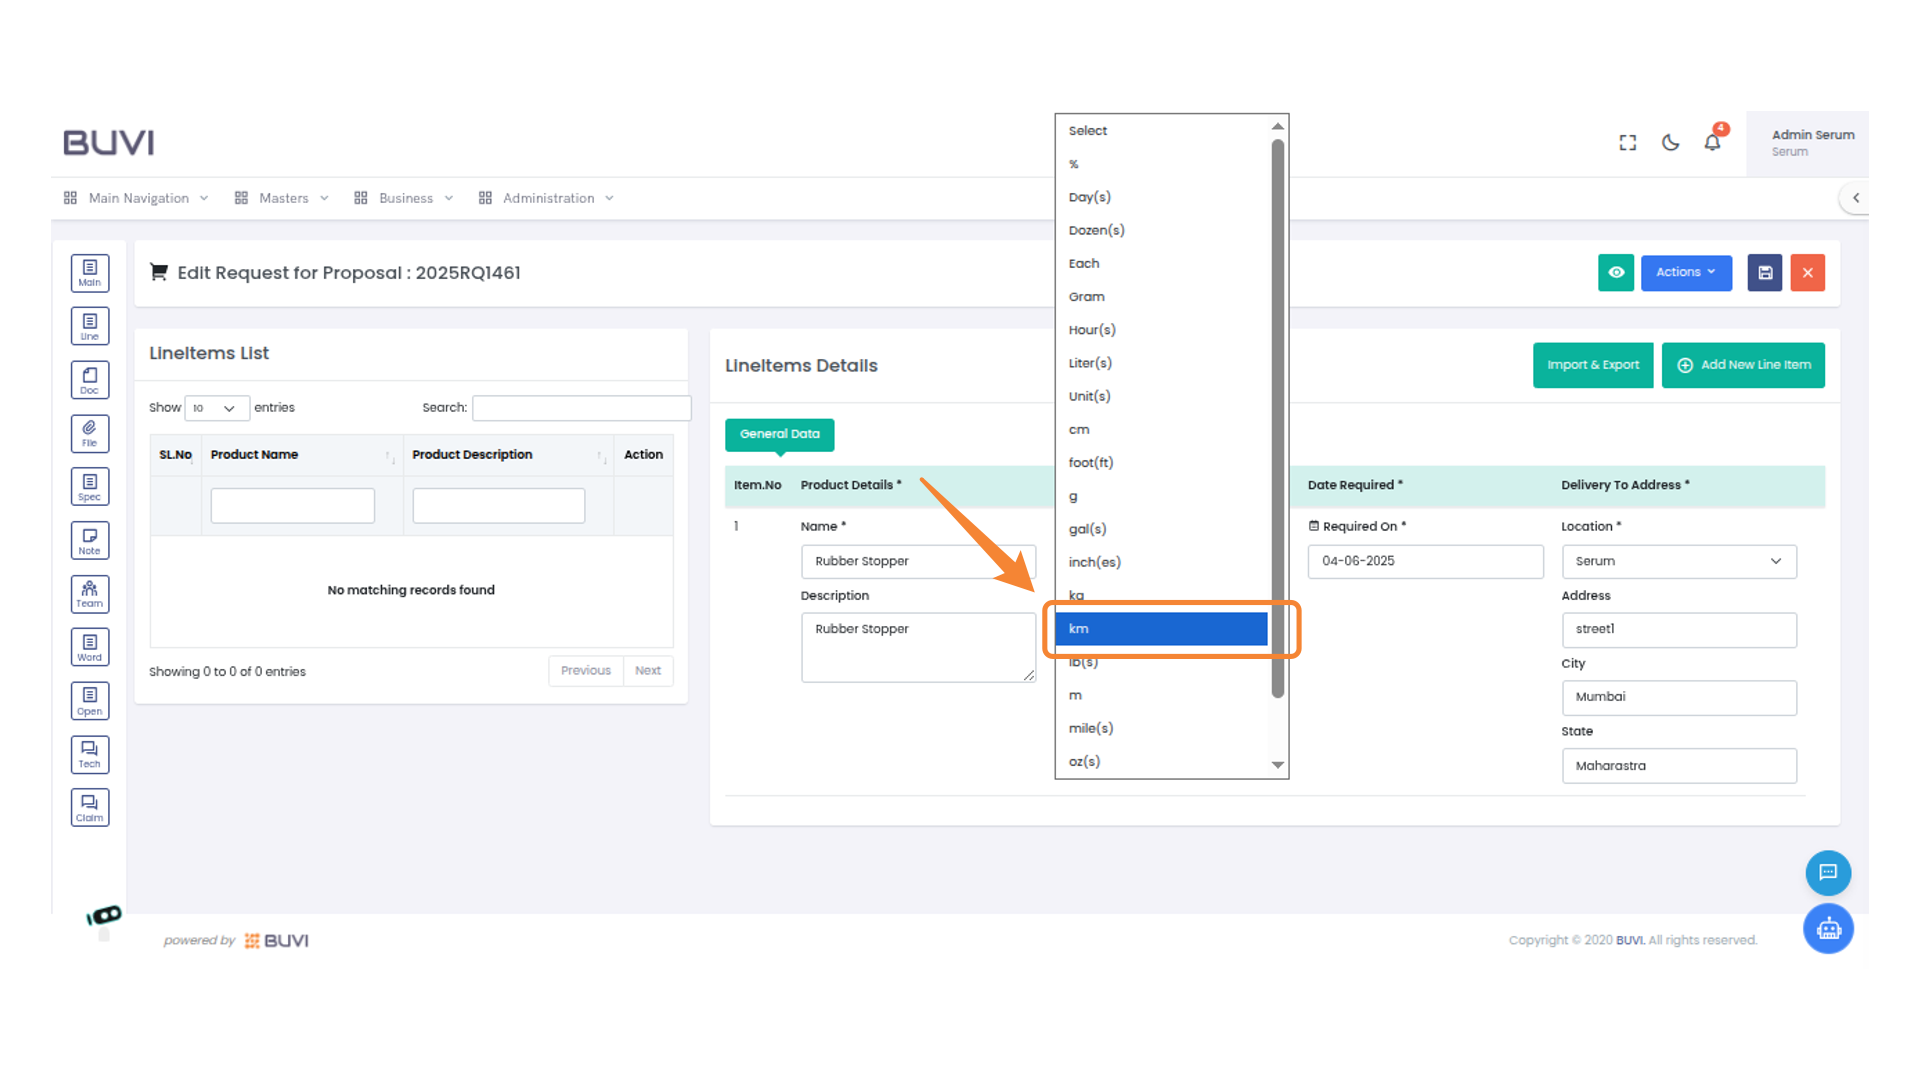
37. Select Unit Type
Choose 'km' from the unit selection dropdown to specify the distance measurement for the item.
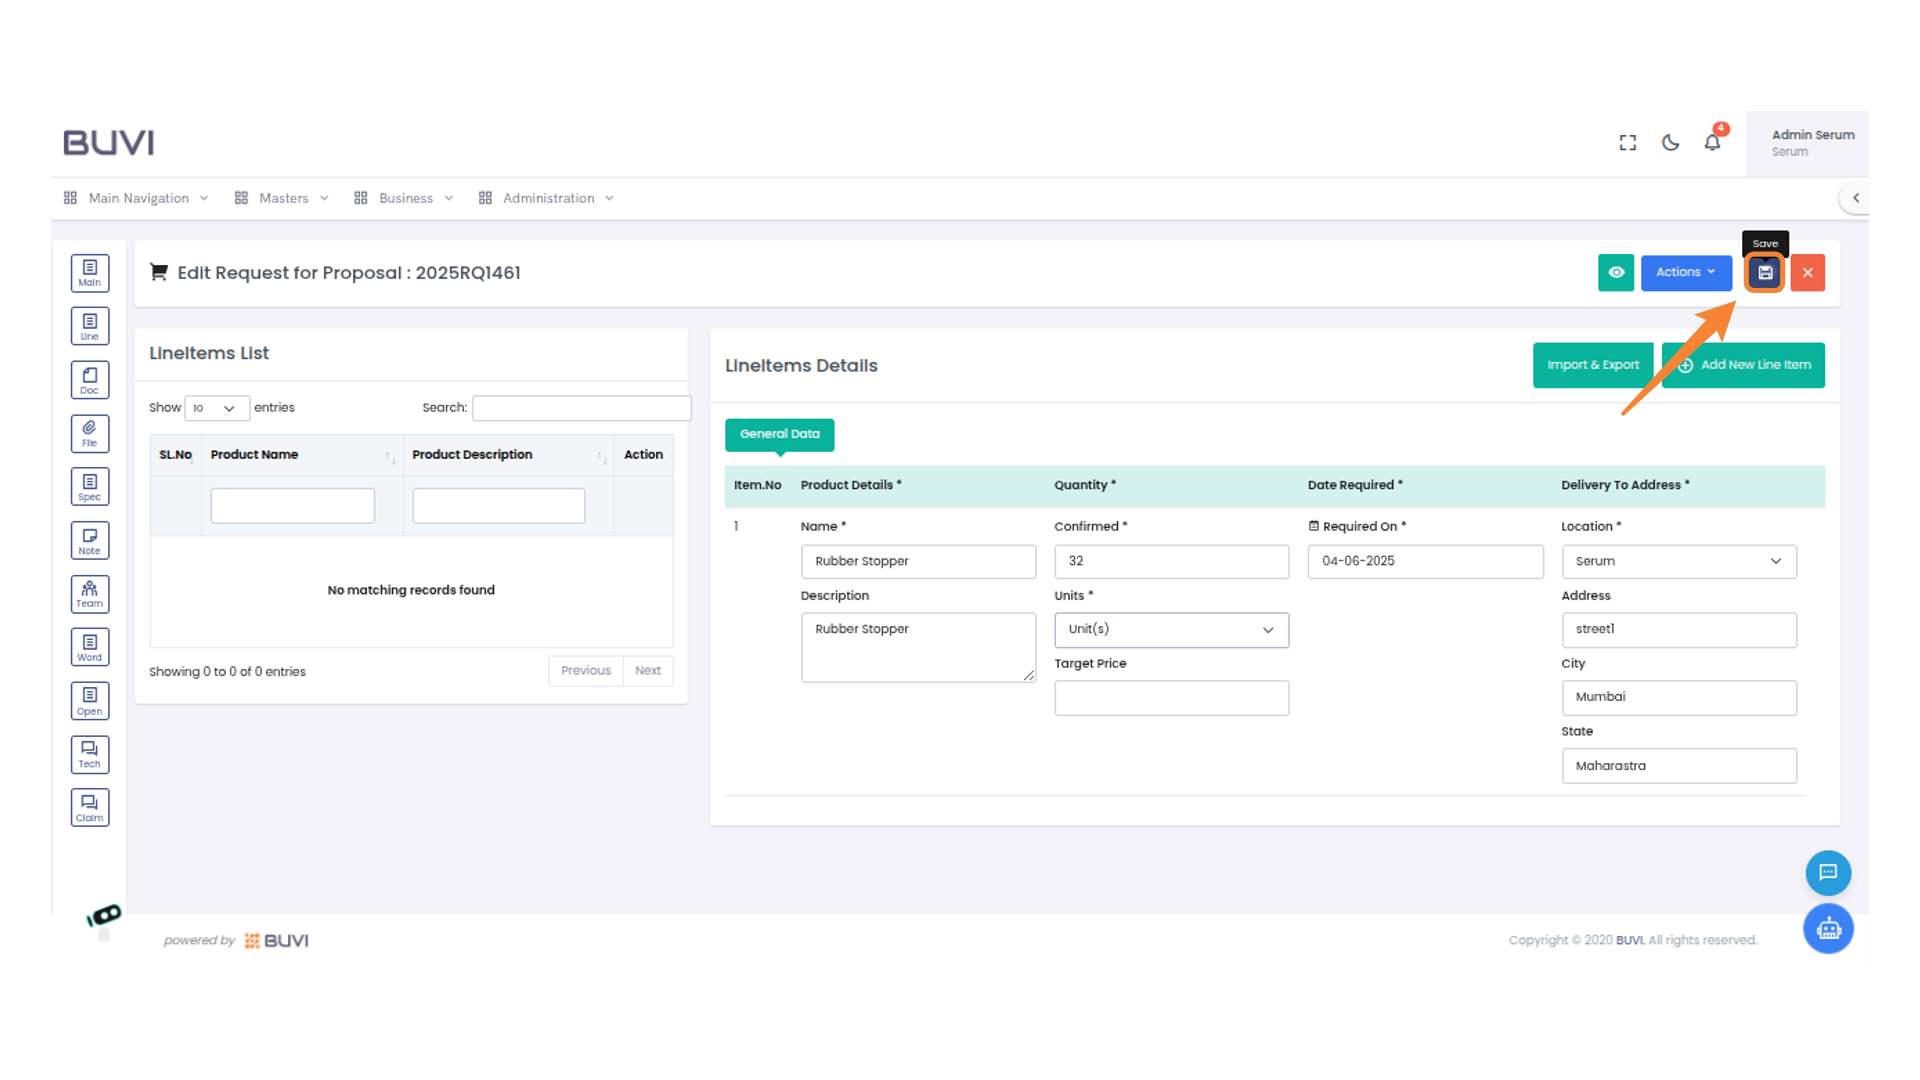
38. Save Entry
save entry
39. Confirm Update Action
Click the 'Update' button to proceed with updating the document.
40. Navigate to Main Menu
Select the 'Main' button on the sidebar to access the primary navigation menu.
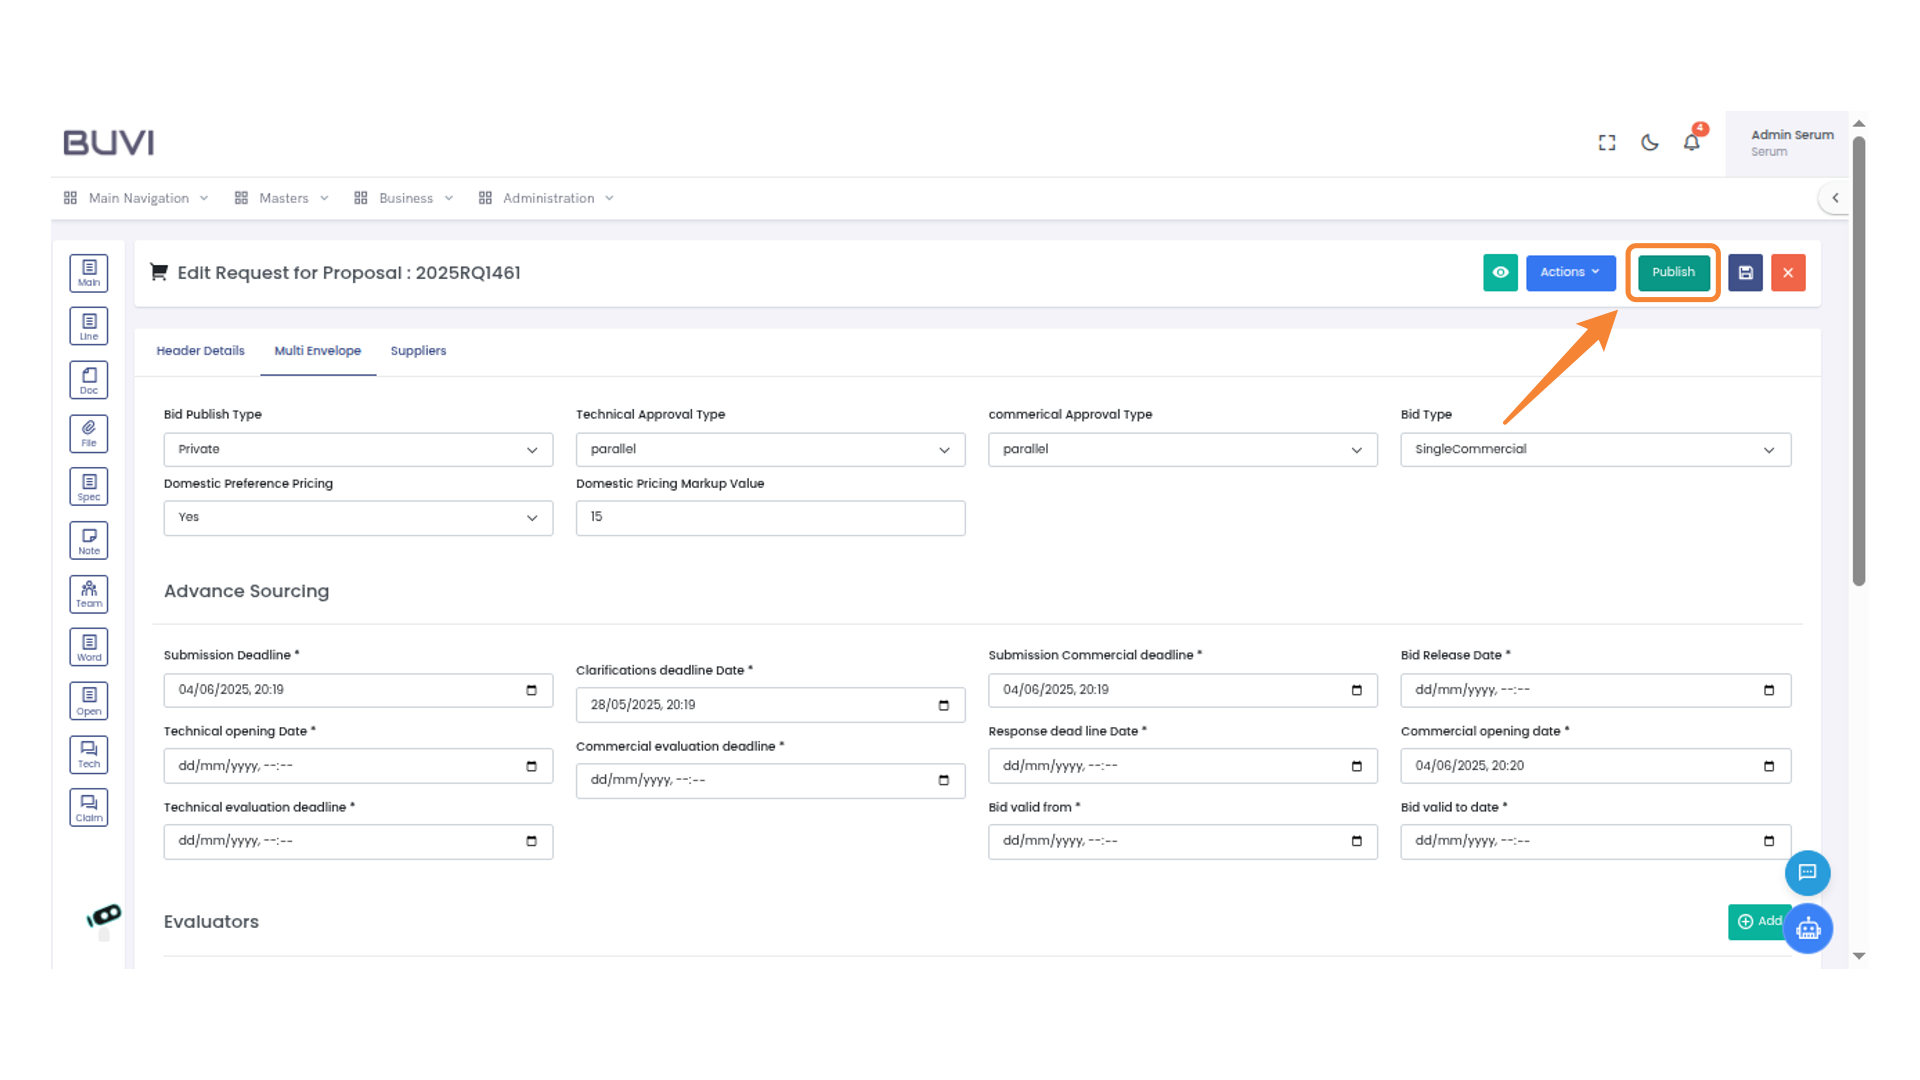
41. Publish the Request
Select 'Publish' to finalize the request for proposal and make it visible to the intended audience.
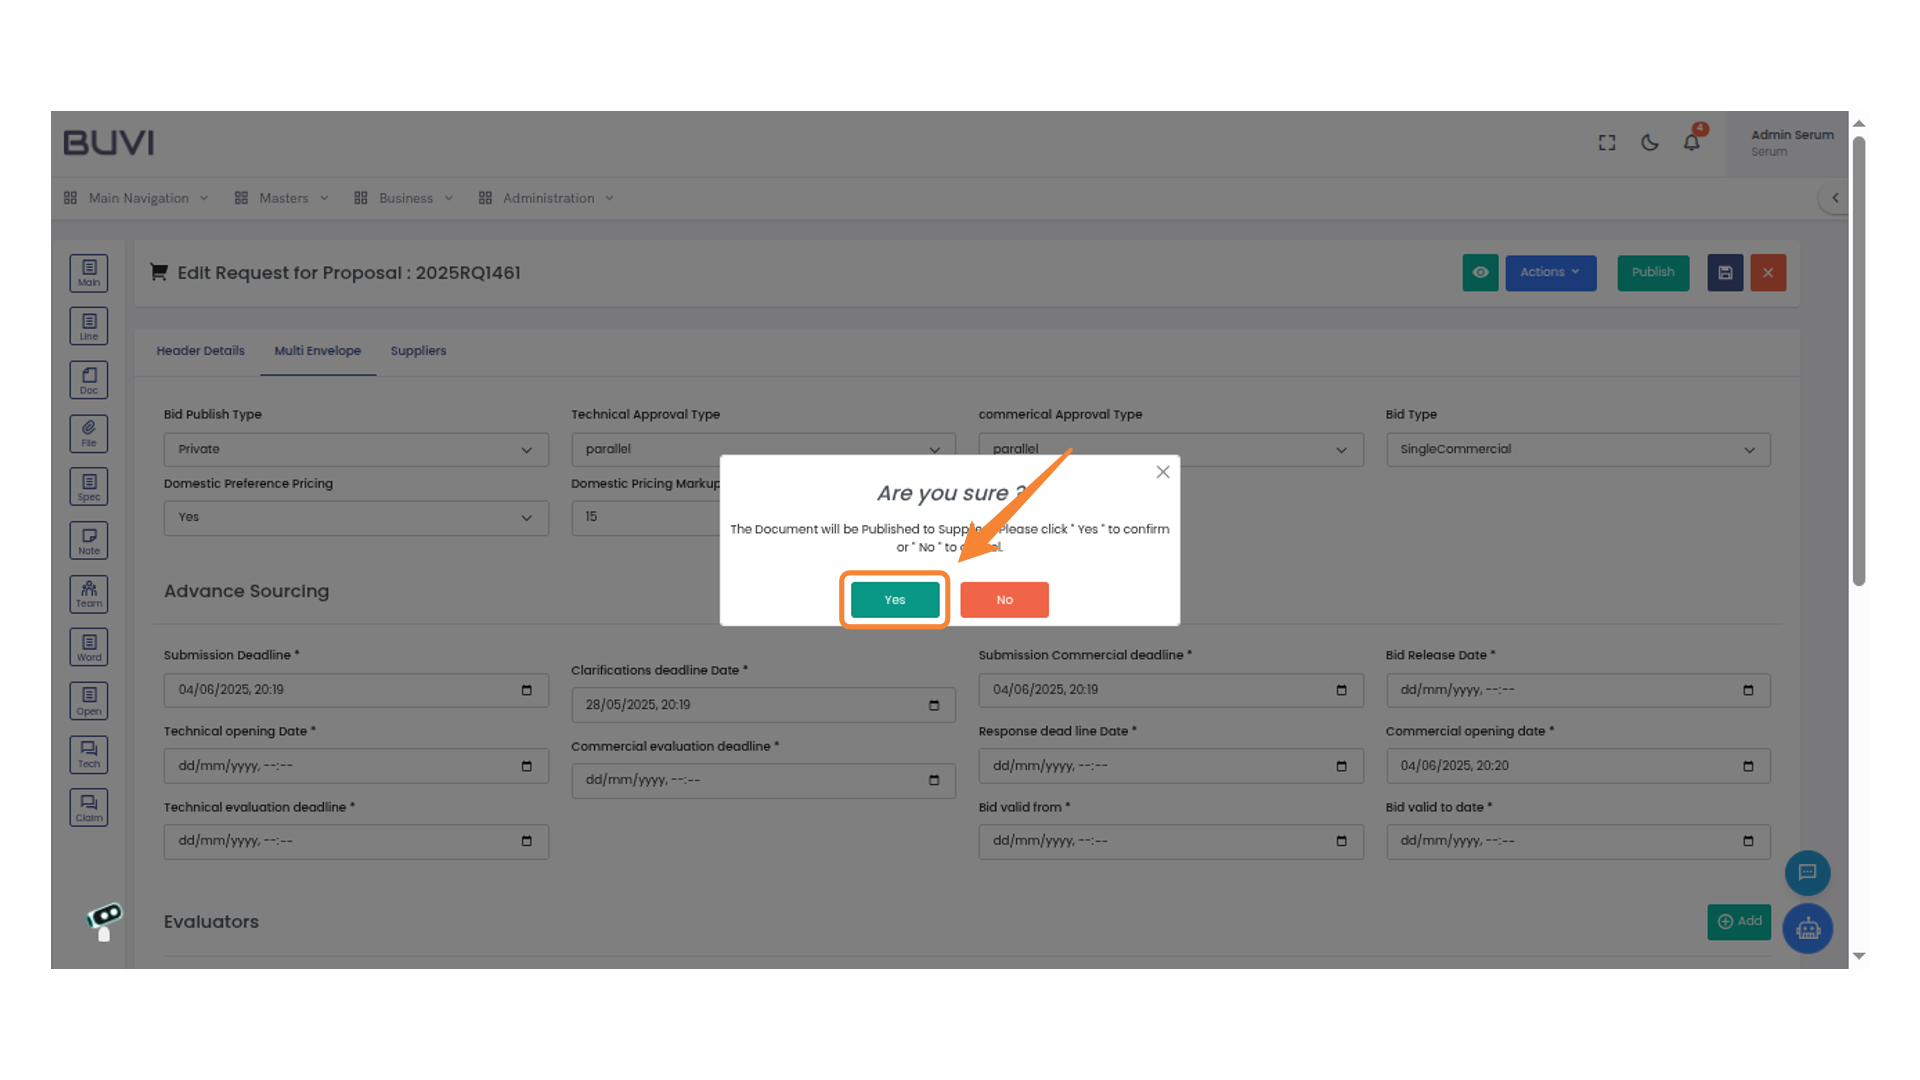
42. Confirm Document Publication
Click 'Yes' to confirm the publication of the document to suppliers or 'No' to cancel.
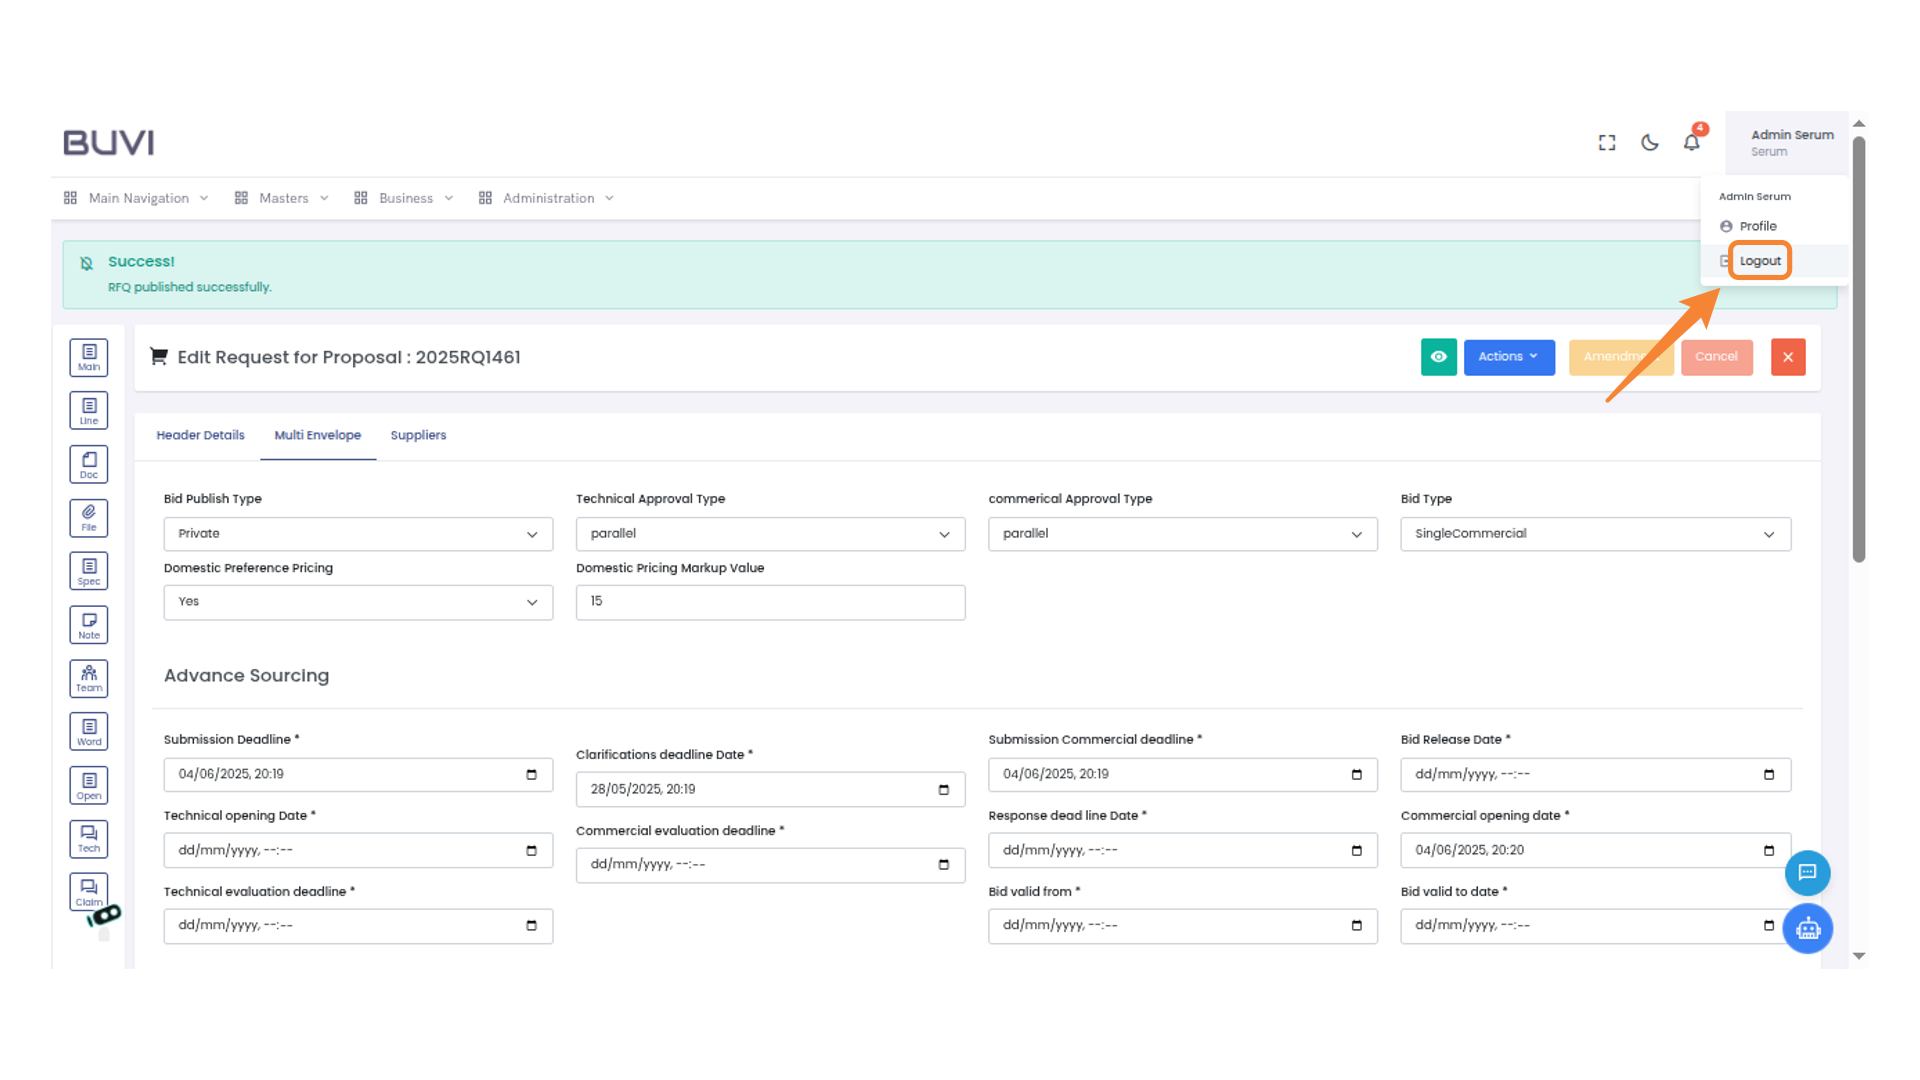
43. Logout from the System
Select 'Logout' to exit the current session.
44. Login to the application as supplier
Login to the application as supplier

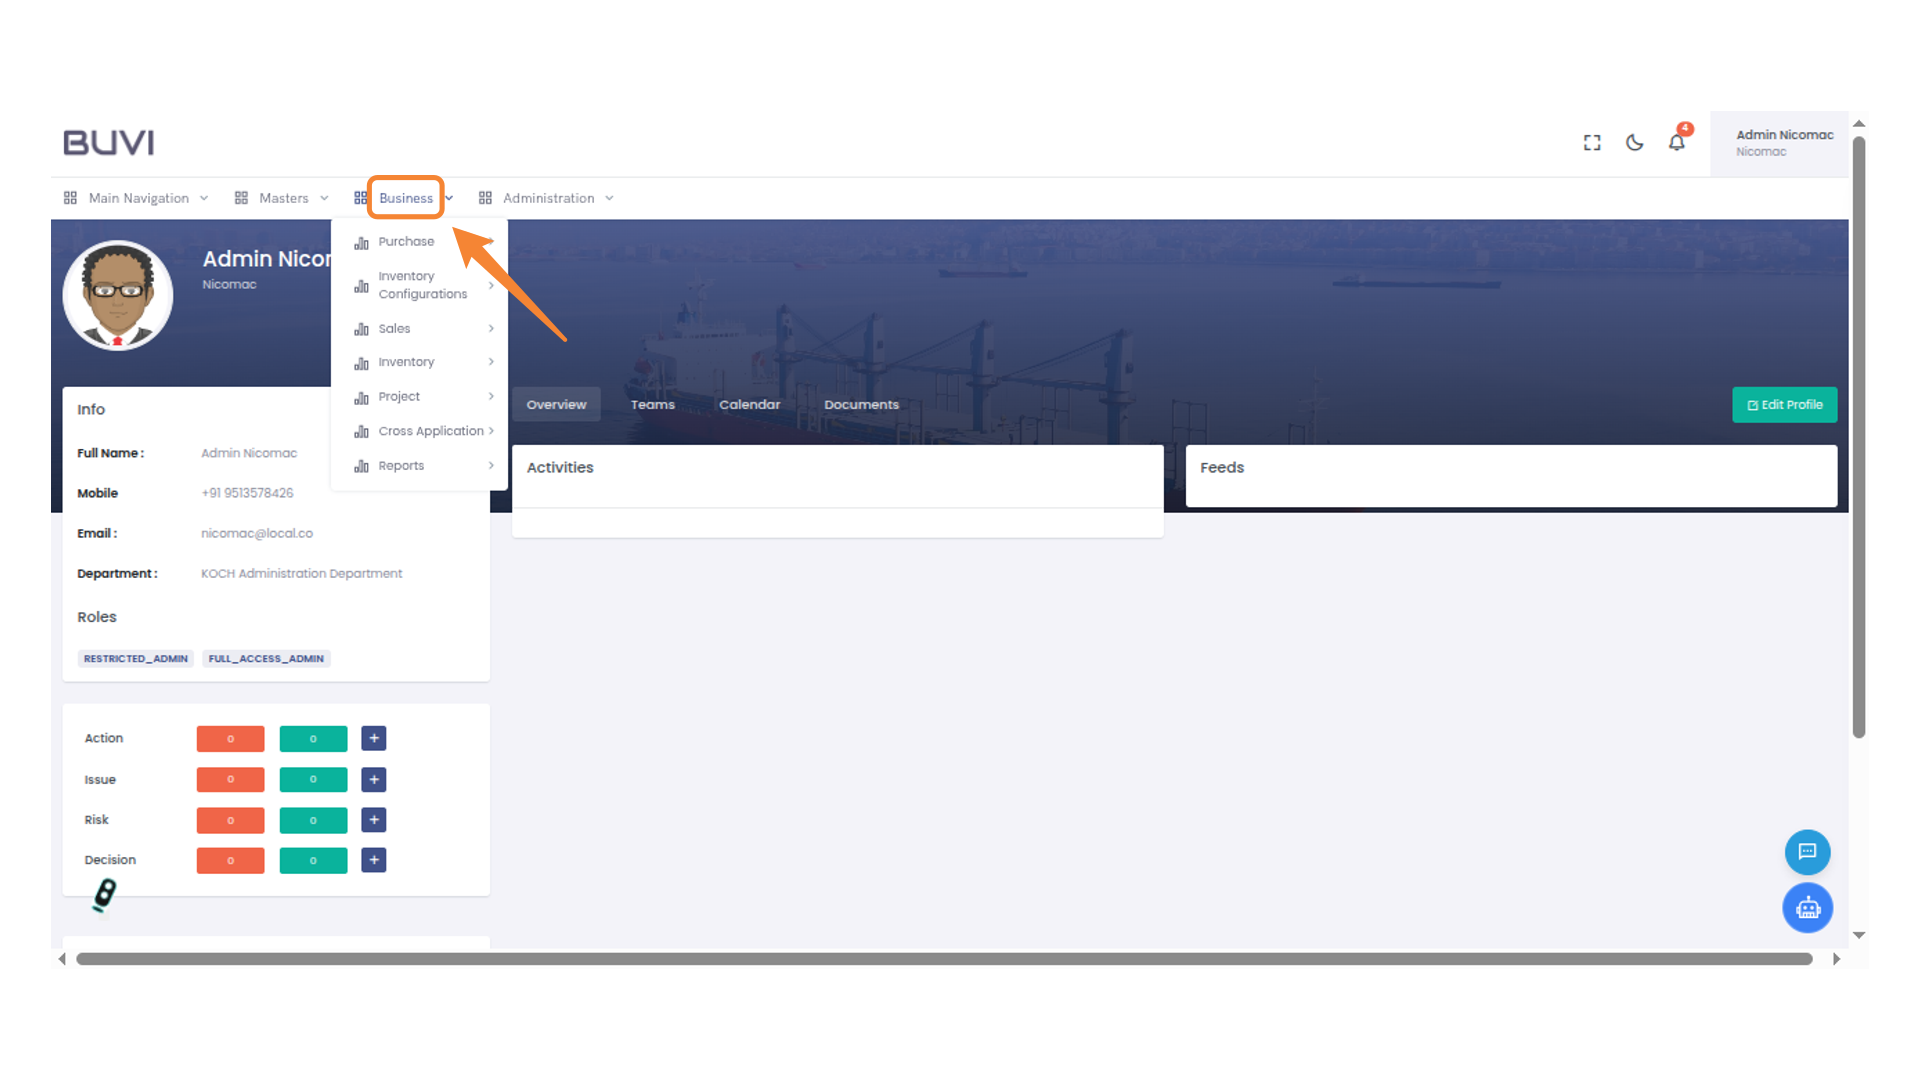
45. Access Business Menu Options
Select 'Business'menu
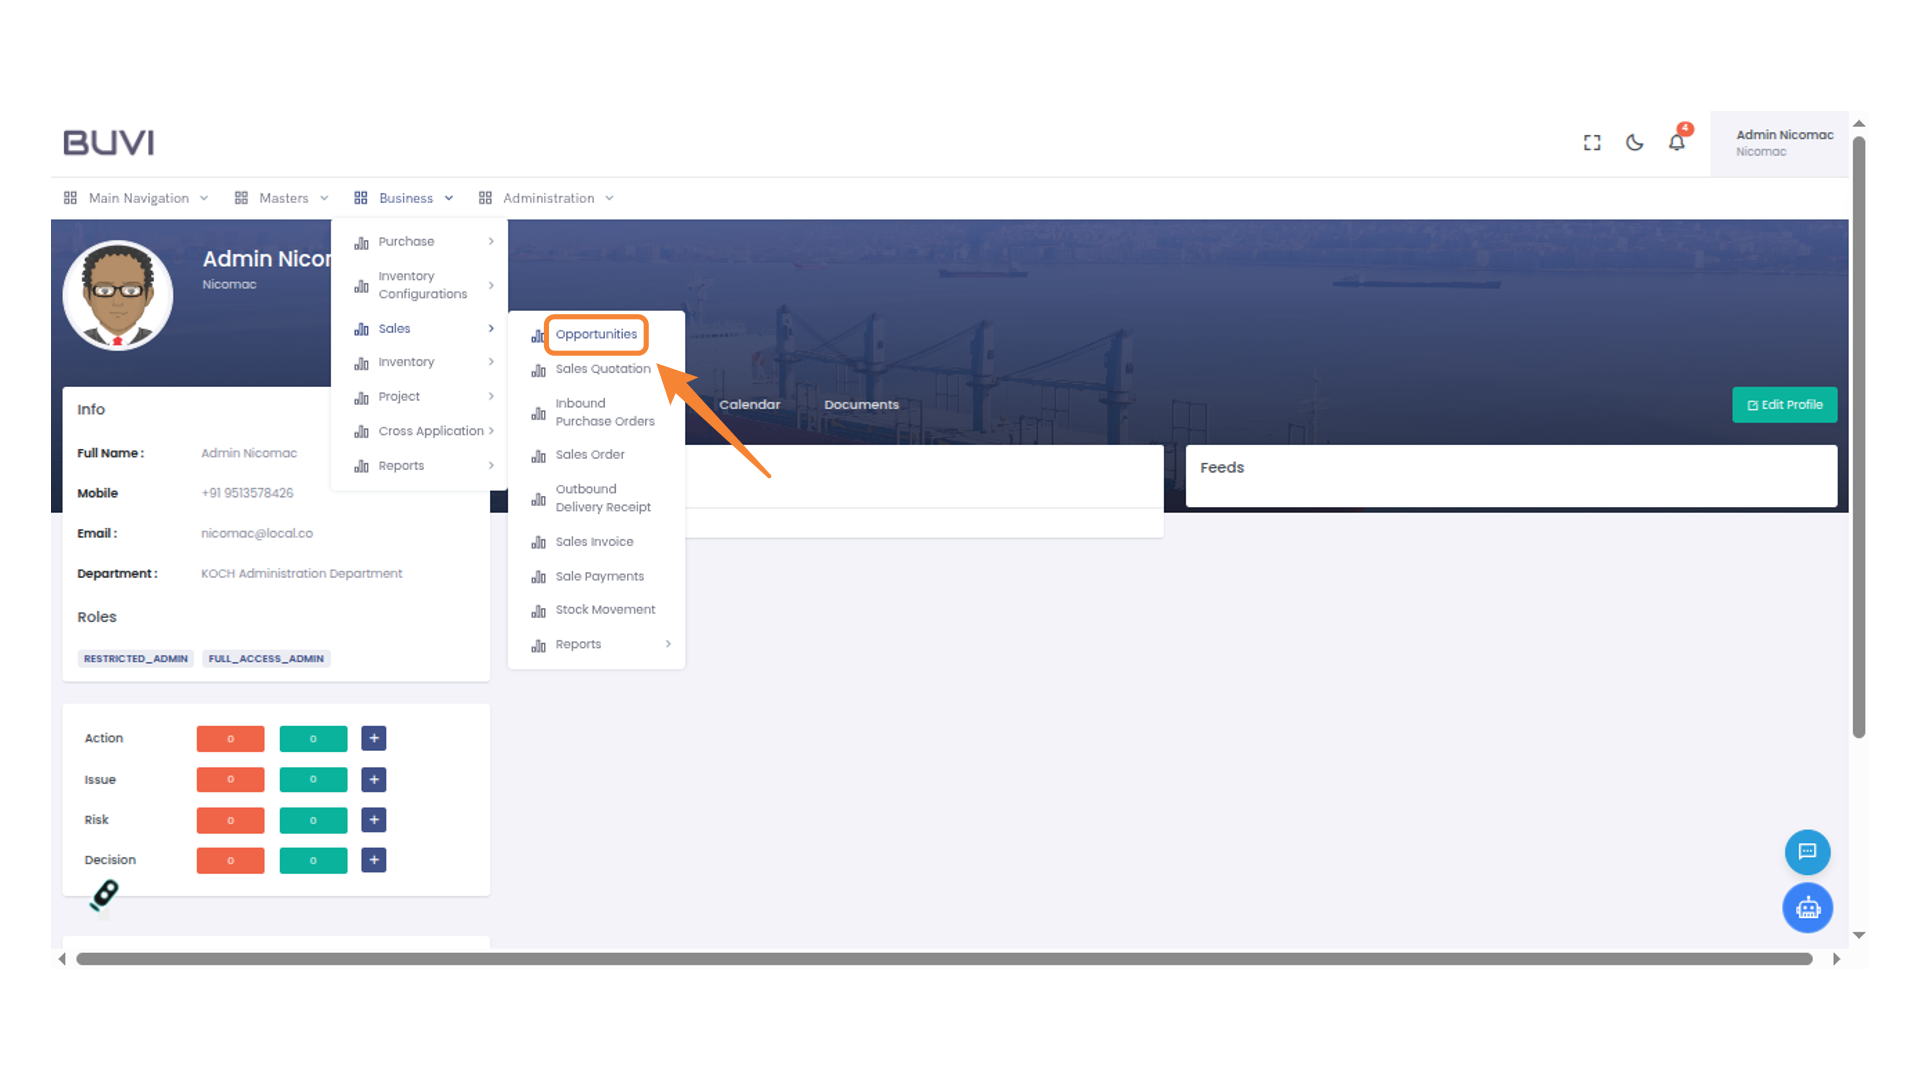
46. Access Opportunities in Sales
Select 'Opportunities' under the 'Sales' menu to view potential business opportunities.
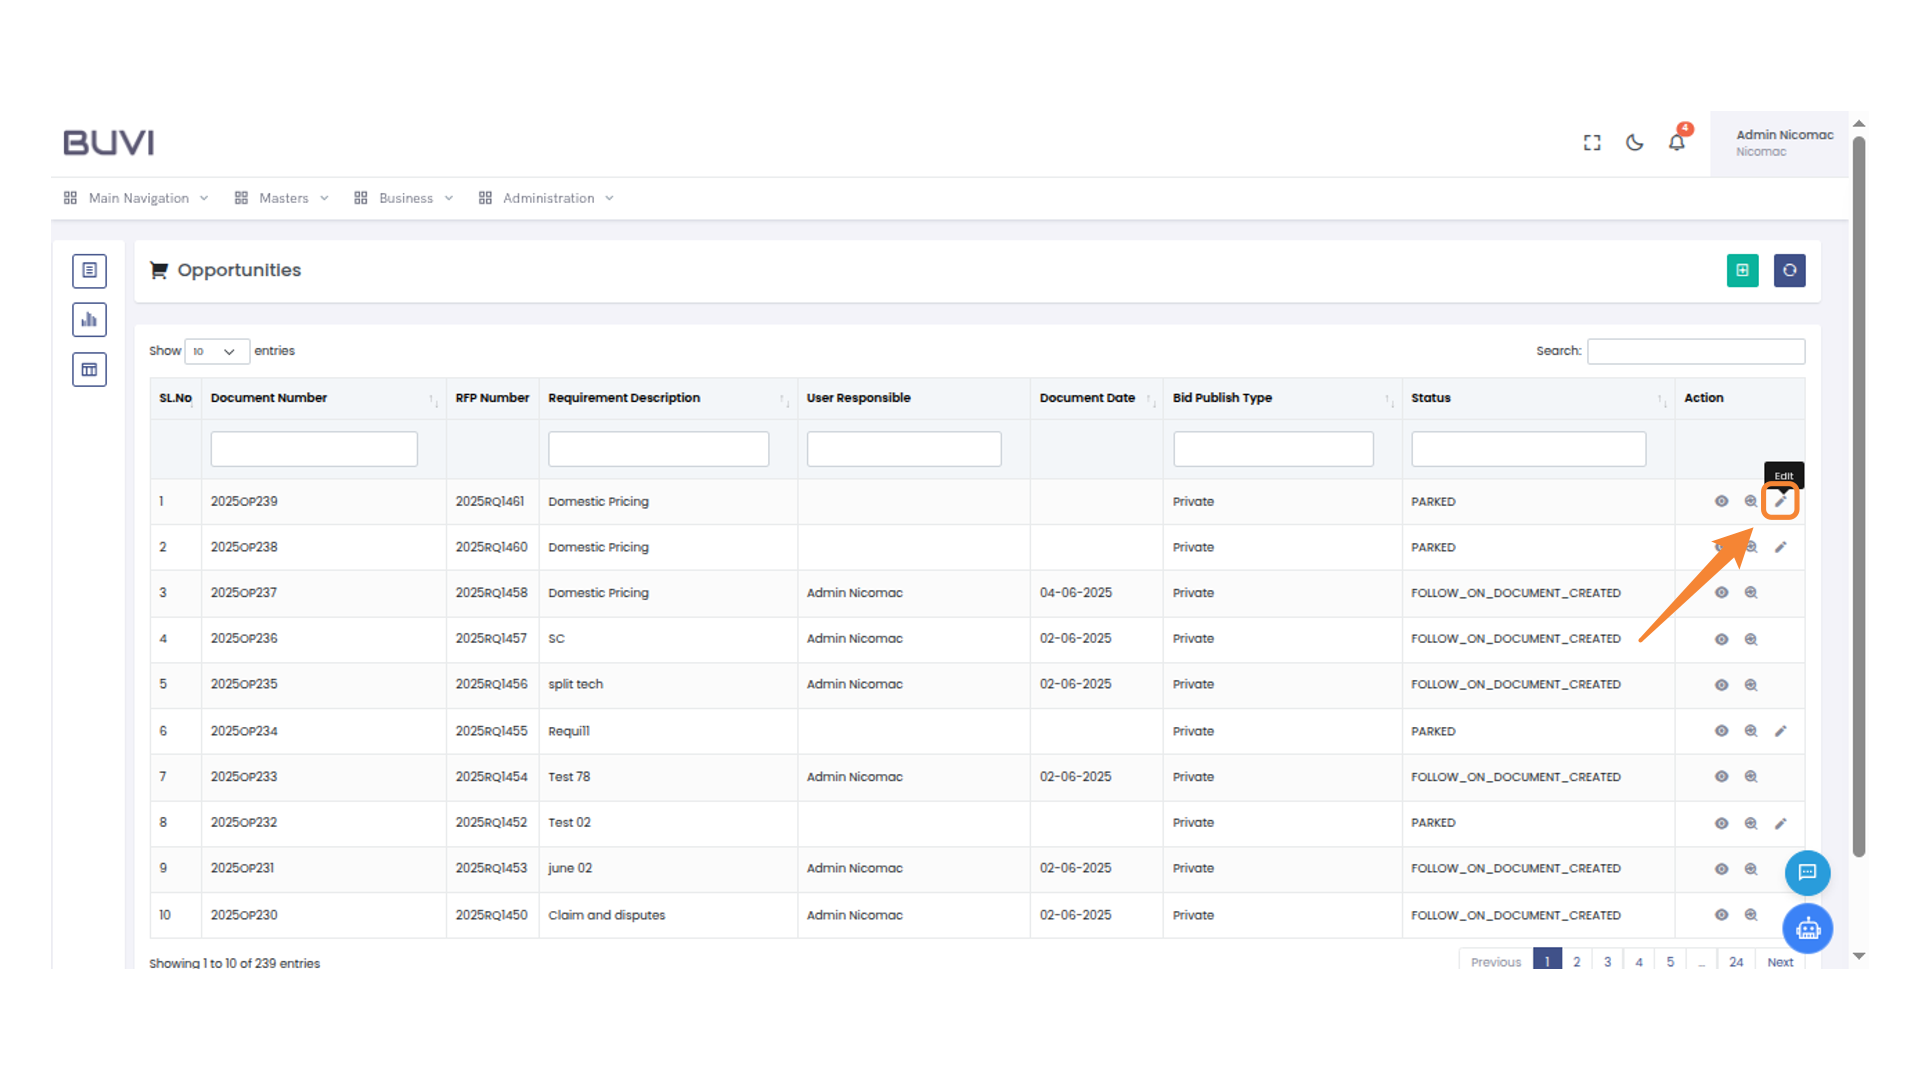
47. Edit Button in Action Column
Click the pencil icon to edit the entry in the action column.
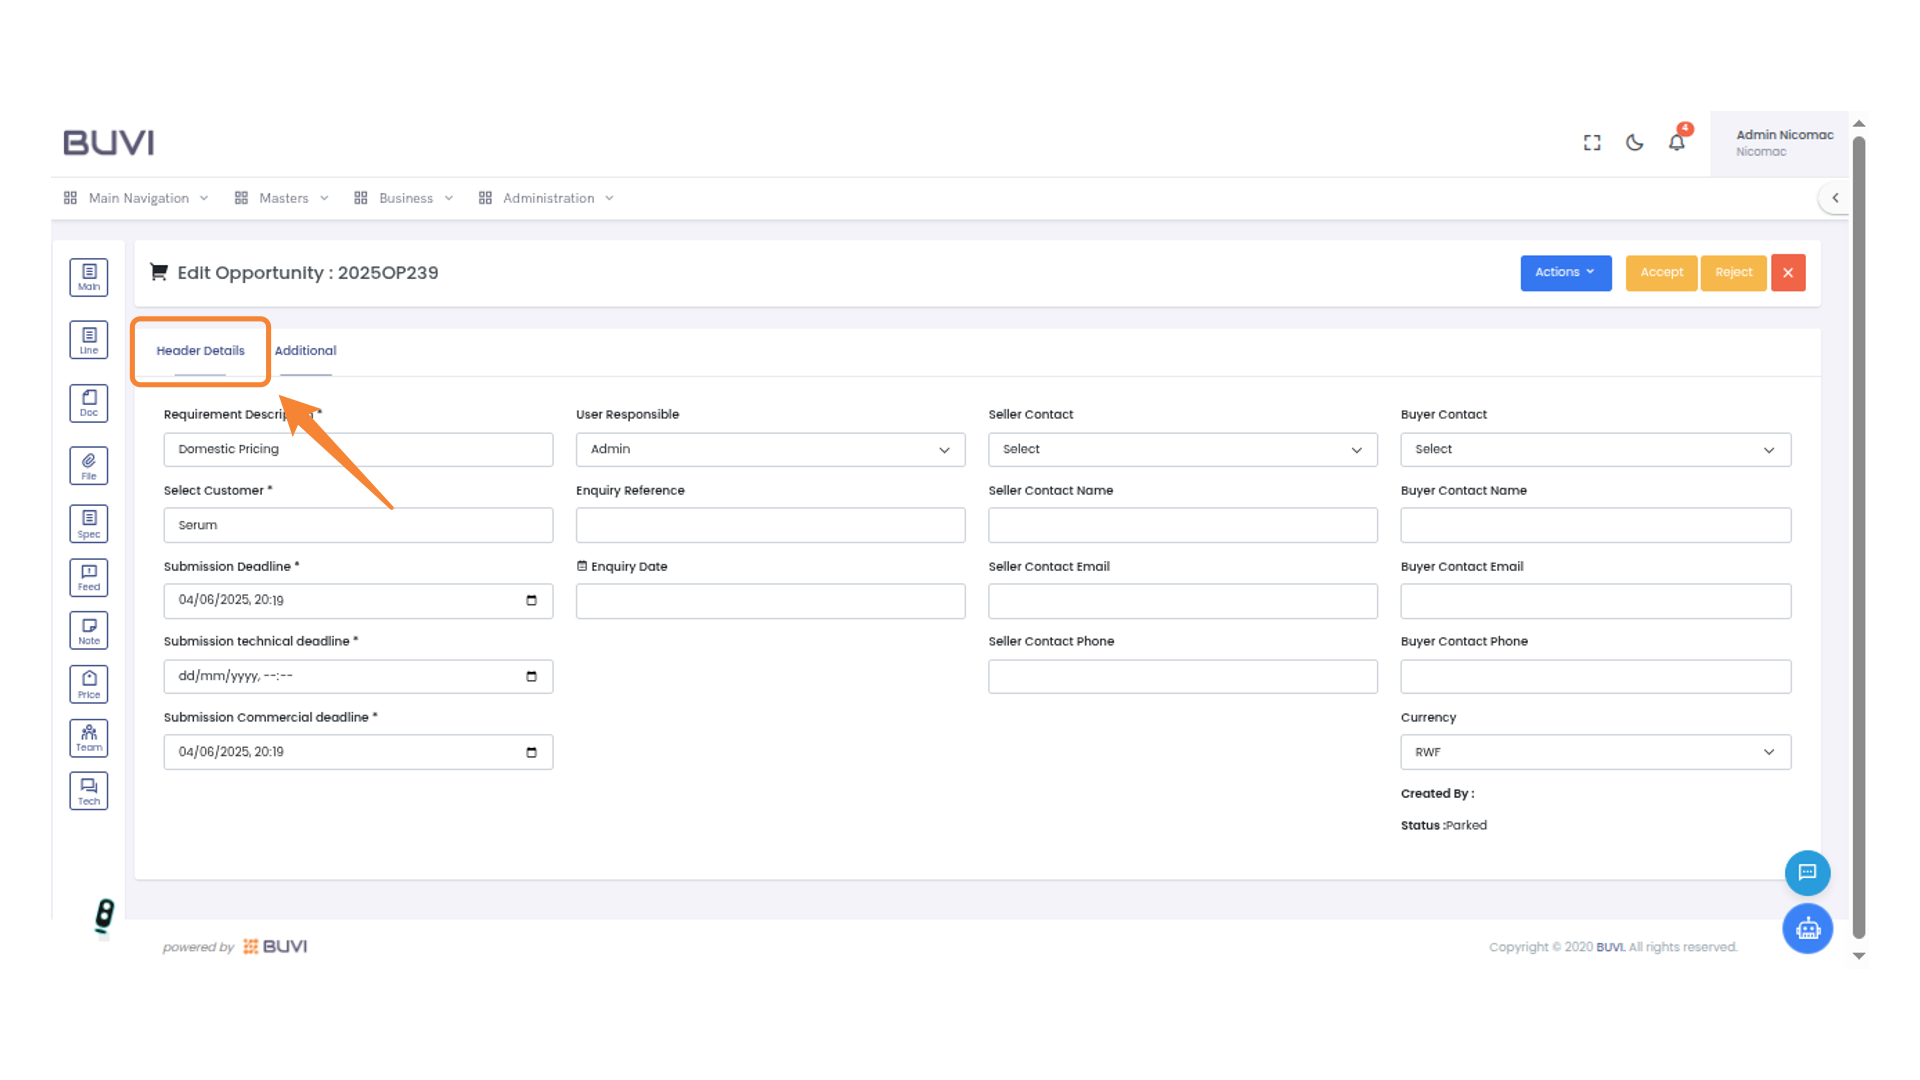
48. Access Header Details
Select the 'Header Details' tab to view or edit primary opportunity information.
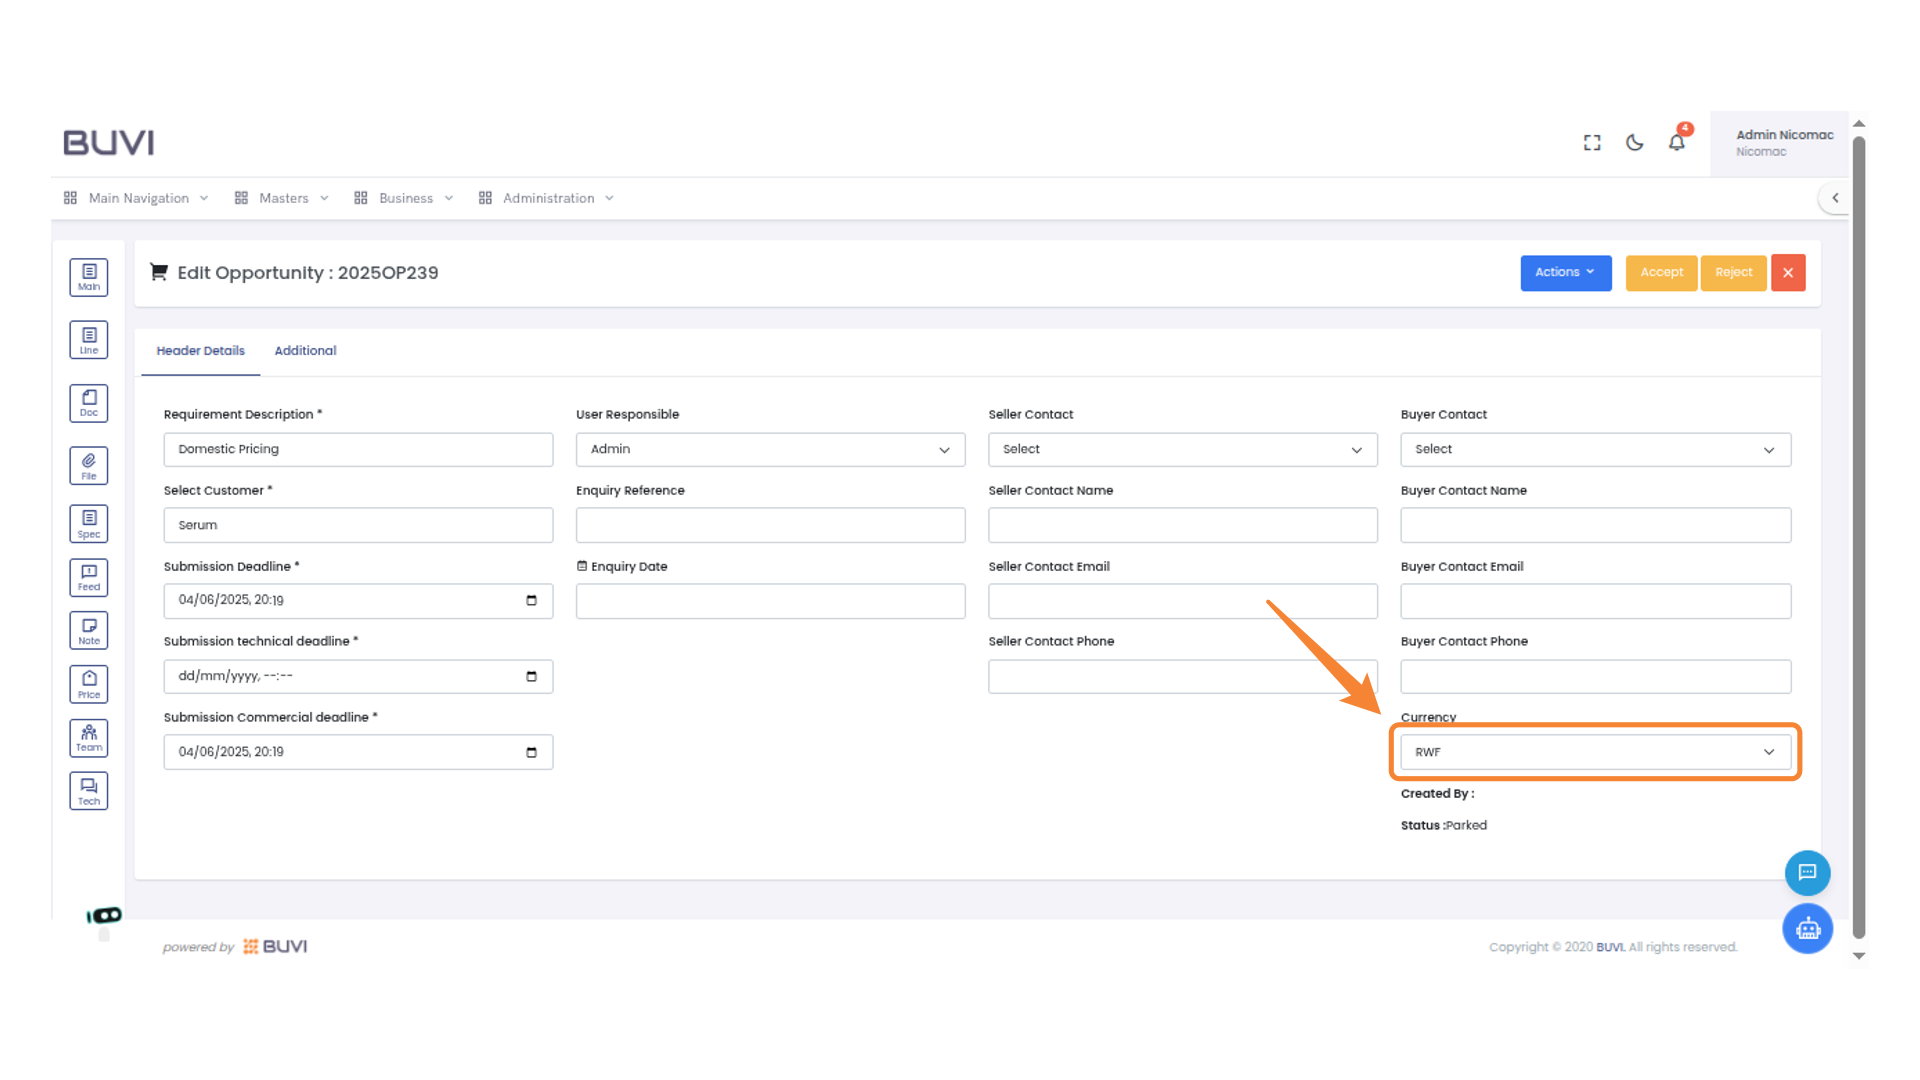
49. Select Currency
select currency
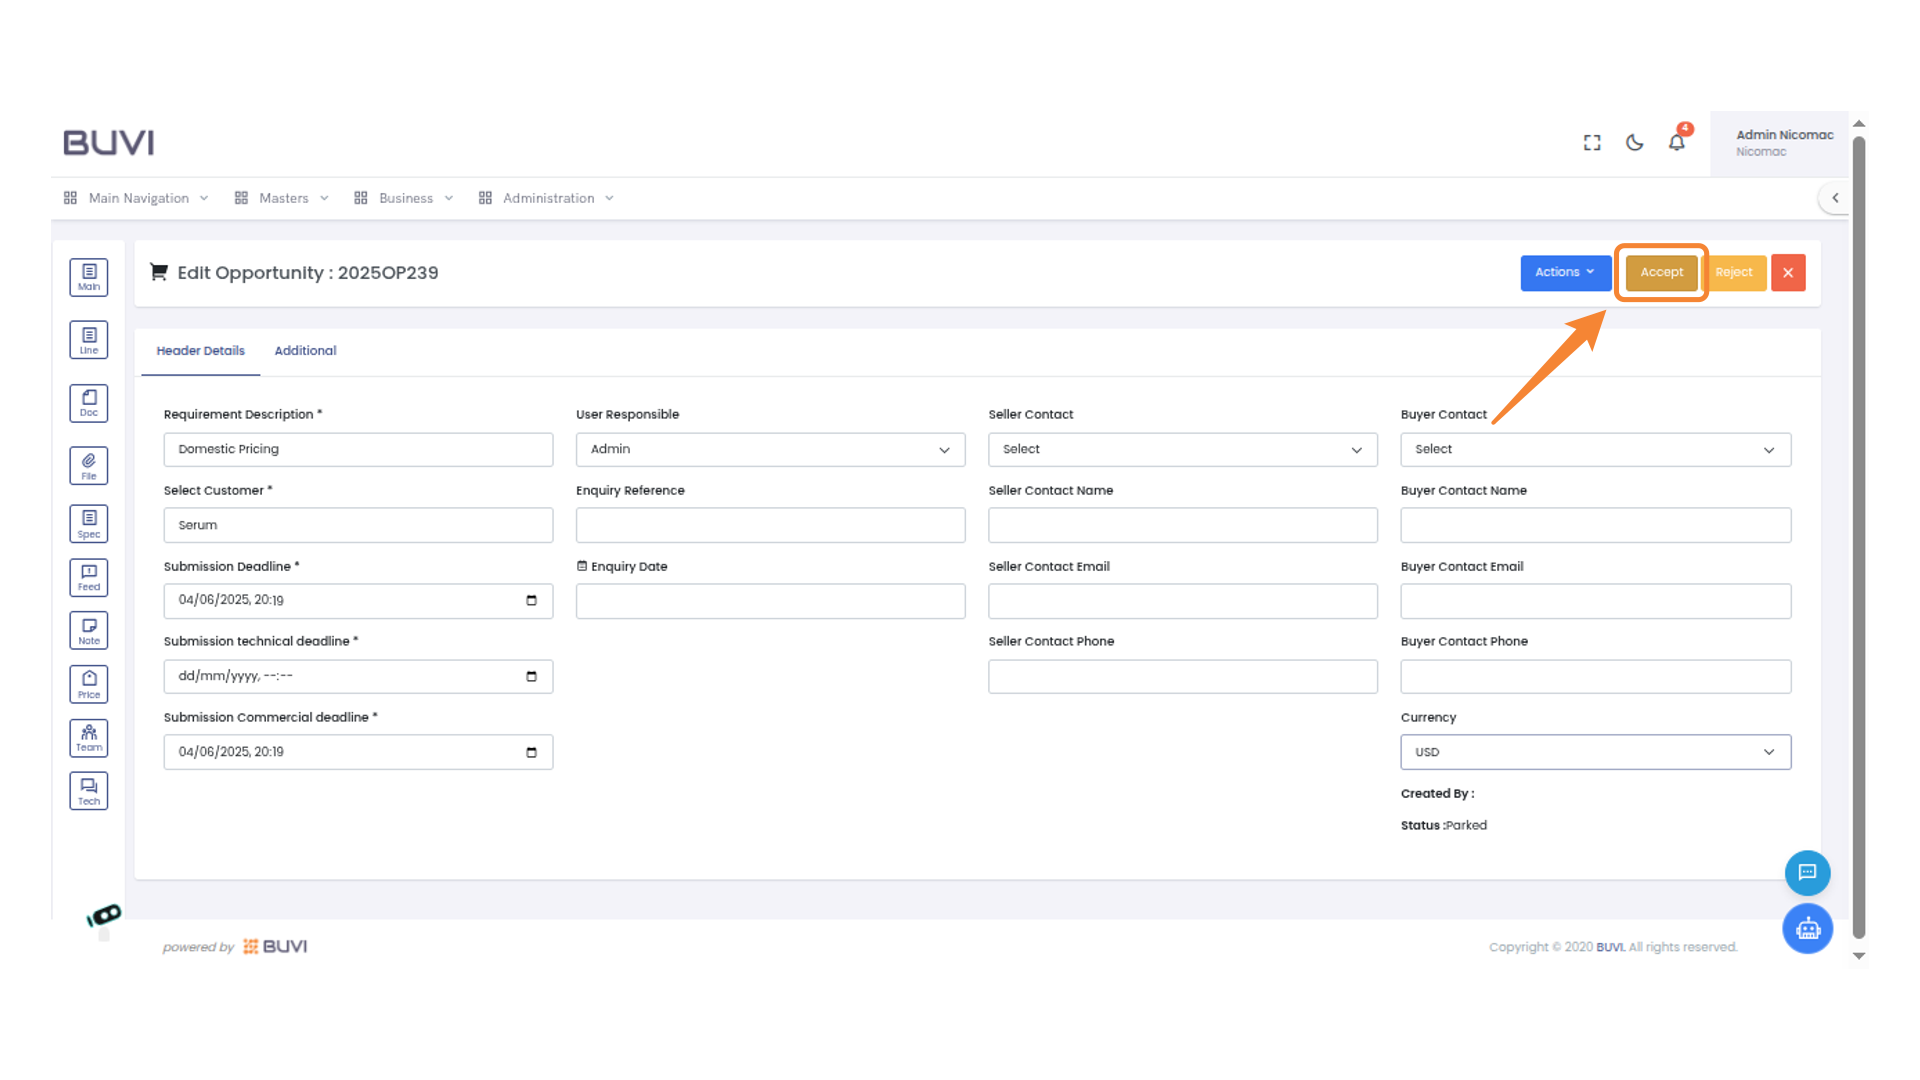
50. Approval Action
Click 'Accept' to approve the opportunity and proceed with the workflow.
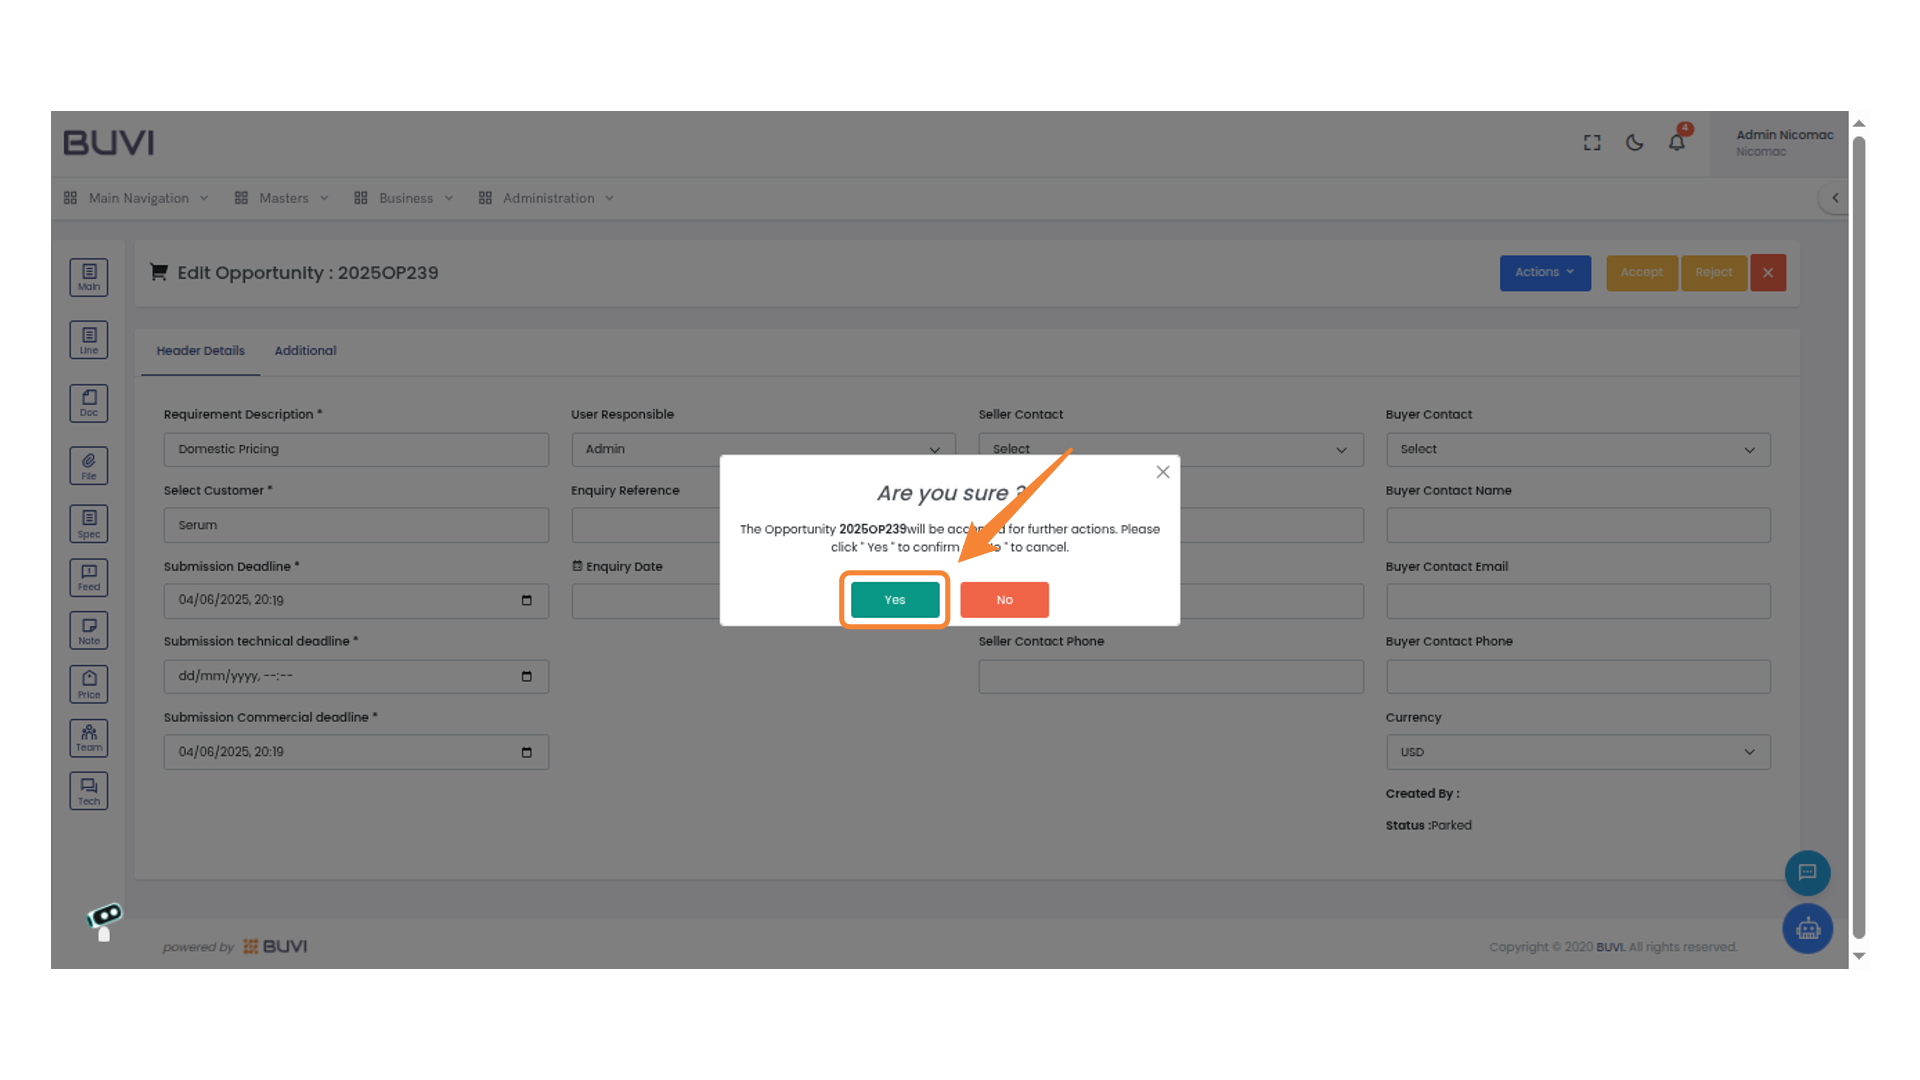
51. Confirm Opportunity Acceptance
Click 'Yes' to confirm the acceptance of the opportunity for further actions.
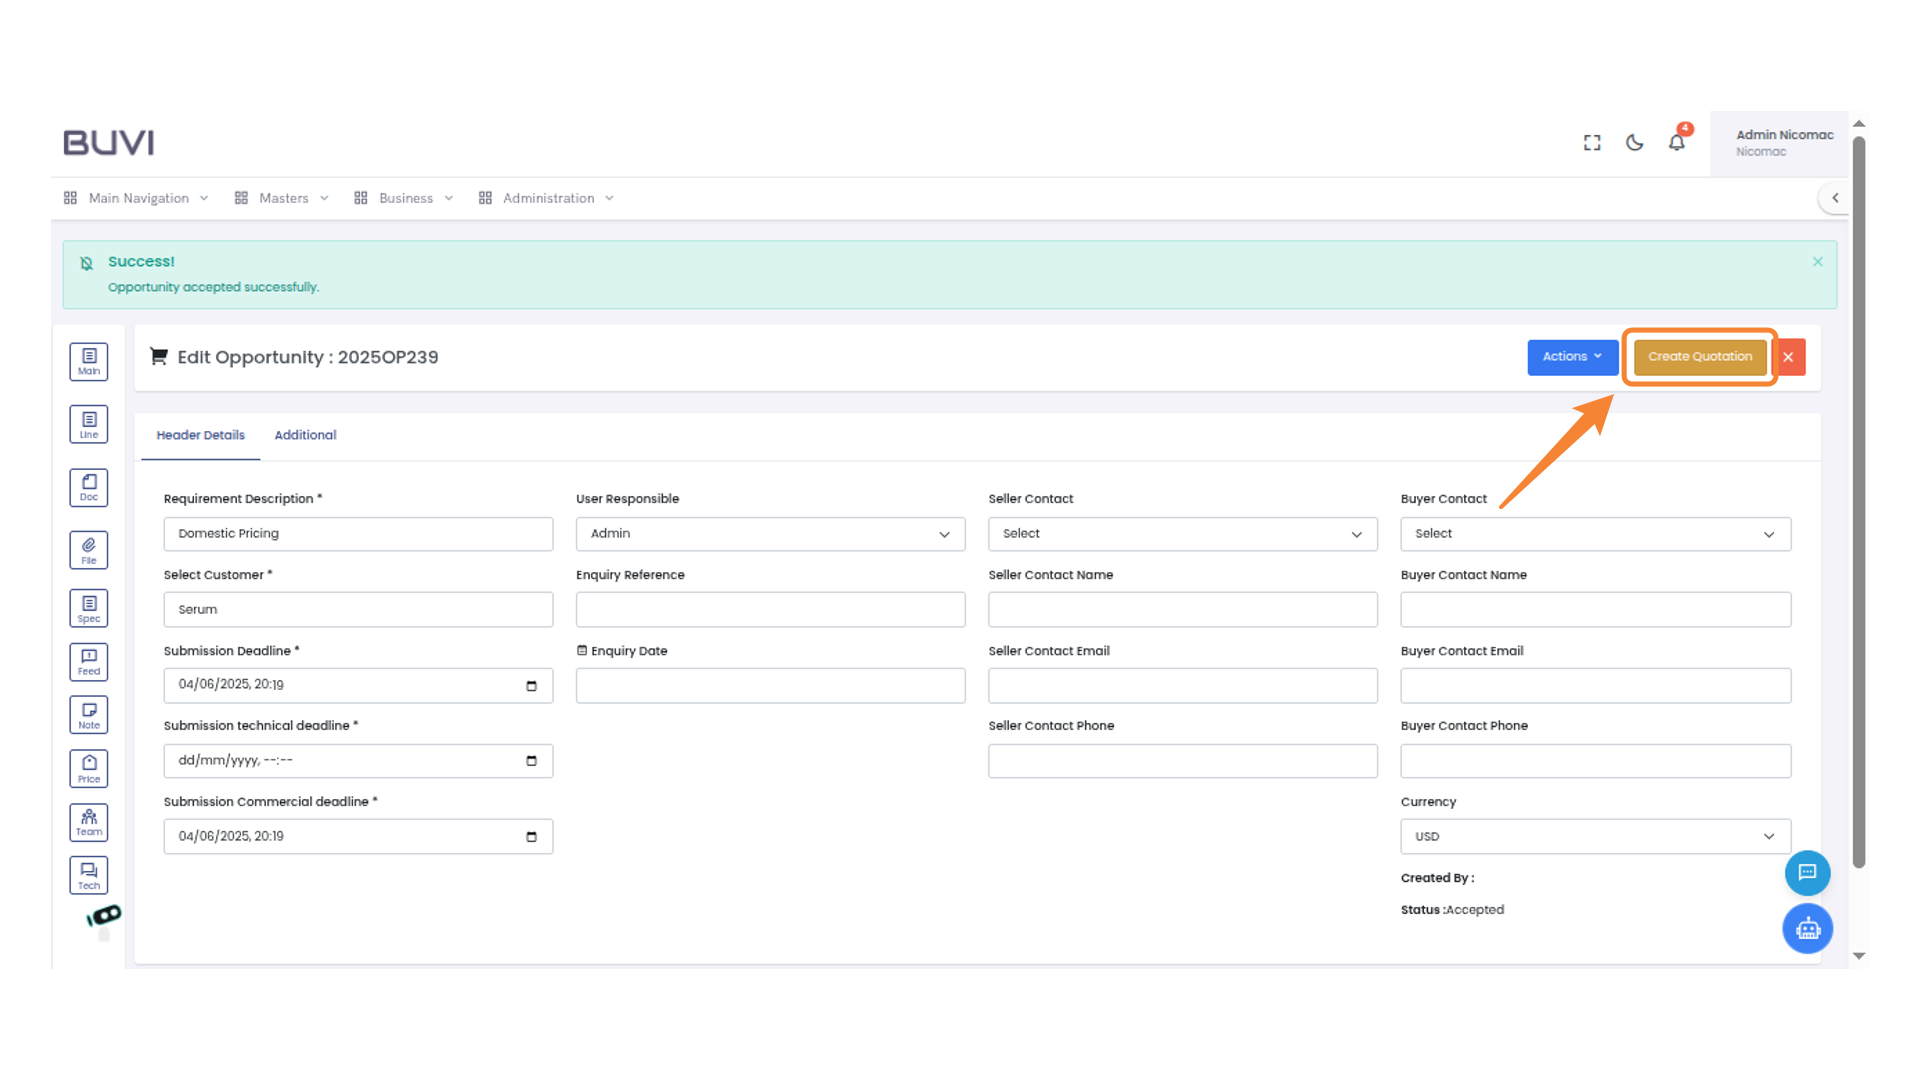
52. Generate a Quotation
Click the 'Create Quotation' button to start generating a quotation for the current opportunity.
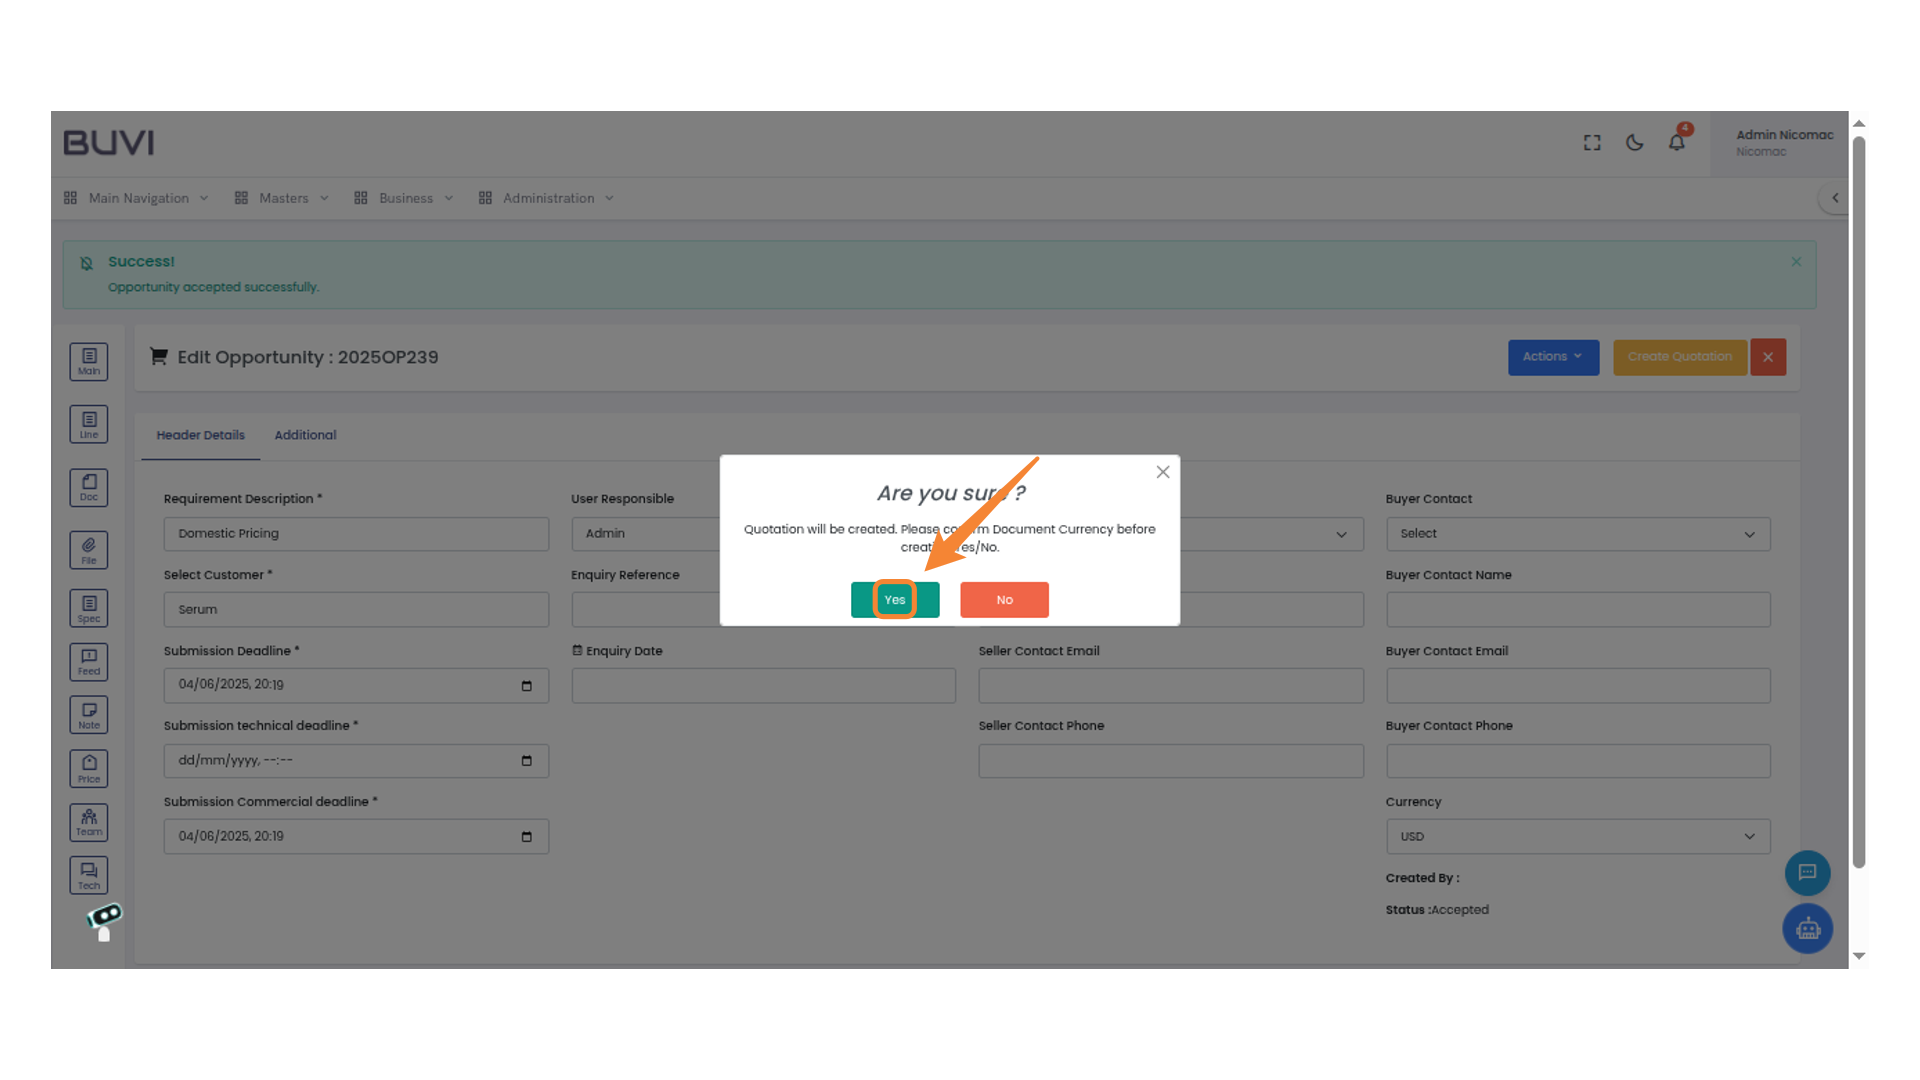
53. Confirm Quotation Creation
Click 'Yes' to confirm the creation of the quotation.
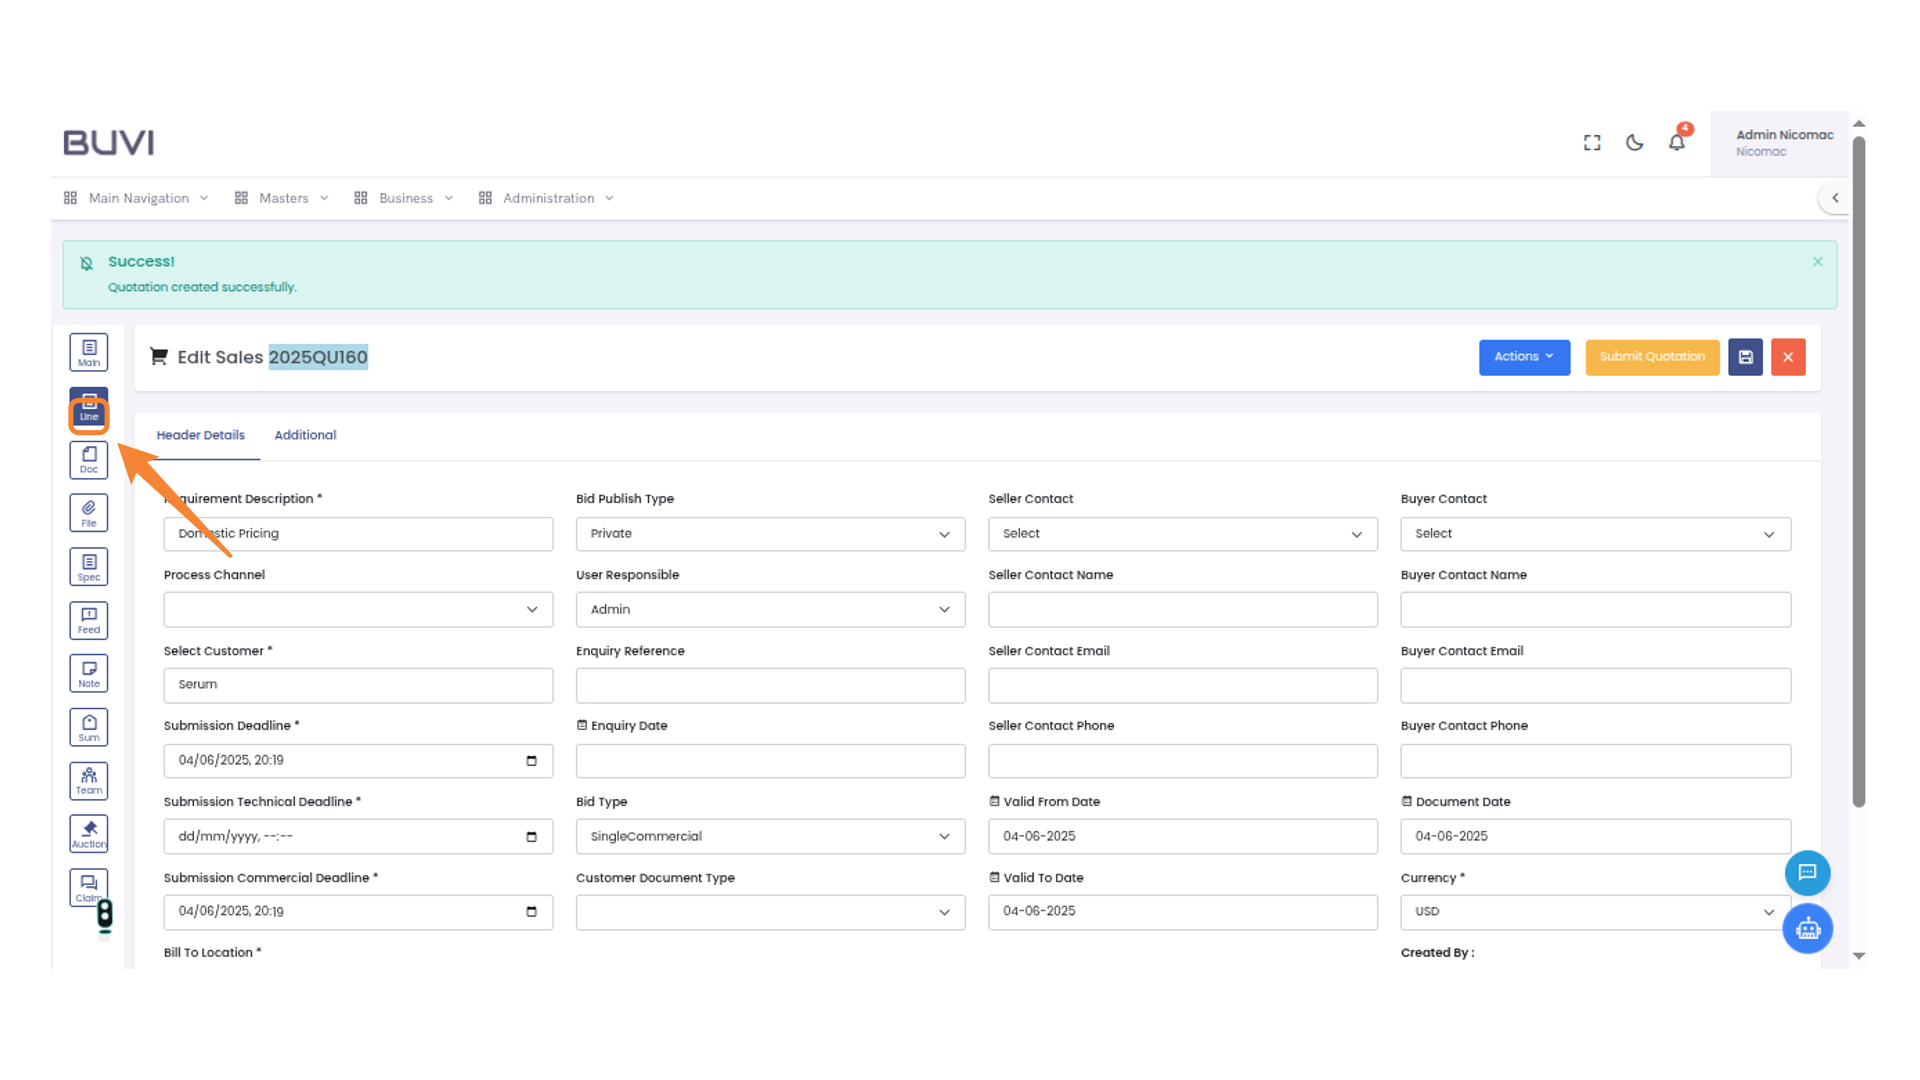
54. Select Line Module
Click the 'Line' button in the sidebar to access line options.
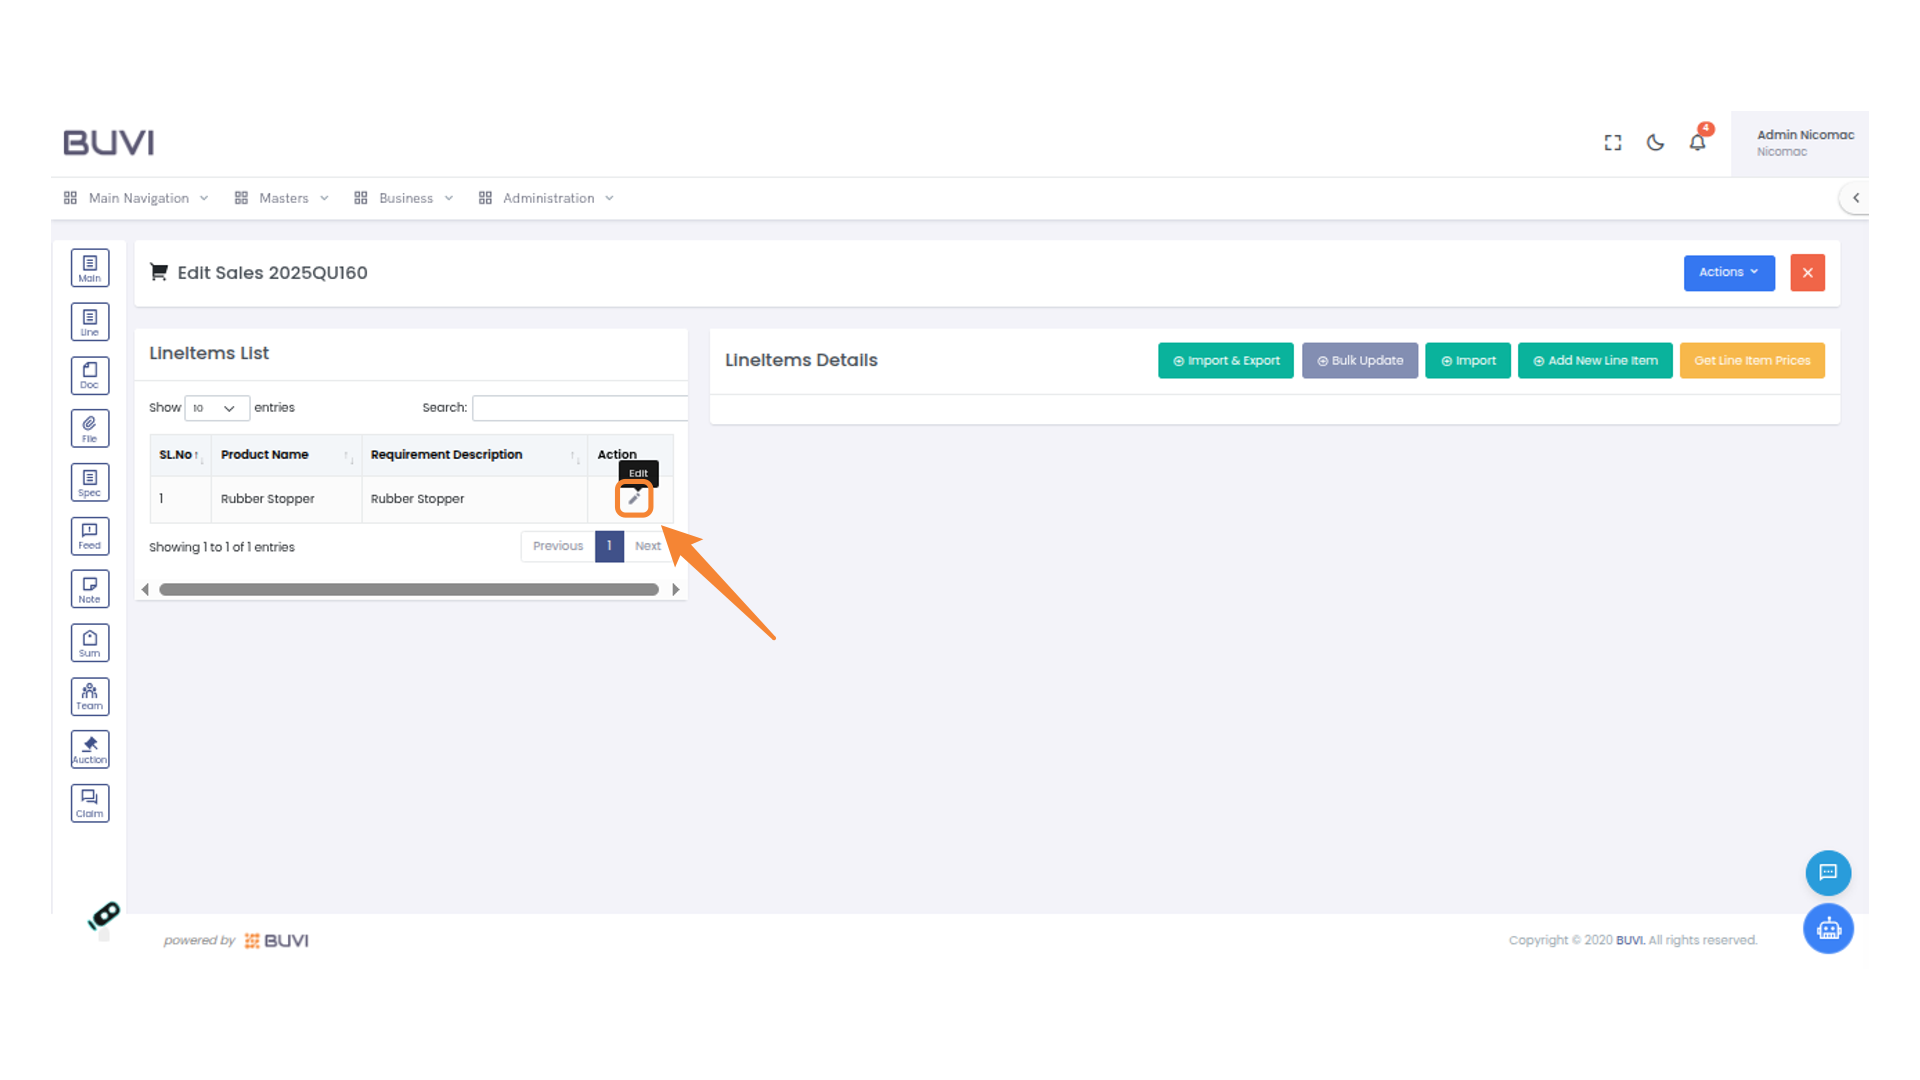
55. Edit Line Item
Click the pencil icon to edit the selected line item.
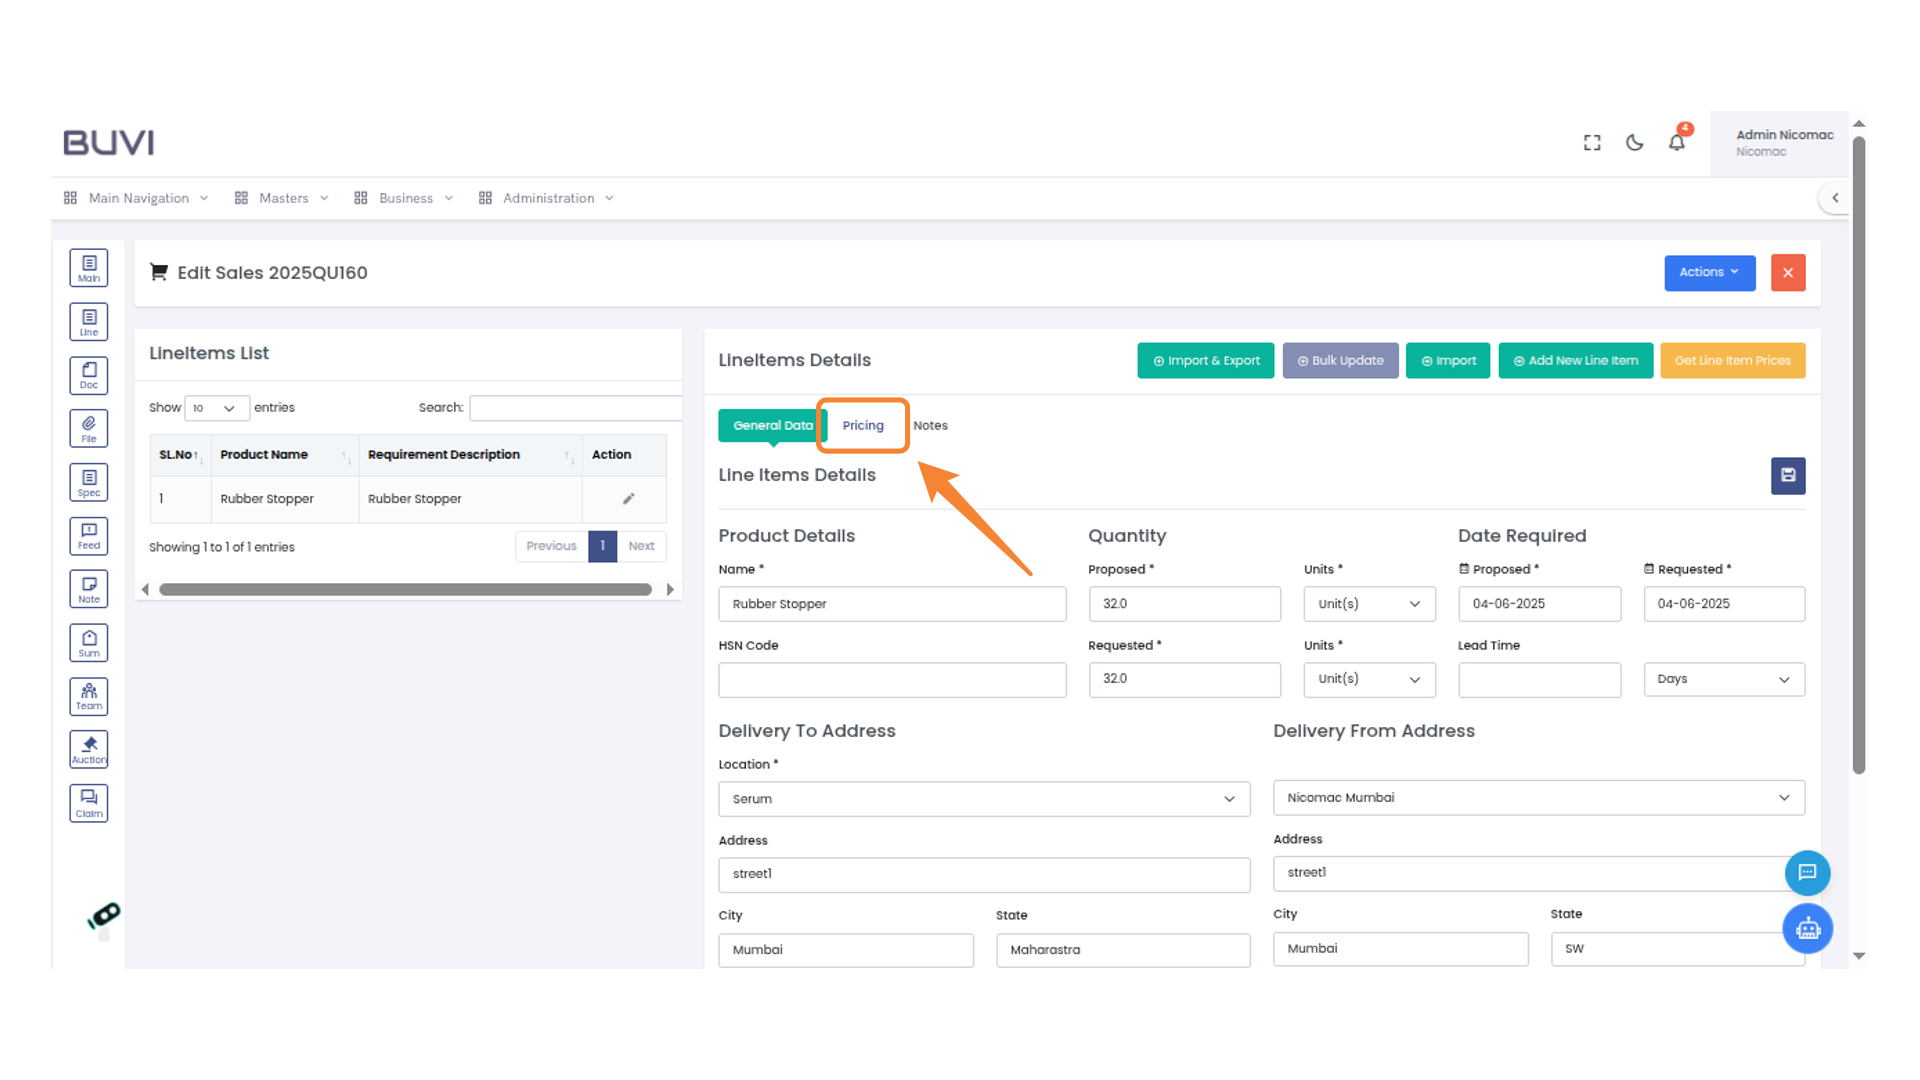
56. Switch to Pricing
Click on 'Pricing' to view or update pricing details for the line item.
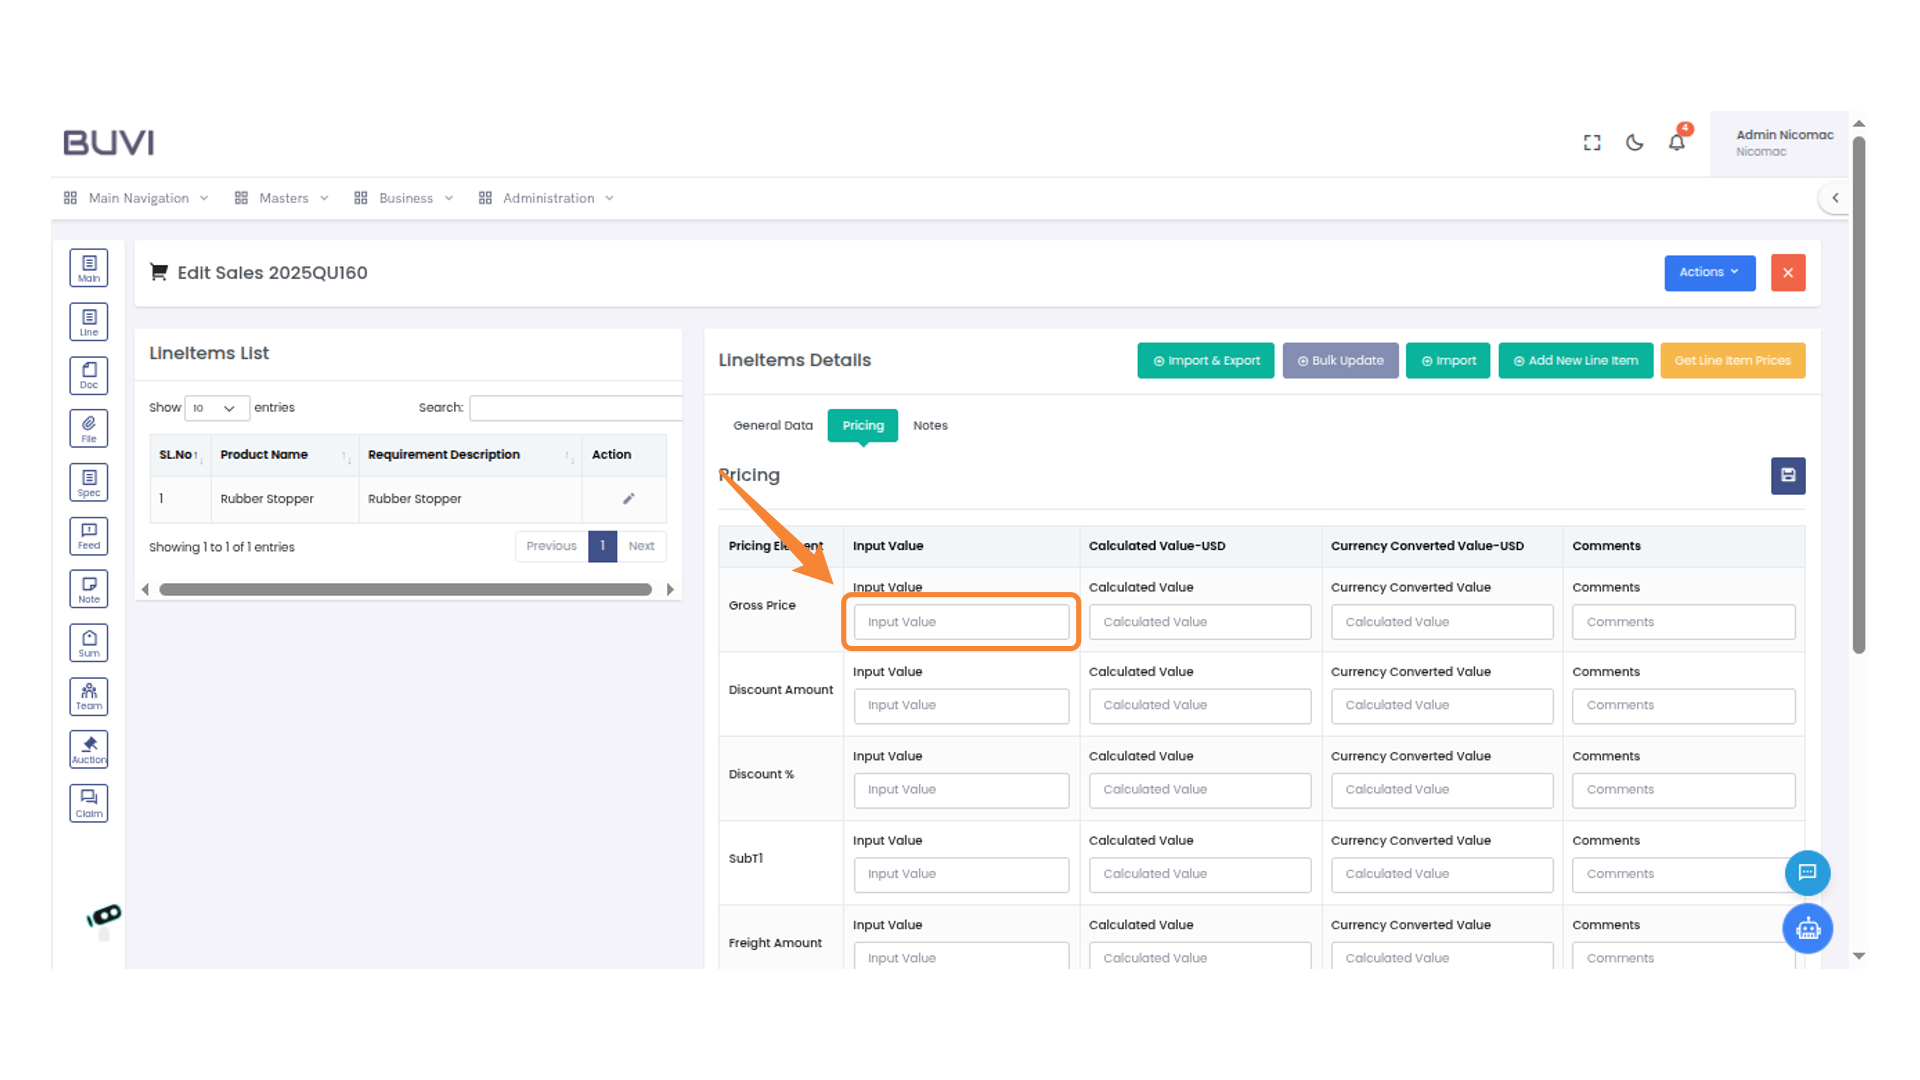
57. Enter Pricing details
Enter Pricing details
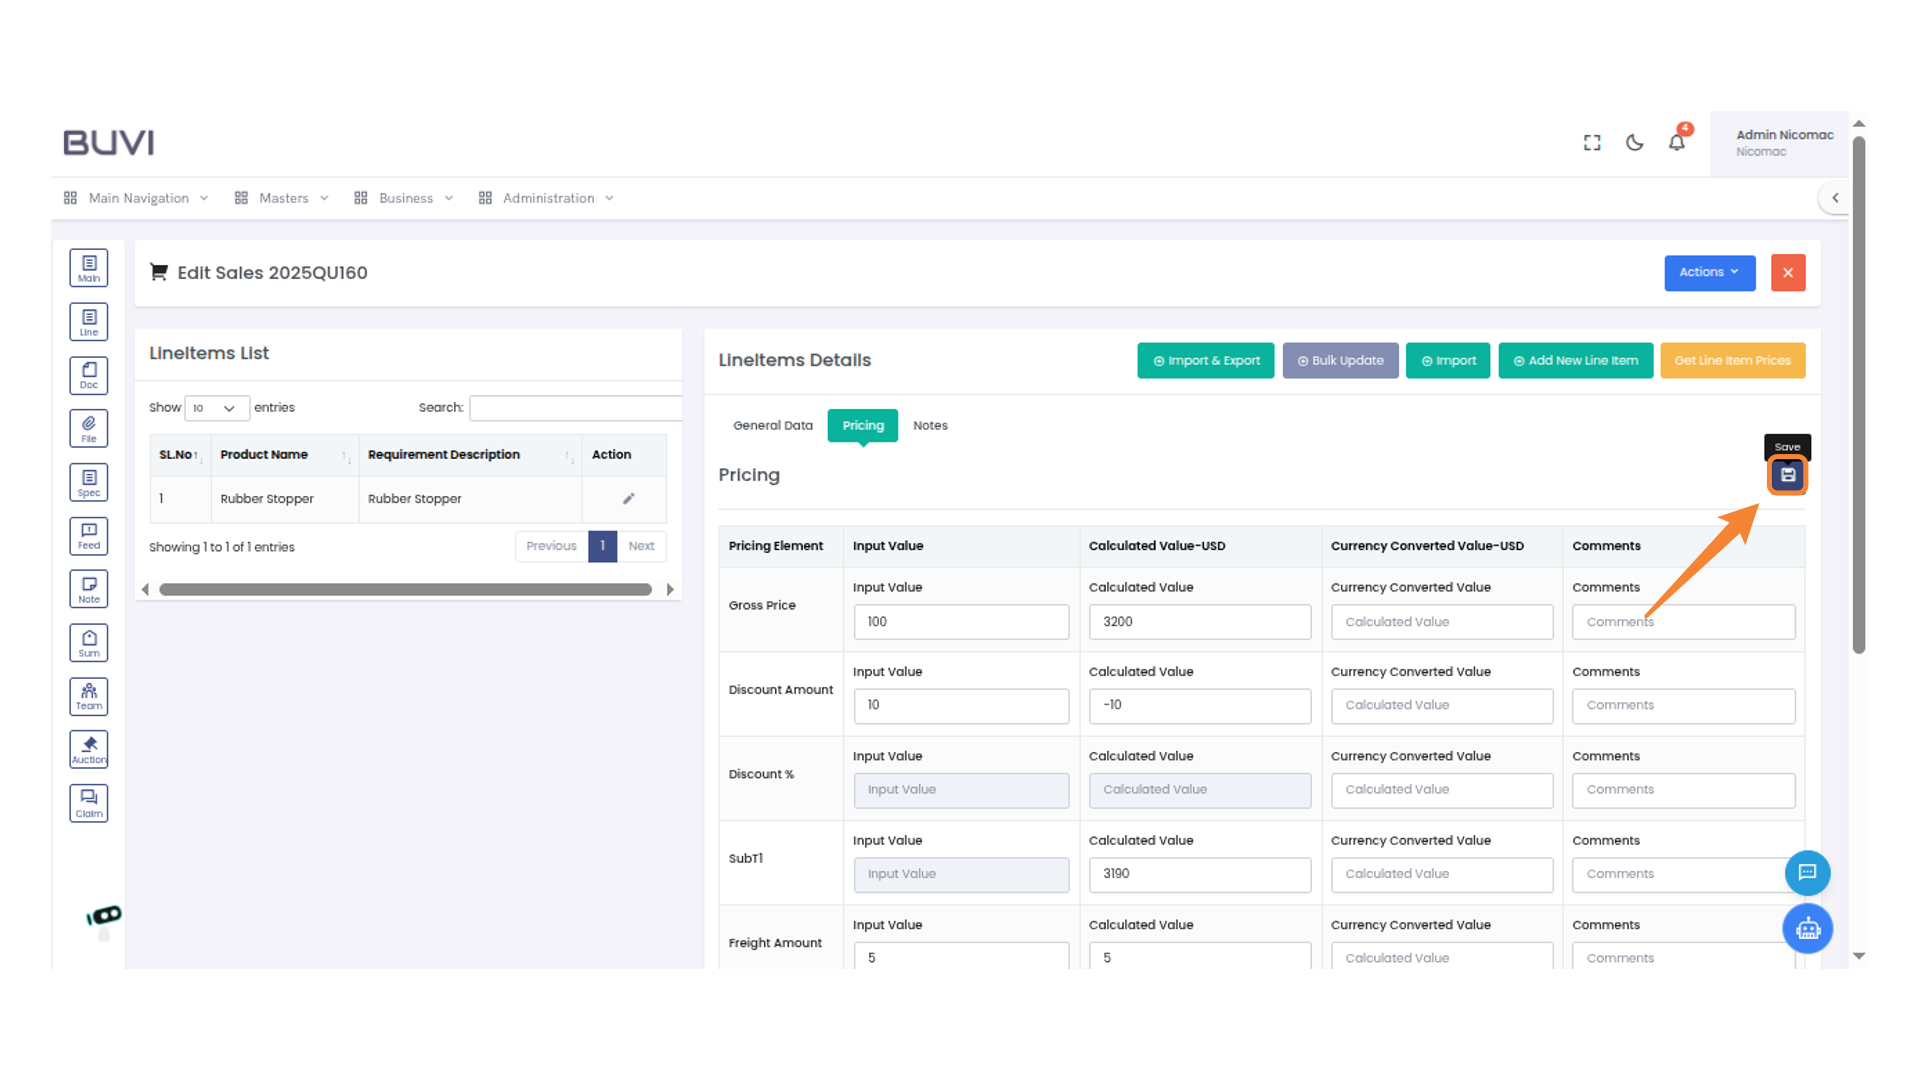
58. Save Item
save line item
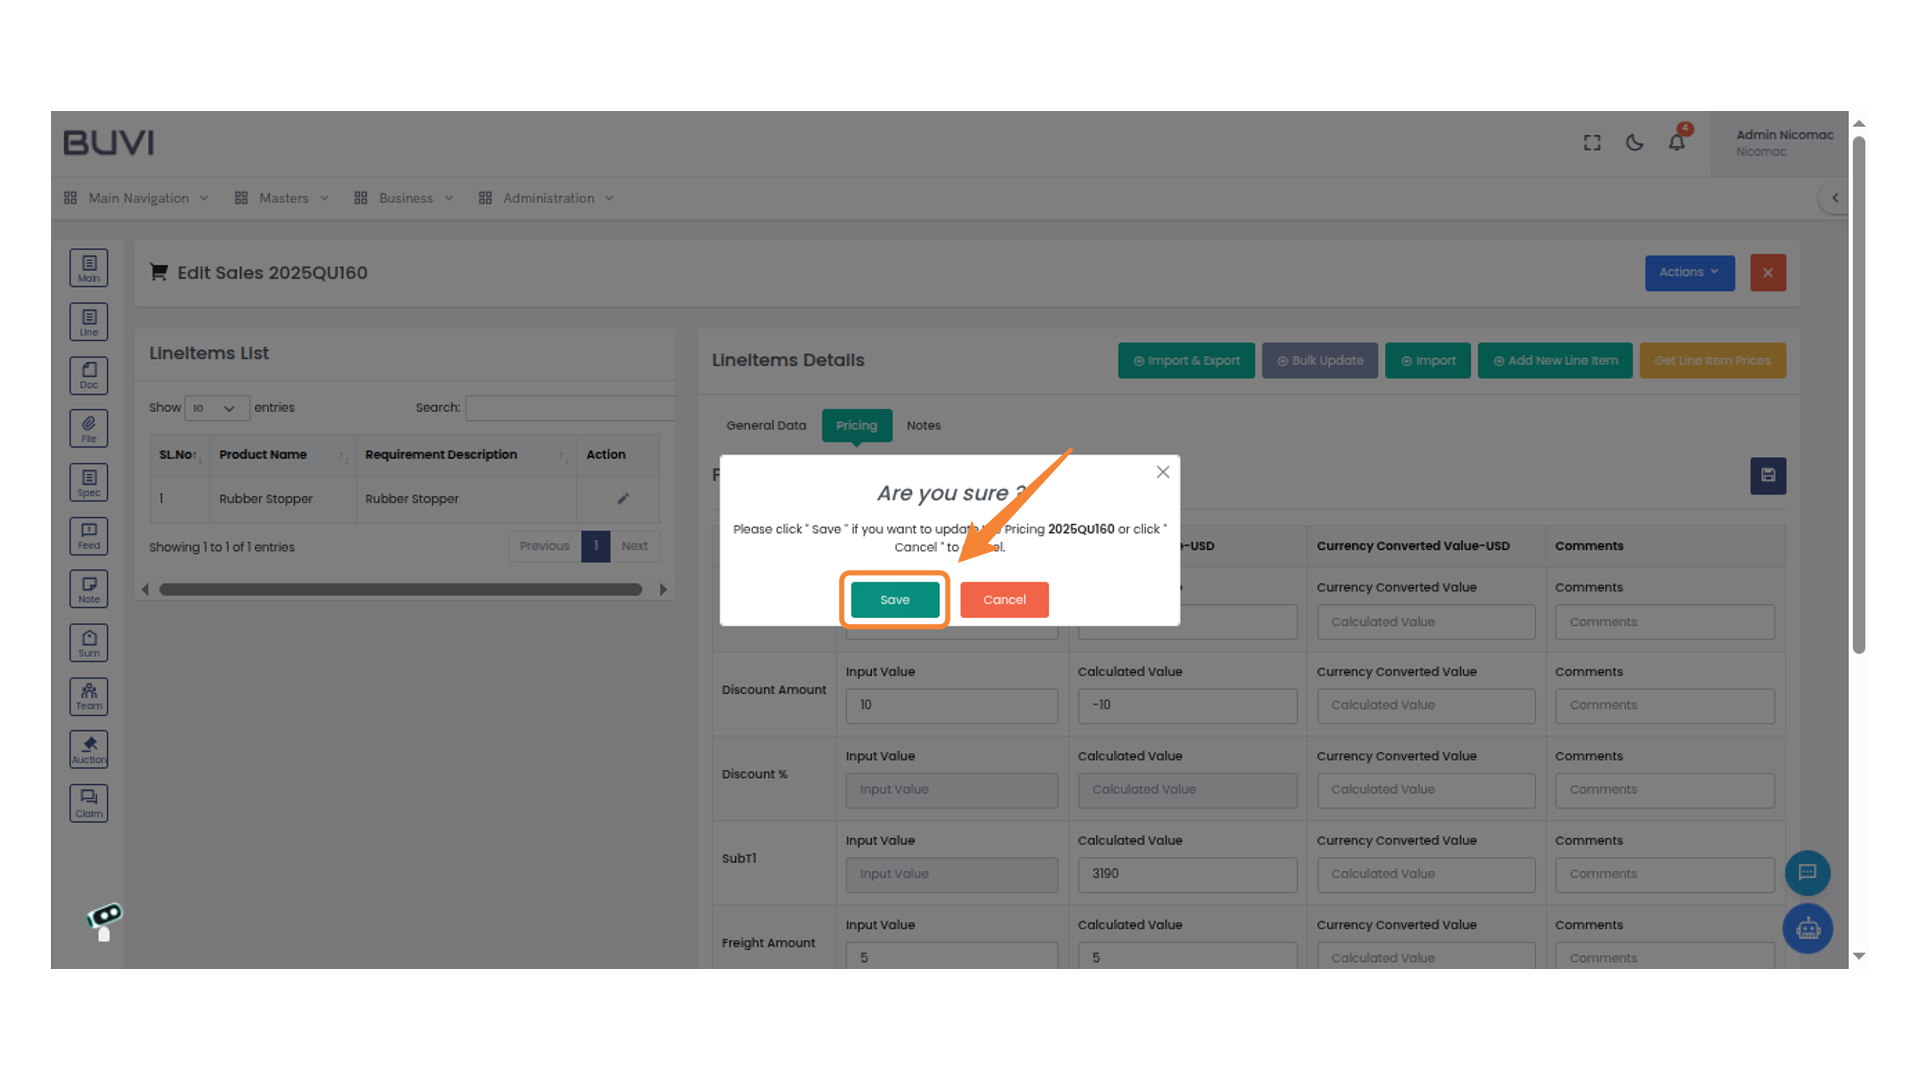
59. Confirm Price Update
Click 'Save' to update the pricing or select 'Cancel' to abort the action.
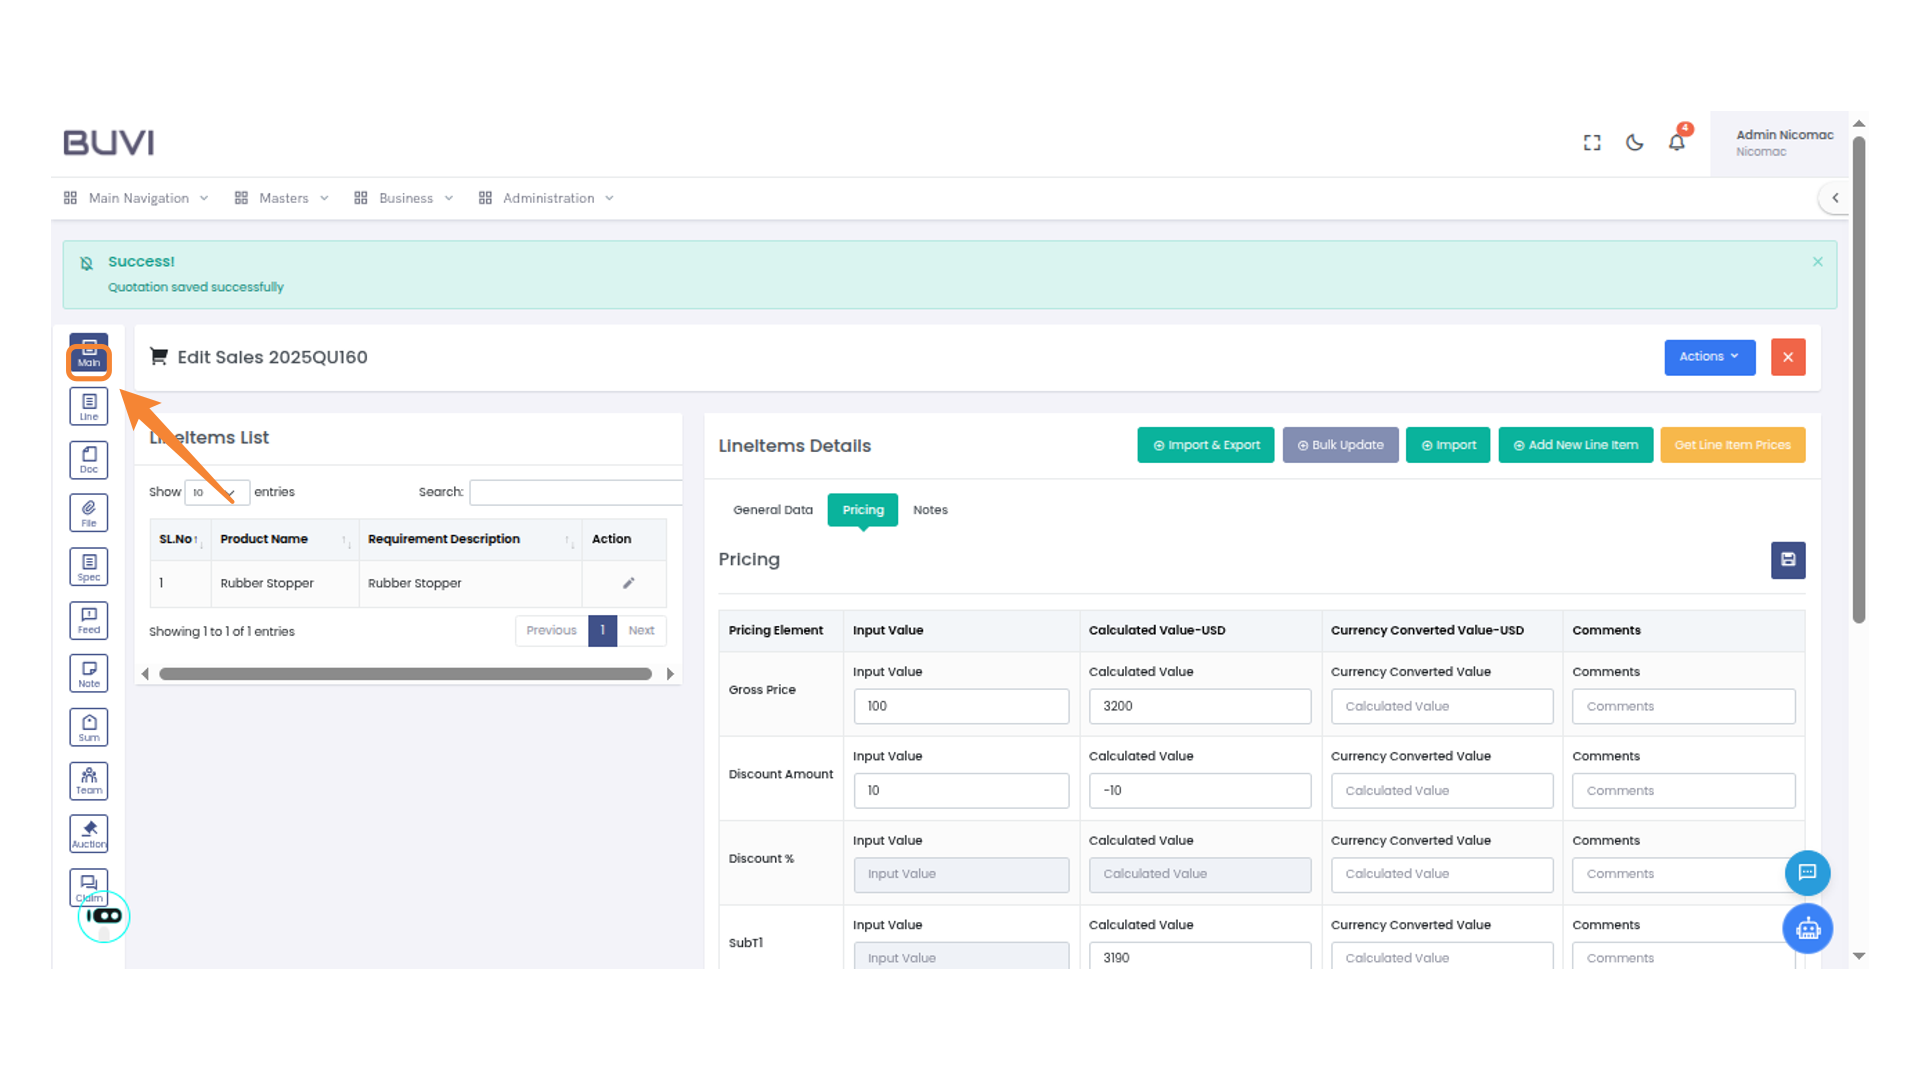
60. Navigate to Main Section
Click on the 'Main' icon to access the main section in the navigation panel.
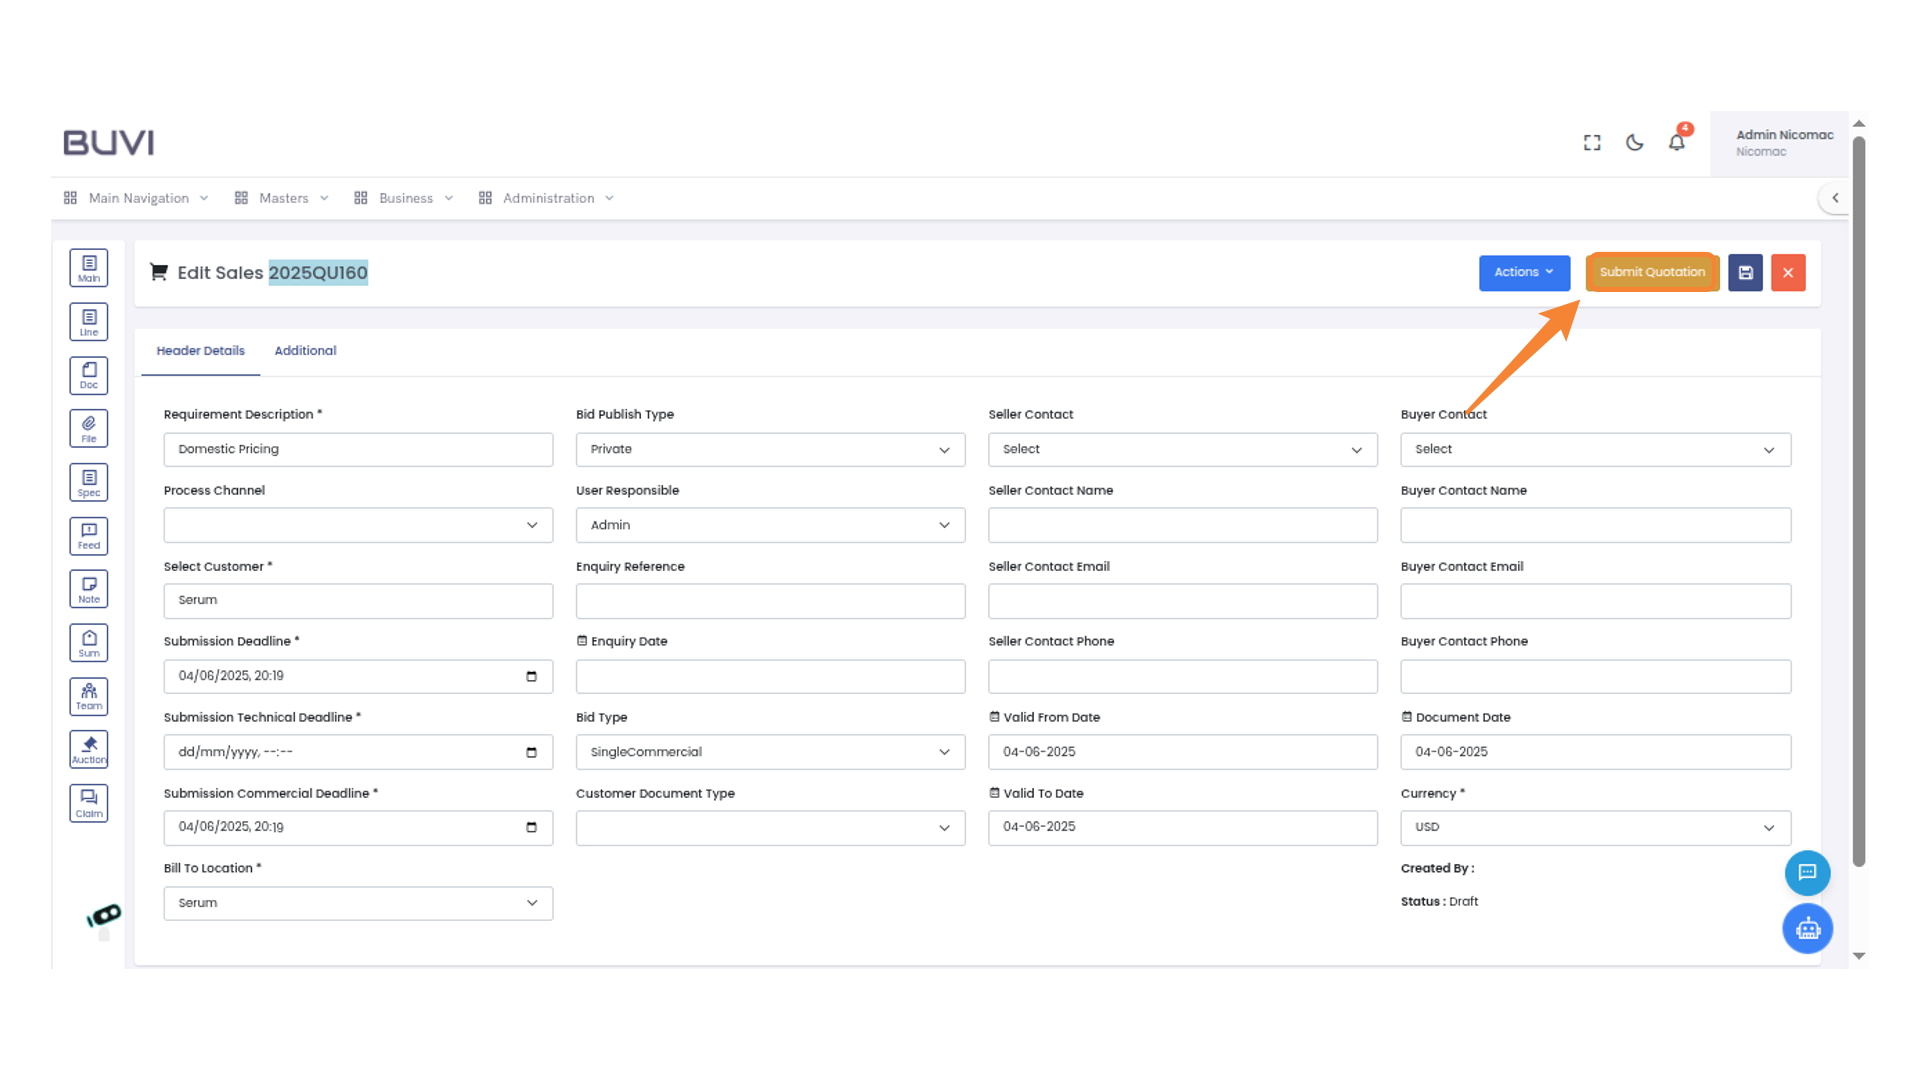
61. Submit Quotation Action
Select 'Submit Quotation' to proceed with submitting your sales quotation.
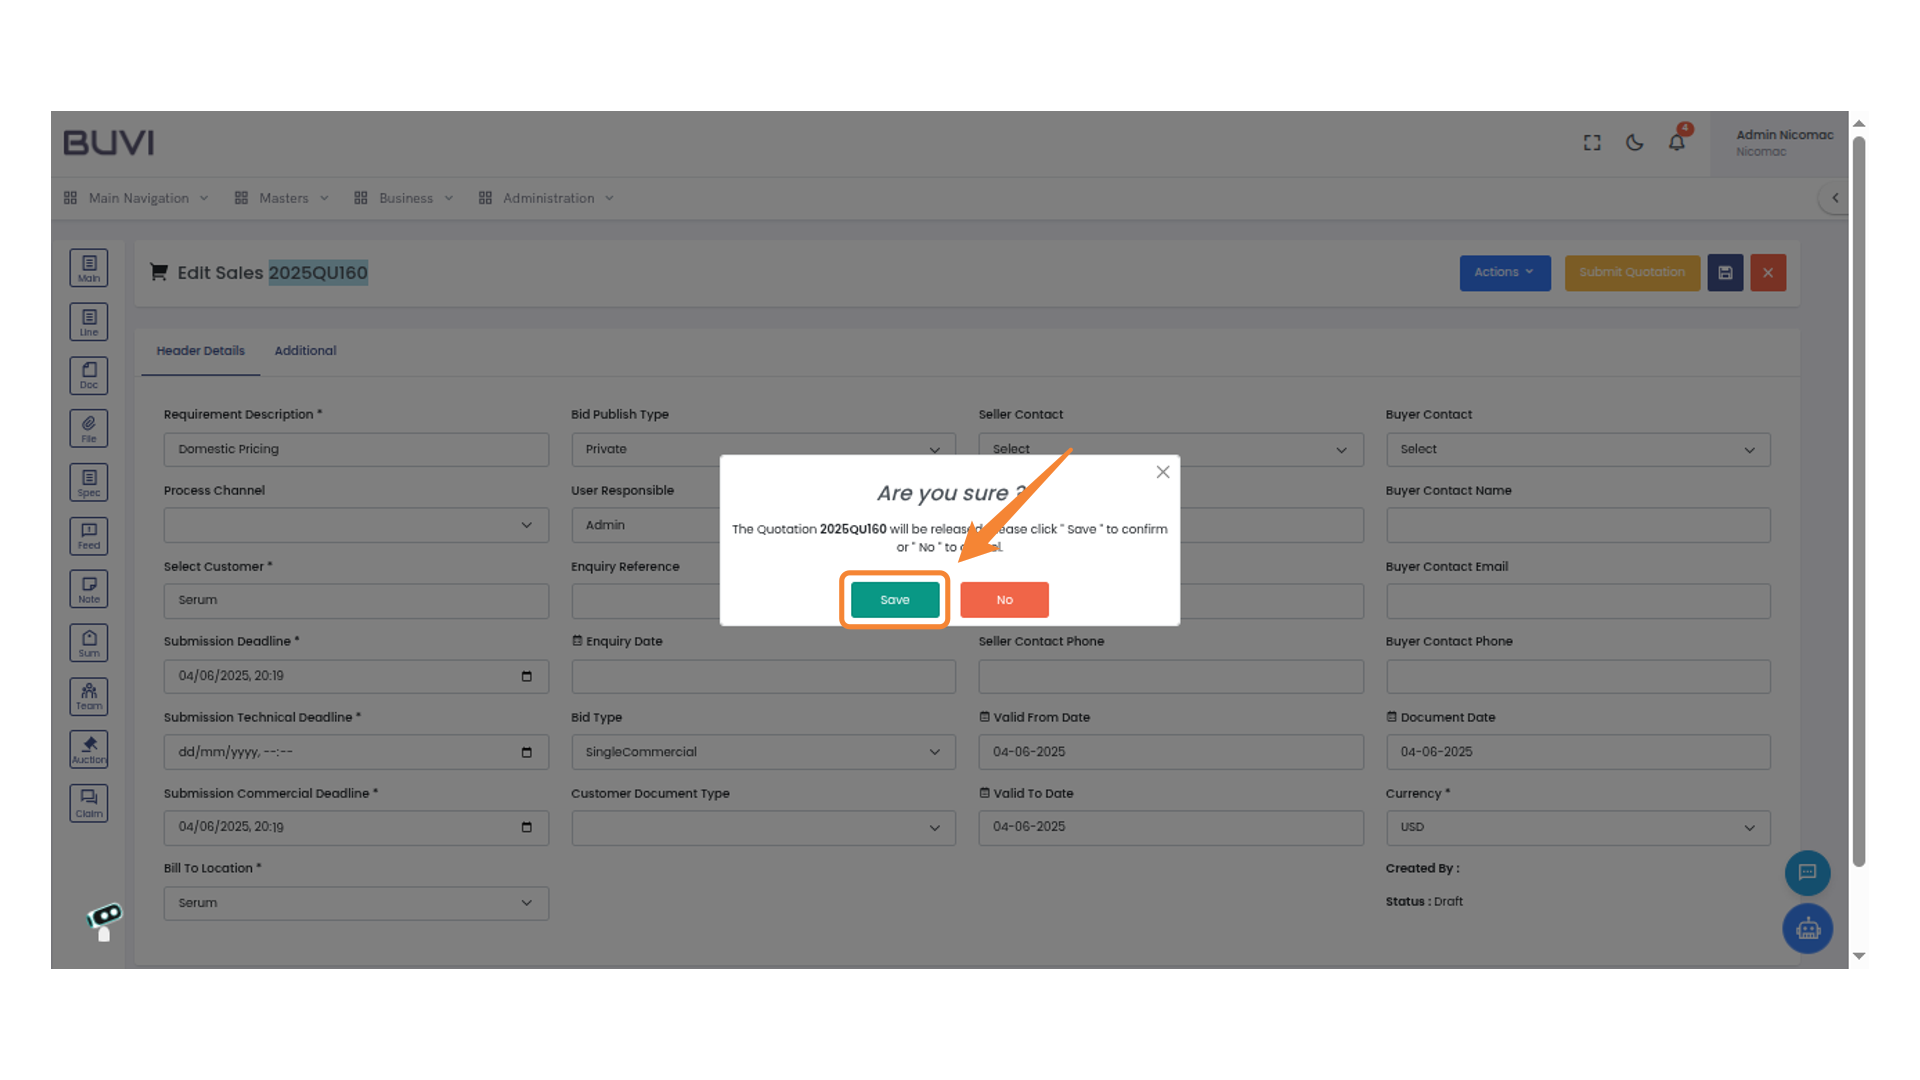
62. Confirmation to Save
Click "Save" to release the quotation 2025QU160 or "No" to cancel.
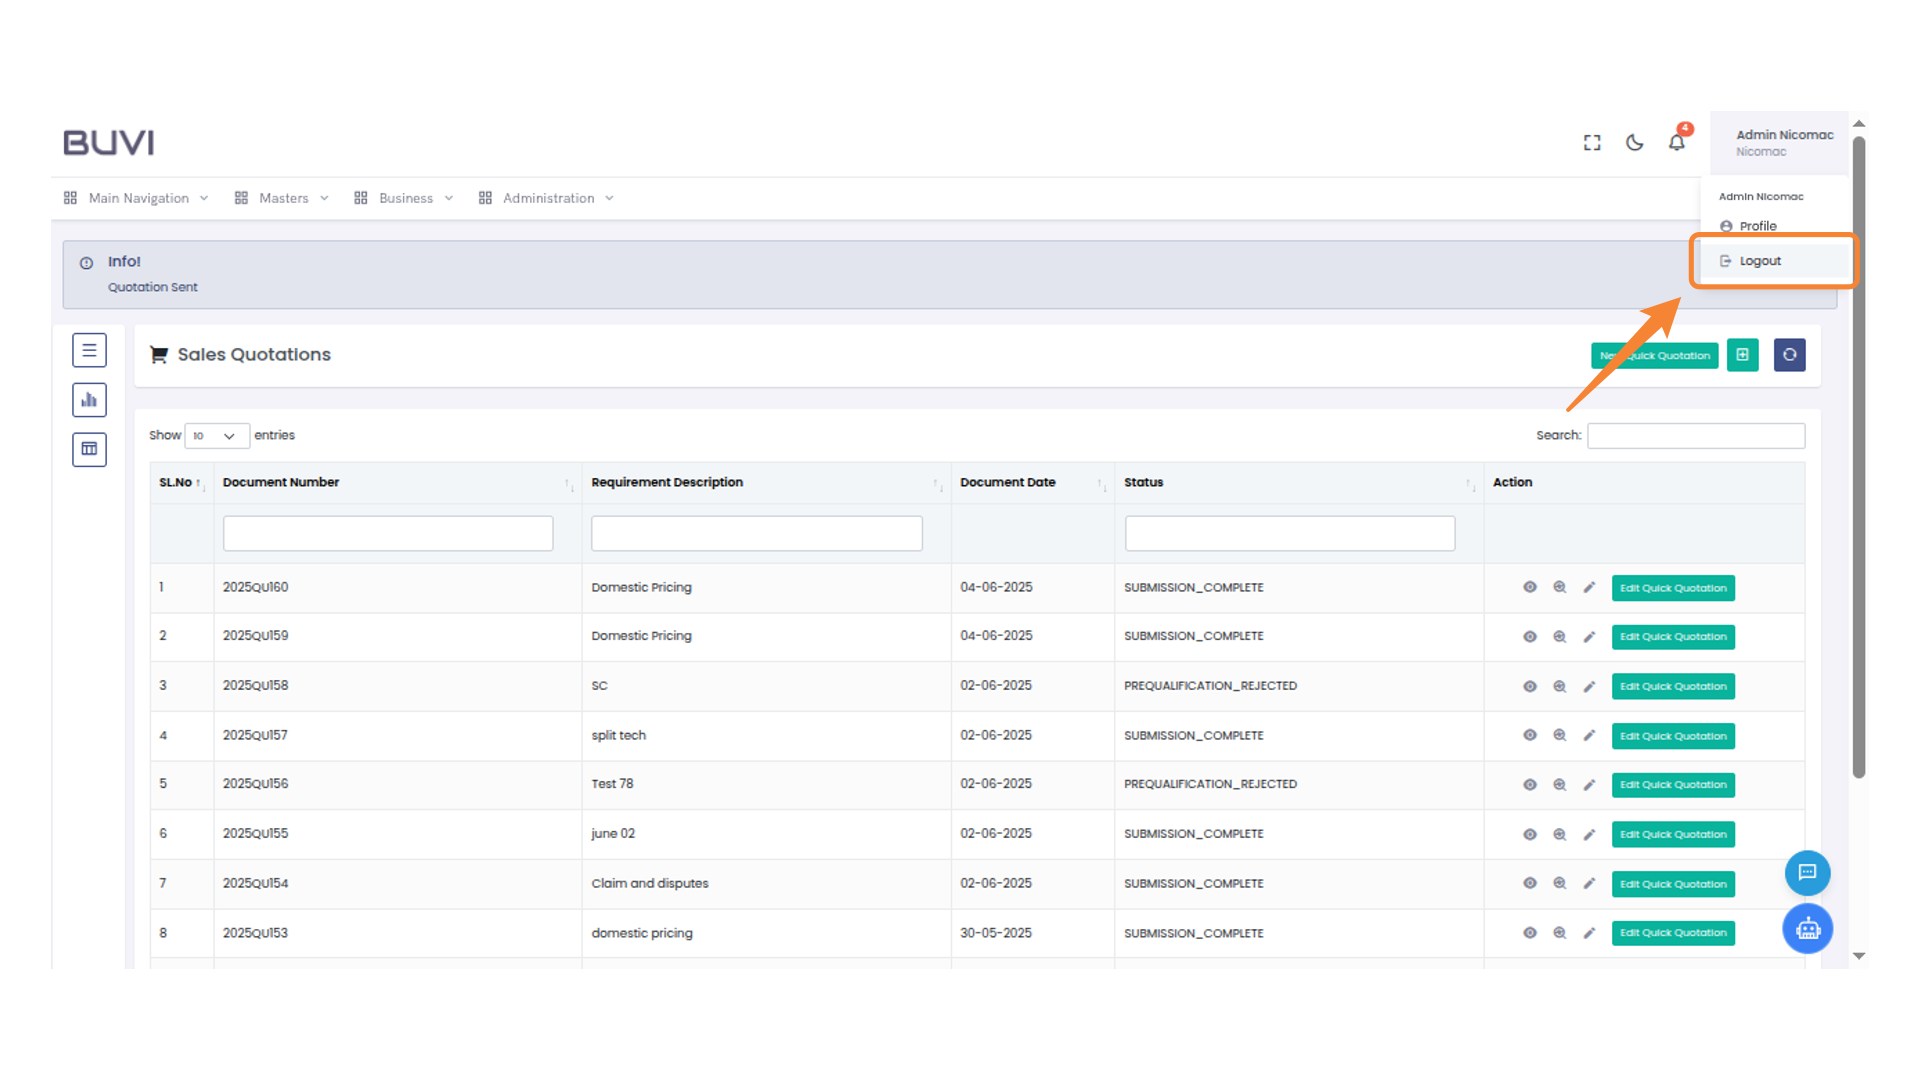
63. Logout Action
Click 'Logout' to exit the application.
64. Login to the application as buyer
Login to the application as buyer
65. Navigate Business Options
click on business menu

66. Access Request for Proposal
Select 'Request for Proposal' from the dropdown menu under 'Purchase' in the 'Business' section.

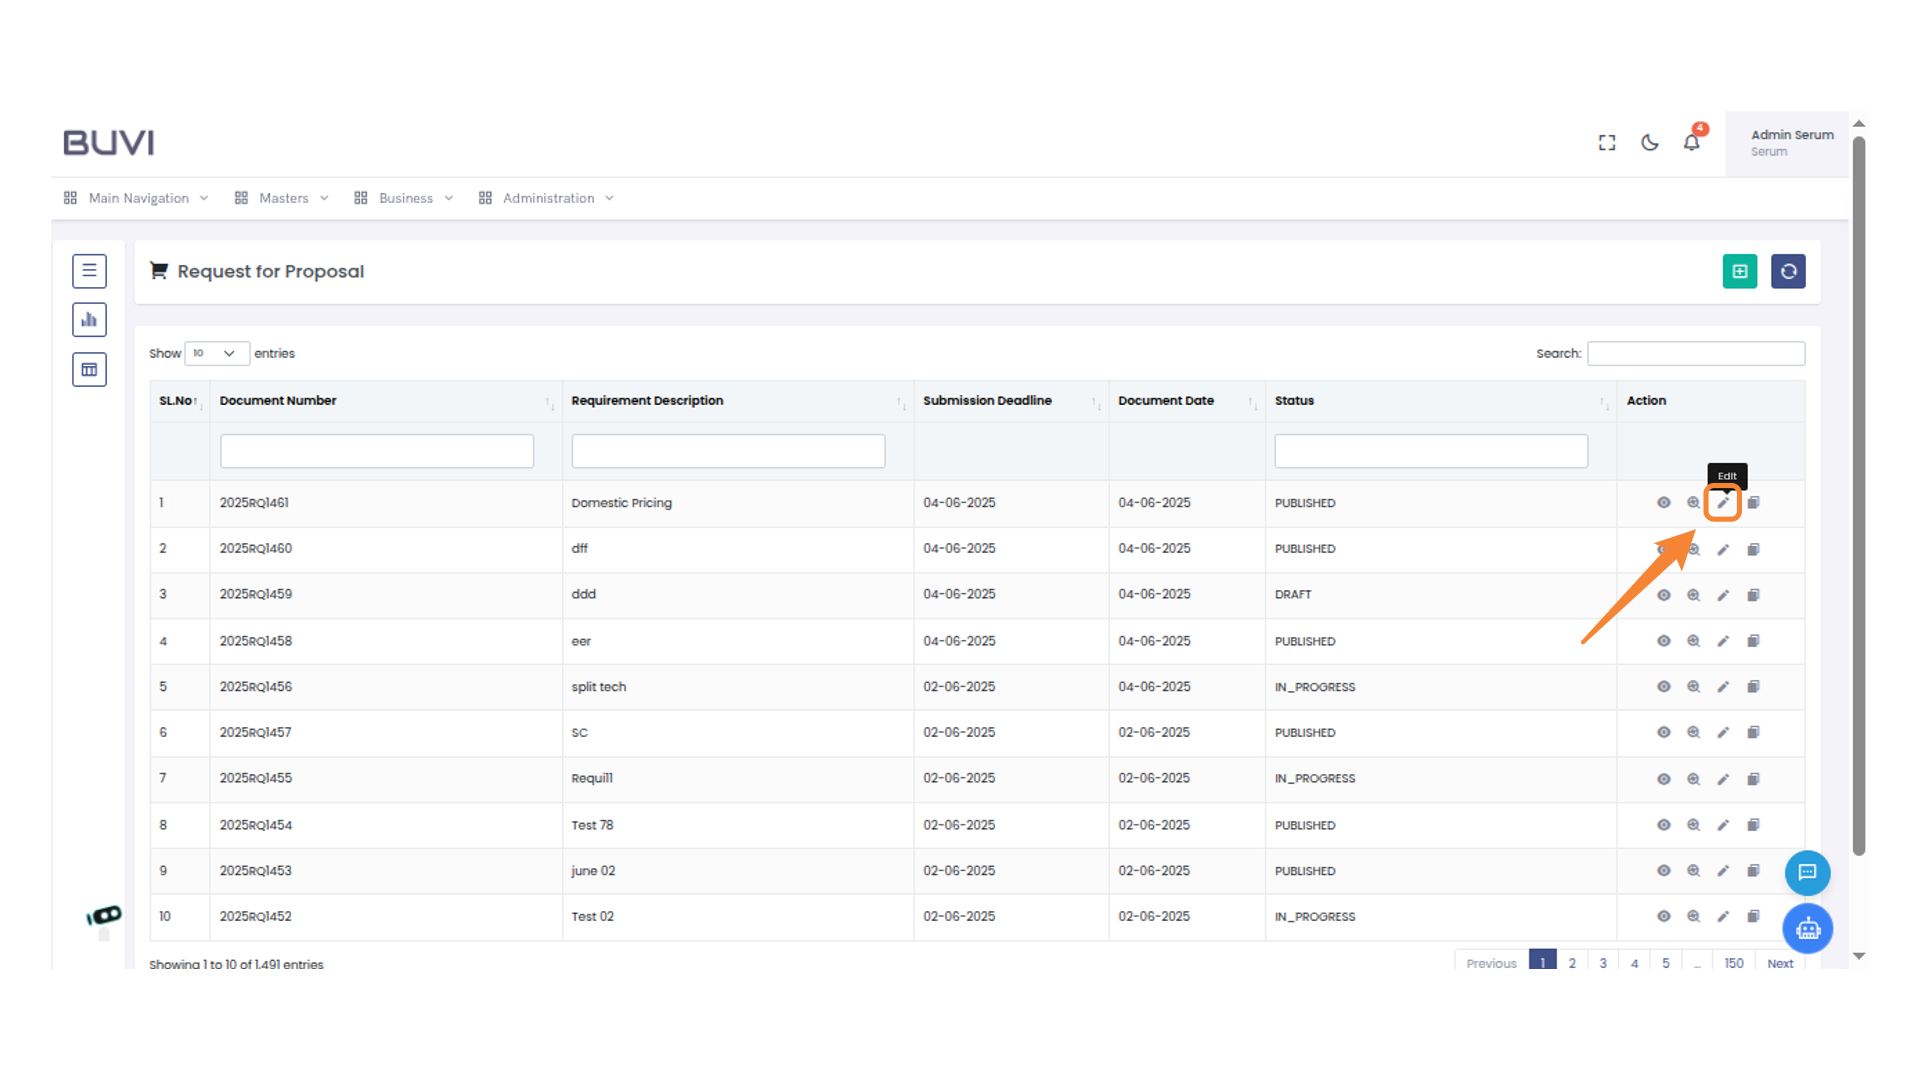
67. Edit Document Icon
Select the pencil icon to edit the selected document.
68. Open Document Icon
Click the "Open" icon to access documents related to the proposal.

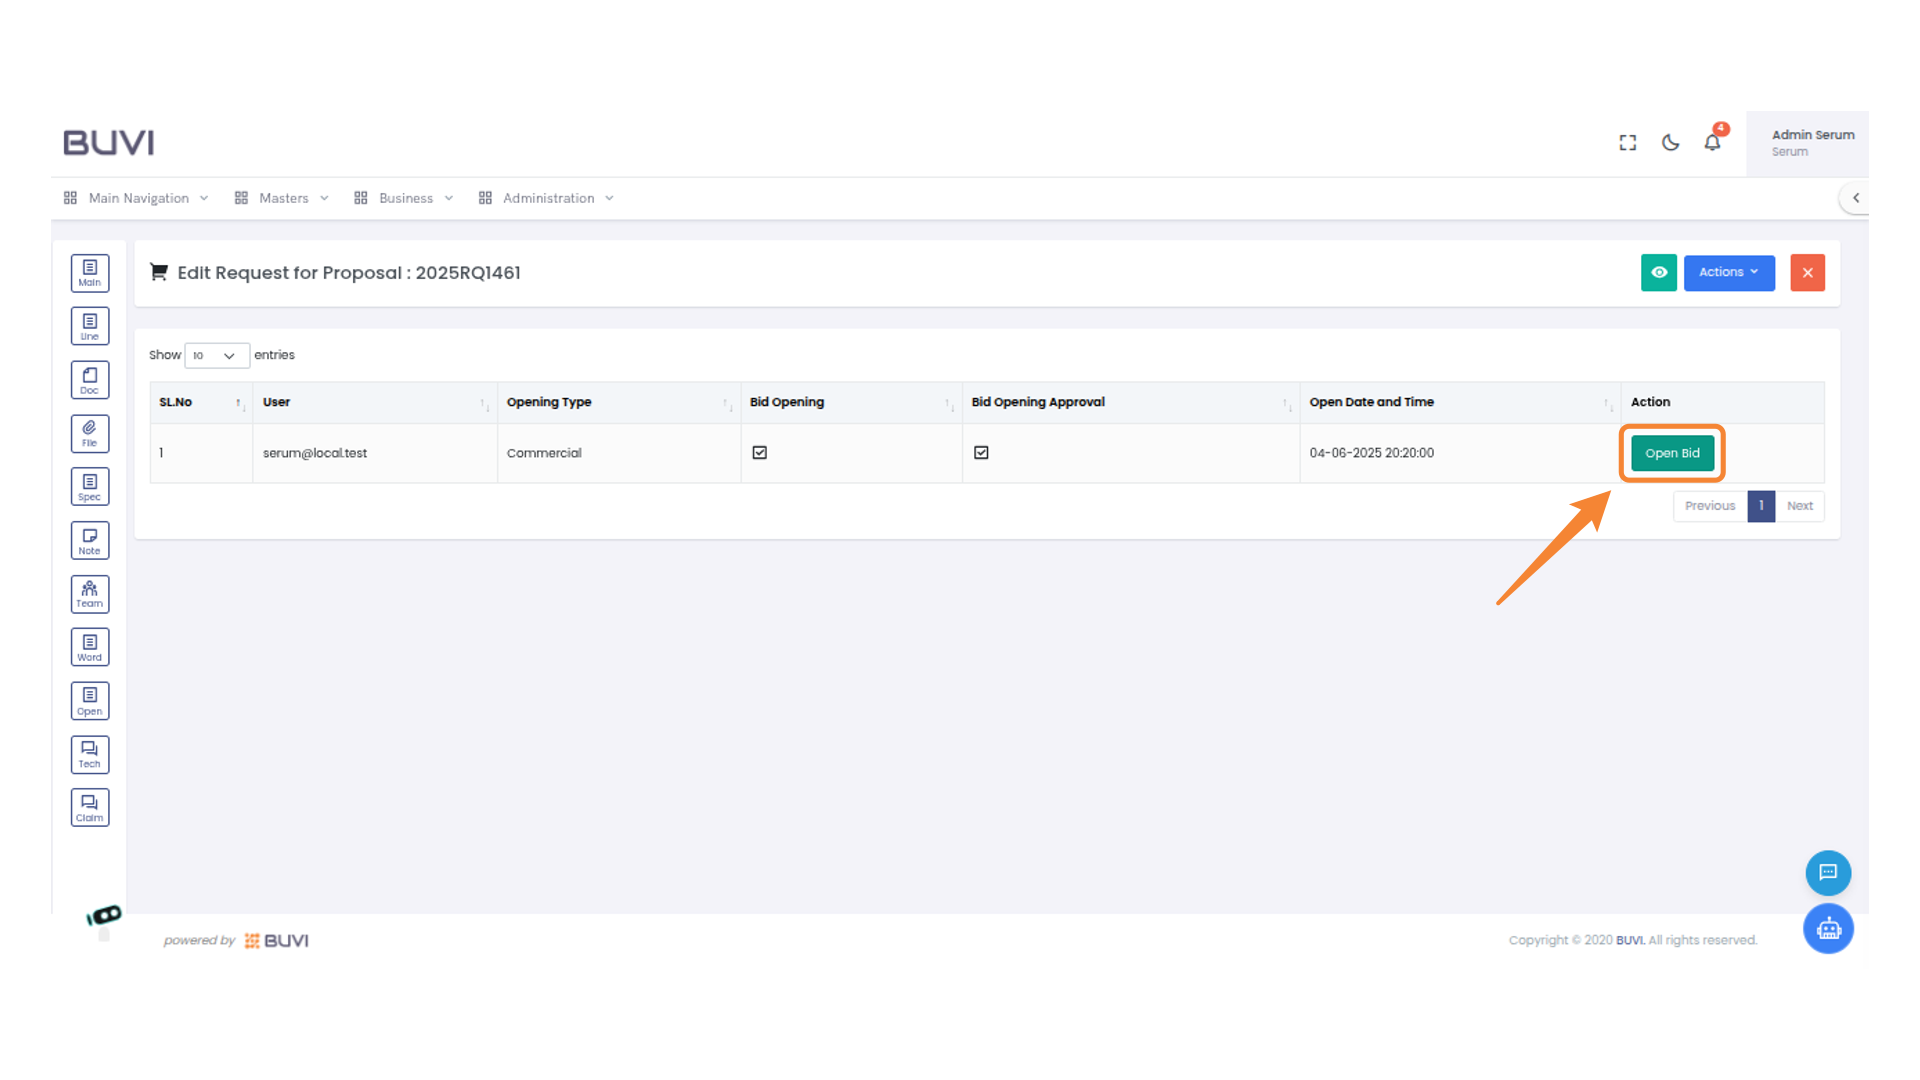
69. Initiate Bid Process
Click on 'Open Bid' to initiate the bid process.
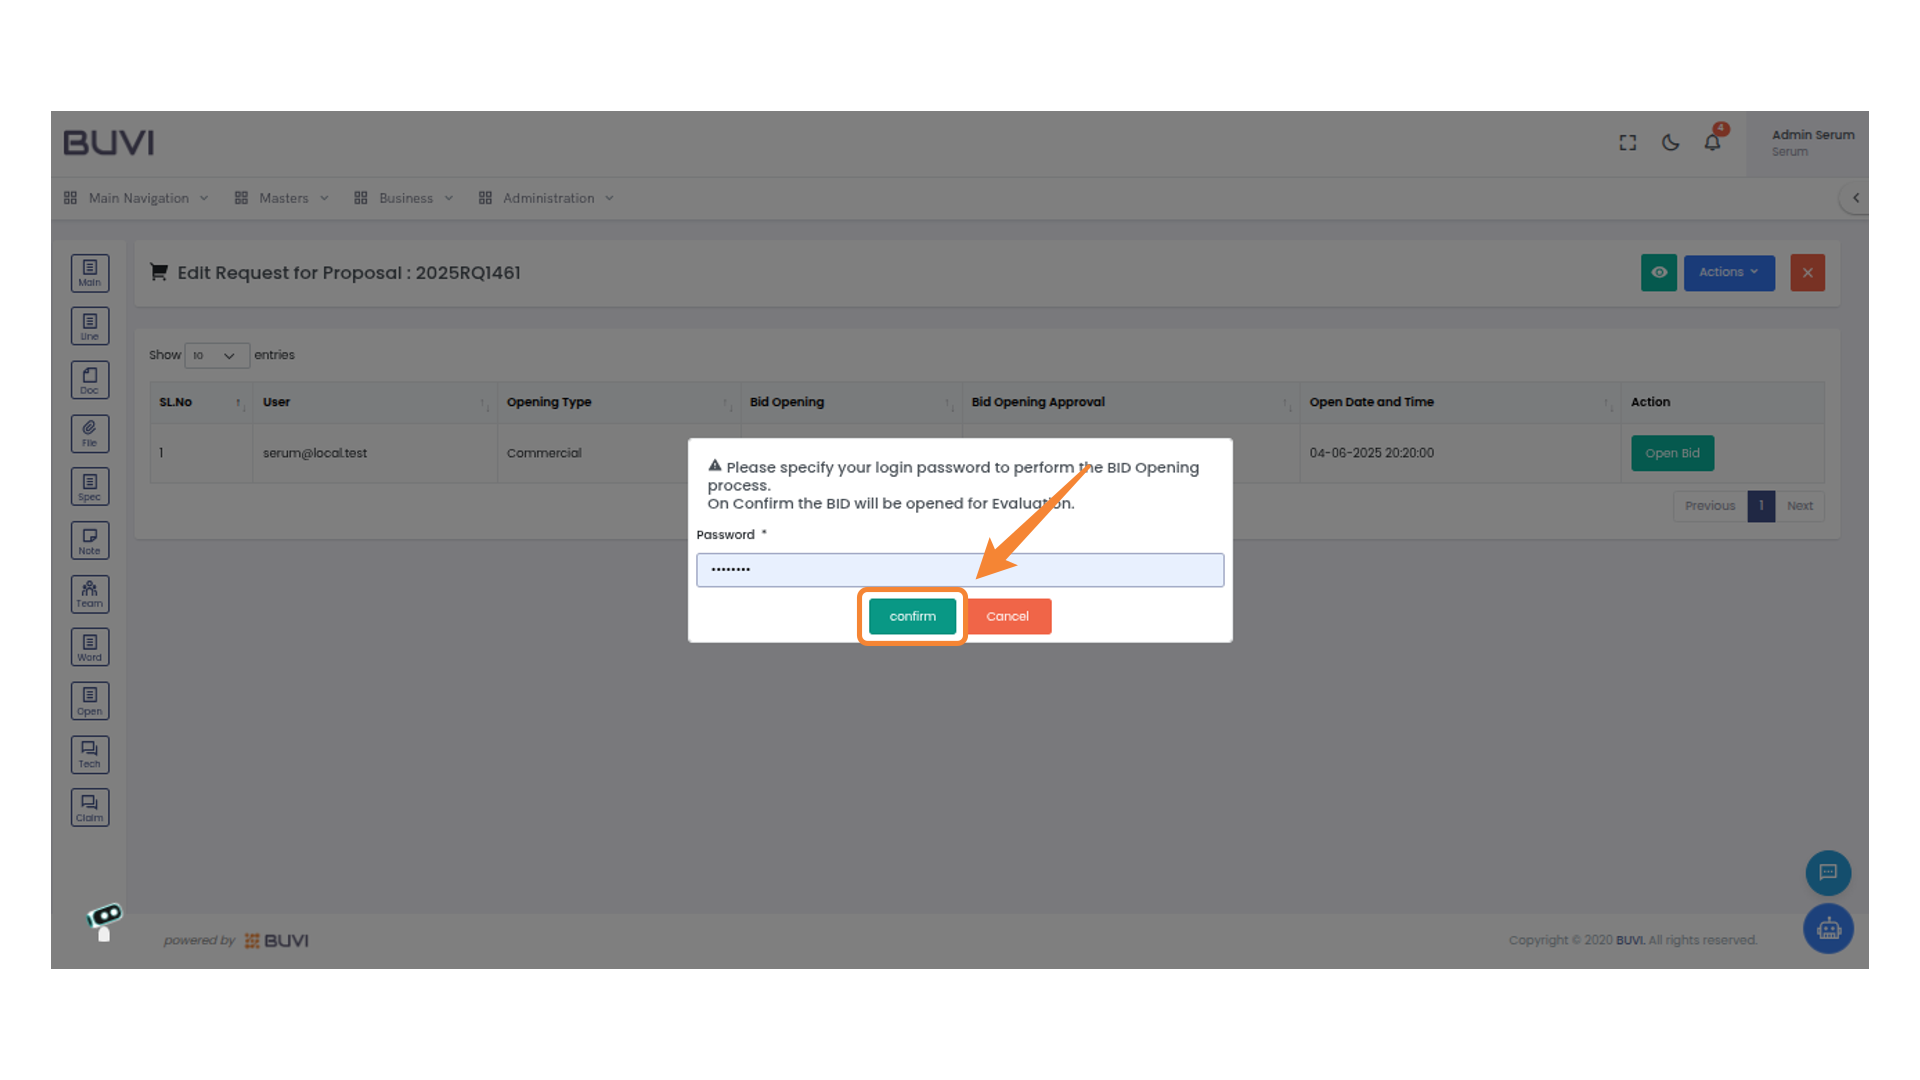
70. Confirm Bid Opening
Click 'confirm' to proceed with the BID opening after entering the required password.
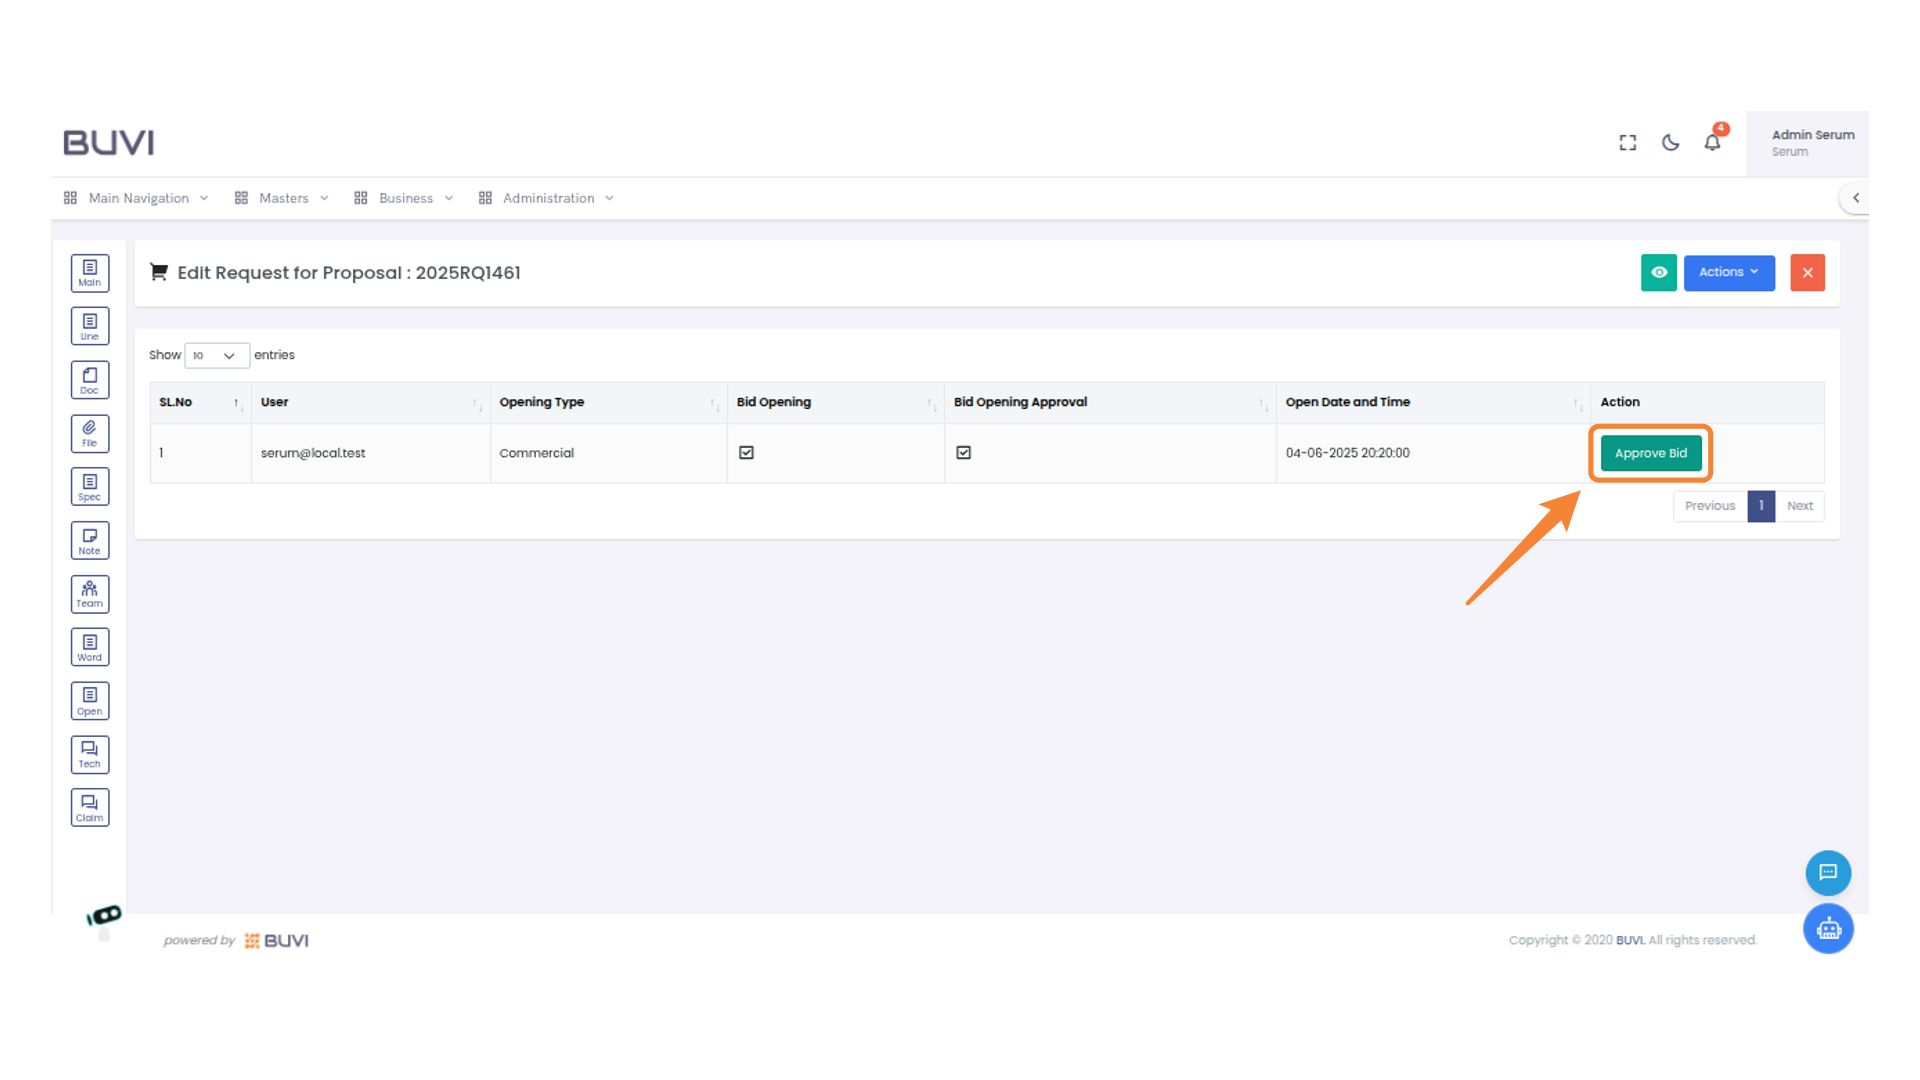
71. Approve the Bid
Click the 'Approve Bid' button to confirm the bid.
72. Enter Password to Proceed
Enter your login password to initiate the BID opening process. Confirm to proceed with evaluation or cancel to abort.
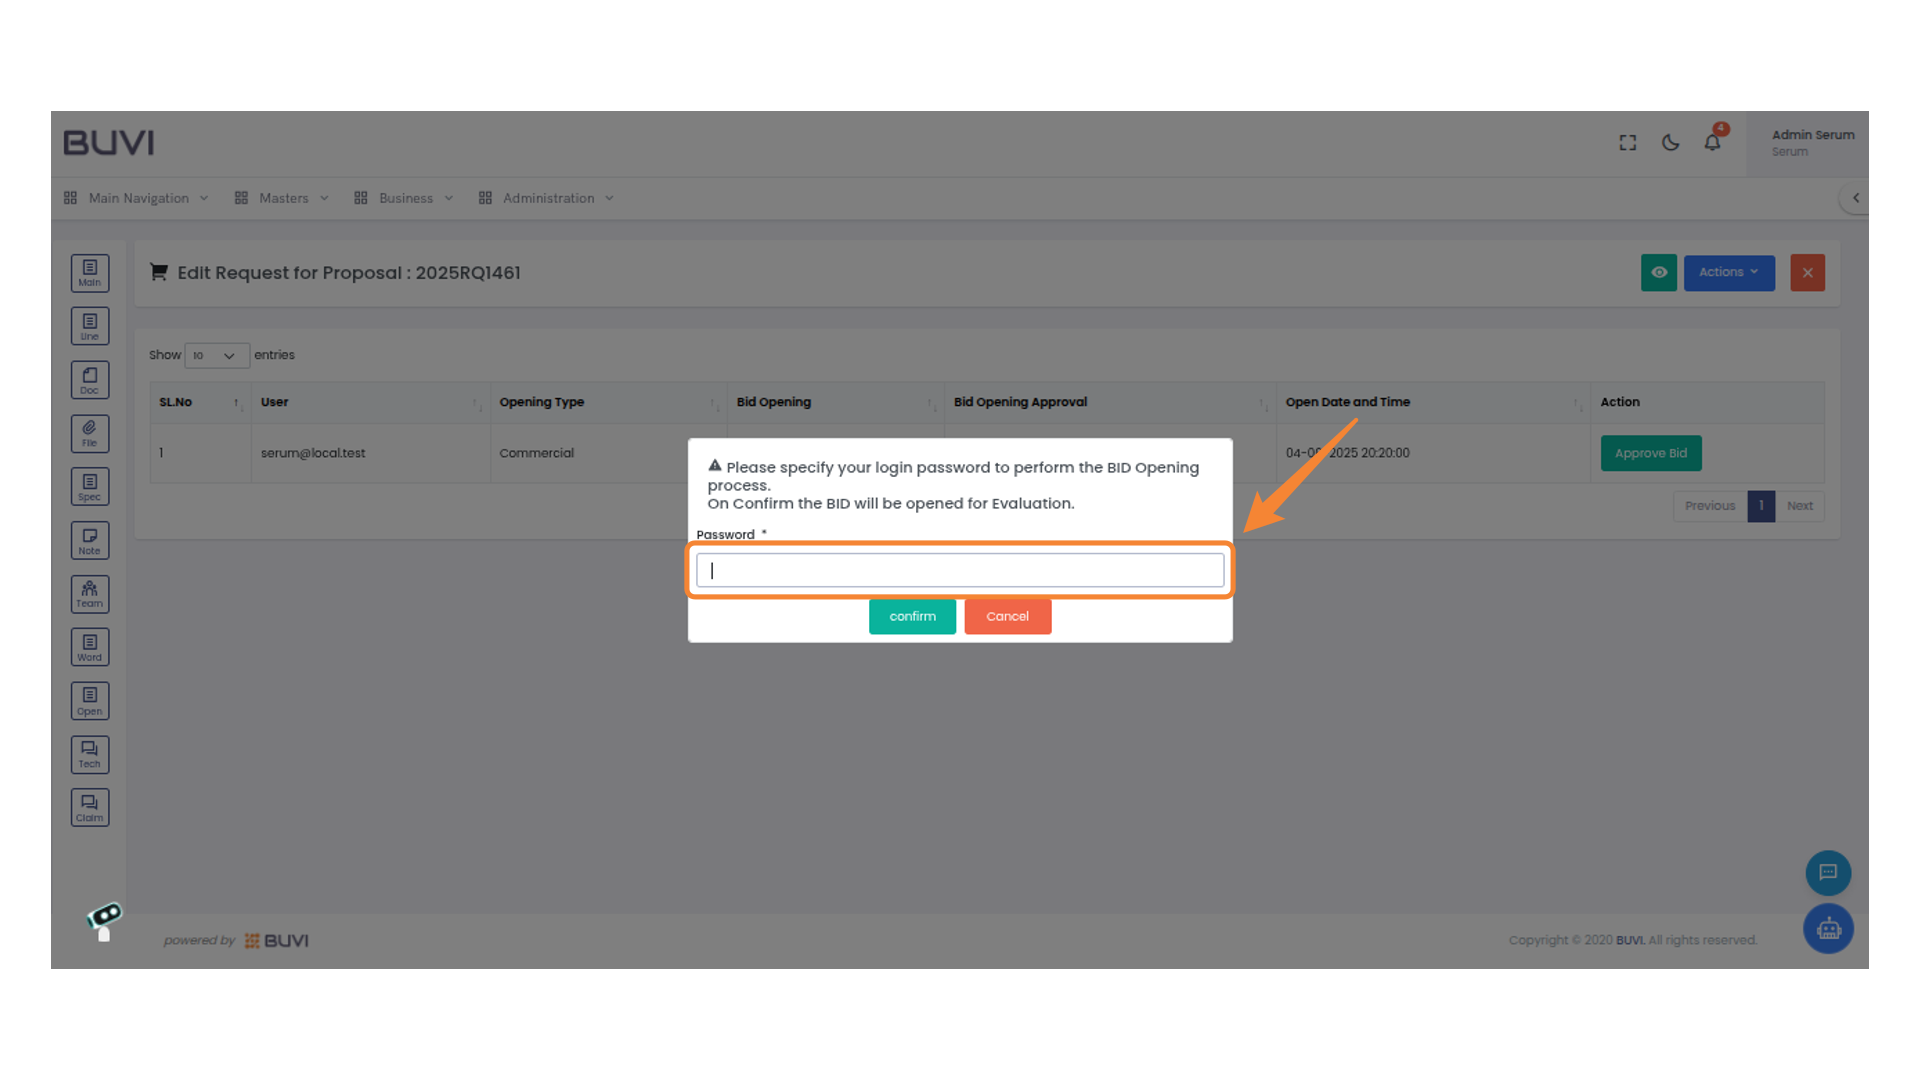
73. Confirm Bid Opening
Click 'confirm' to proceed with the bid opening process after entering your password.

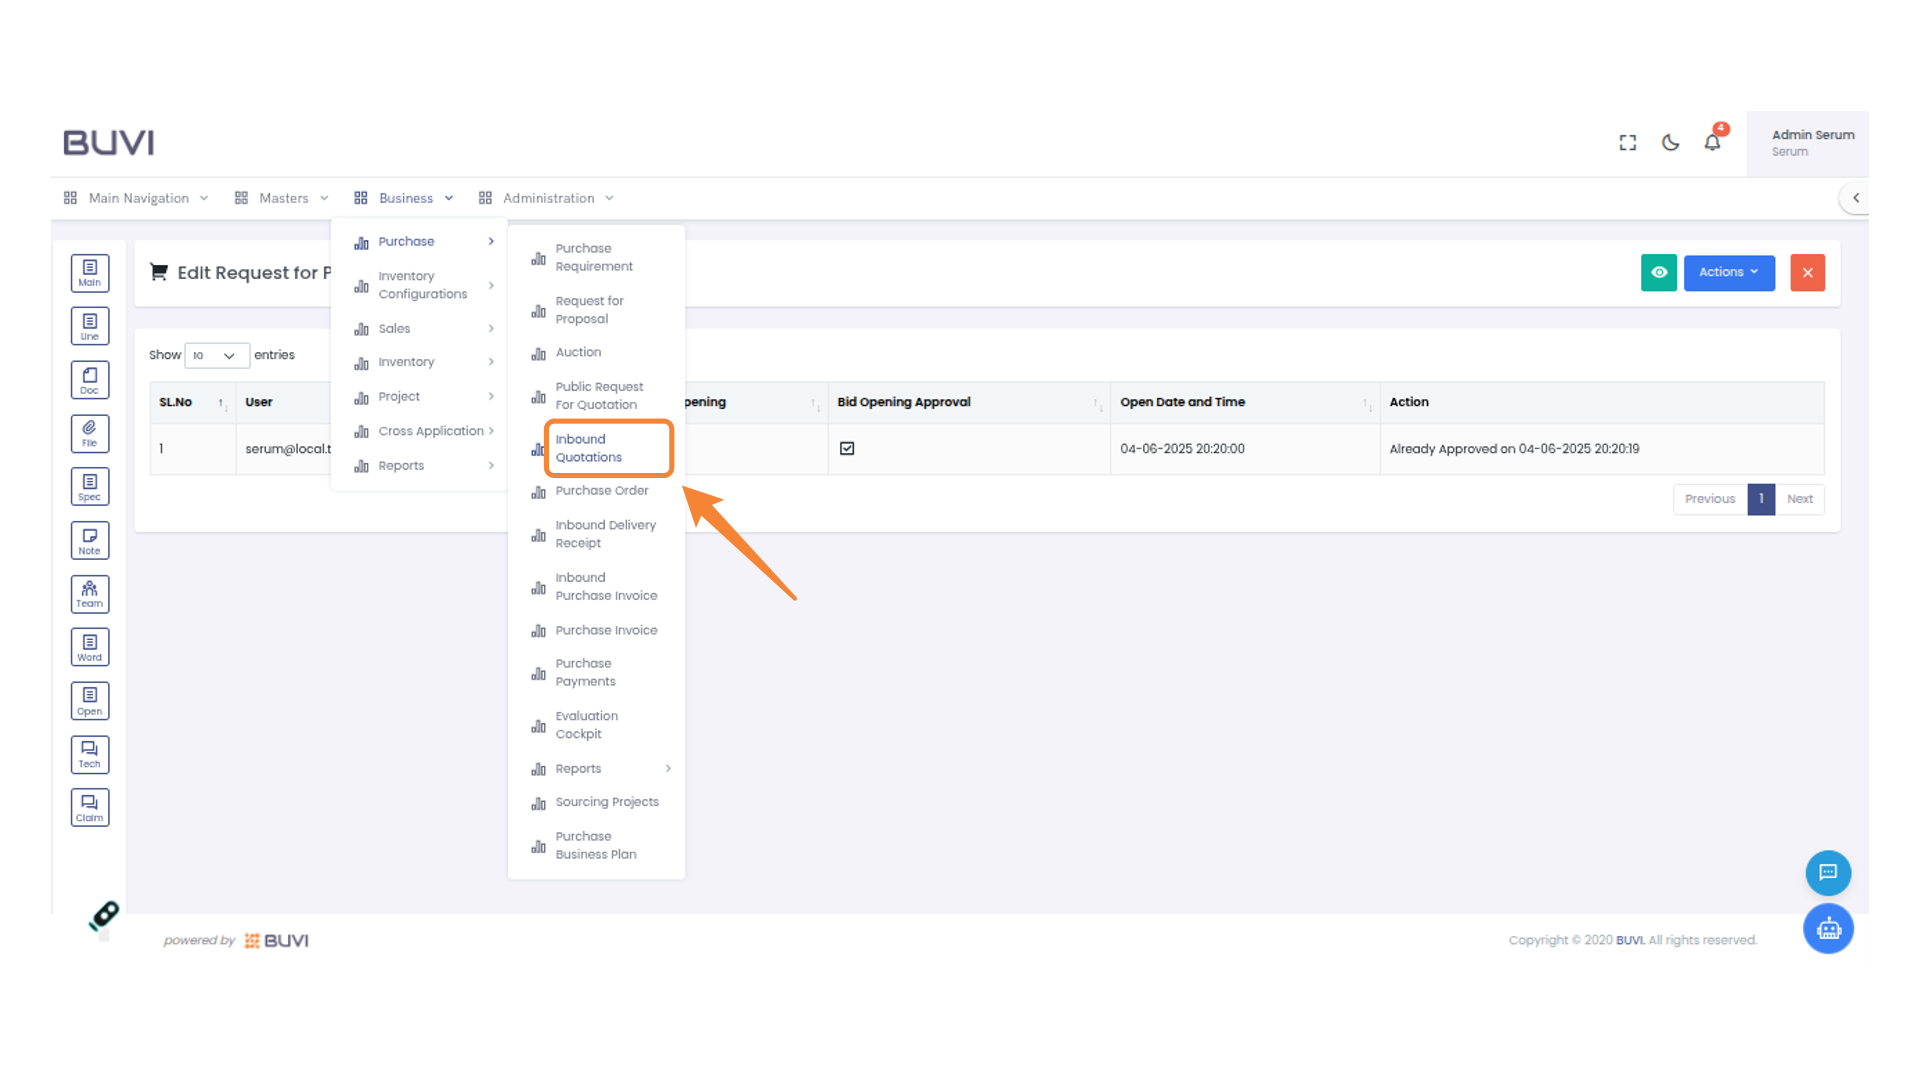
74. Access Inbound Quotations Section
Select 'Inbound' then click on 'Quotations' from the dropdown menu under 'Purchase'.
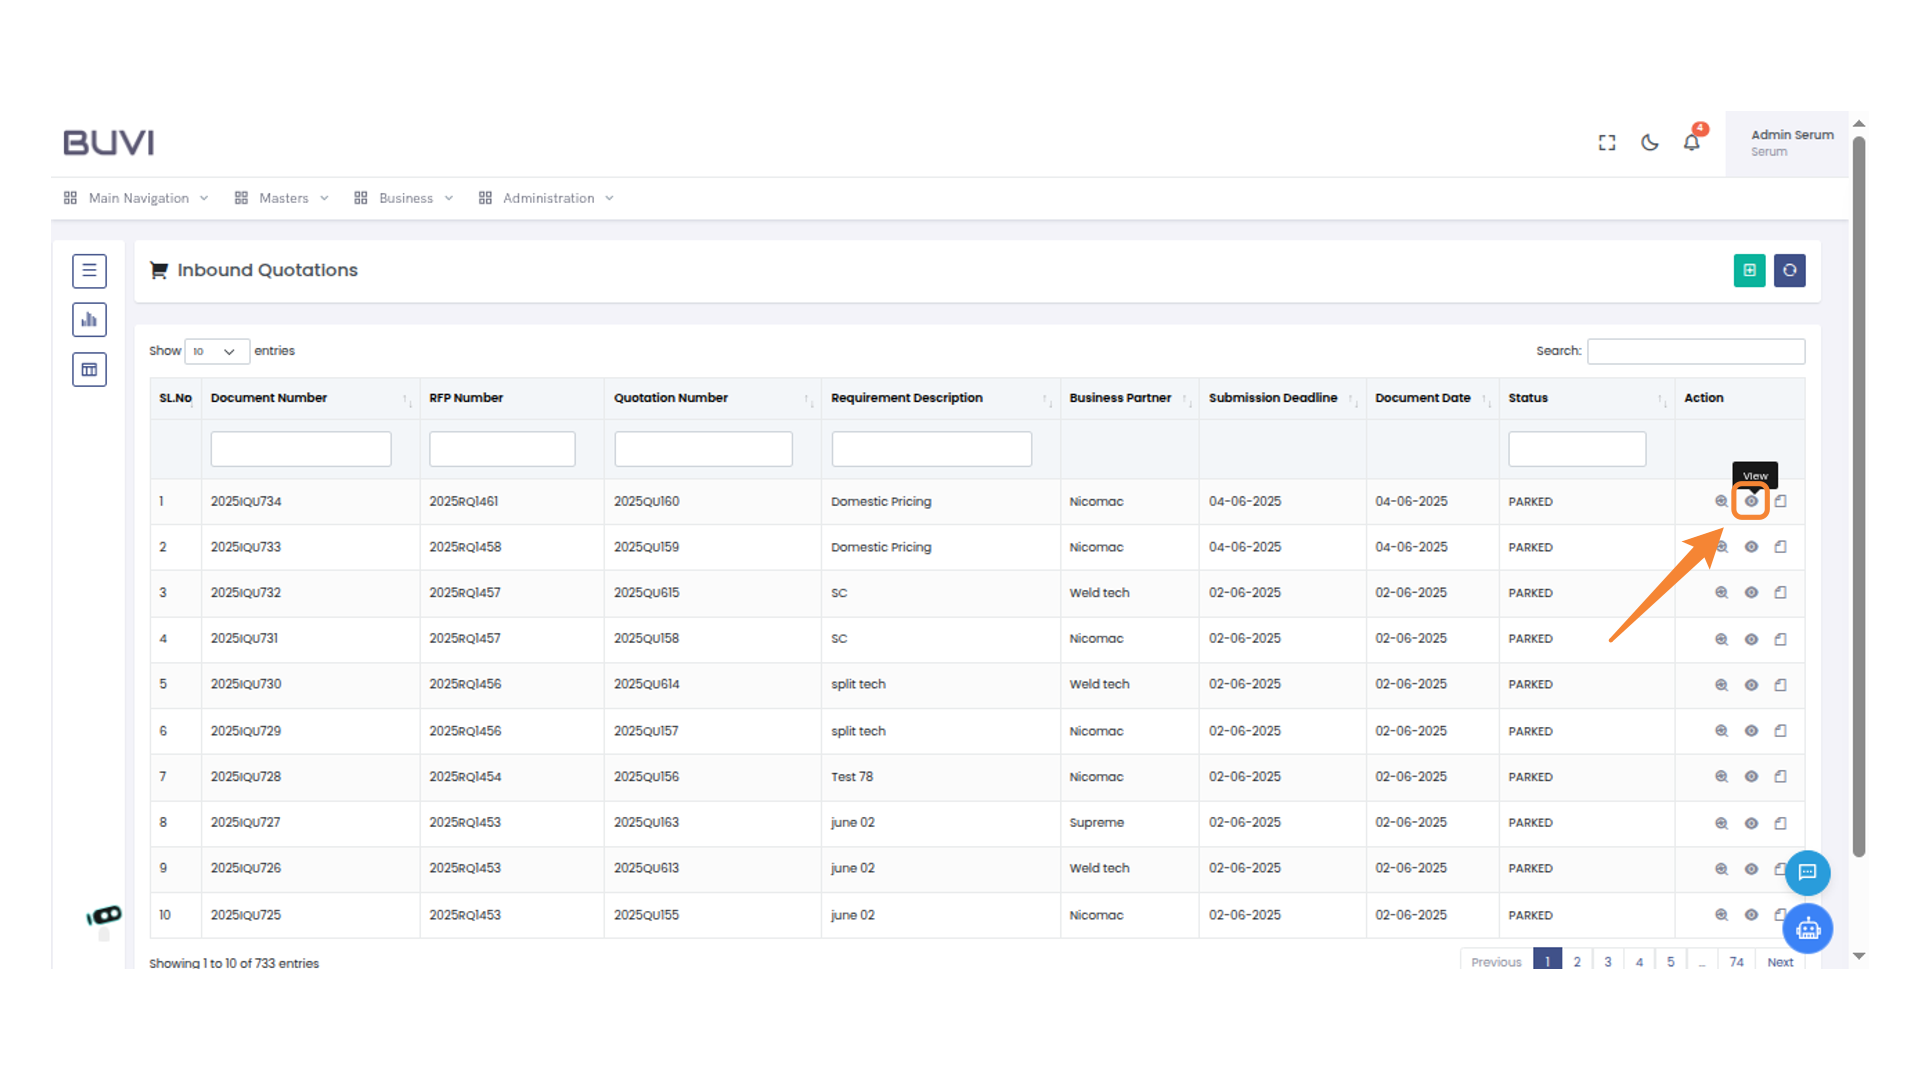
75. View Quotation
Click the view icon to save the verify quotation.
76. Access Line Item Details
Click the 'Line' icon to view and manage line item details in the quotation system.
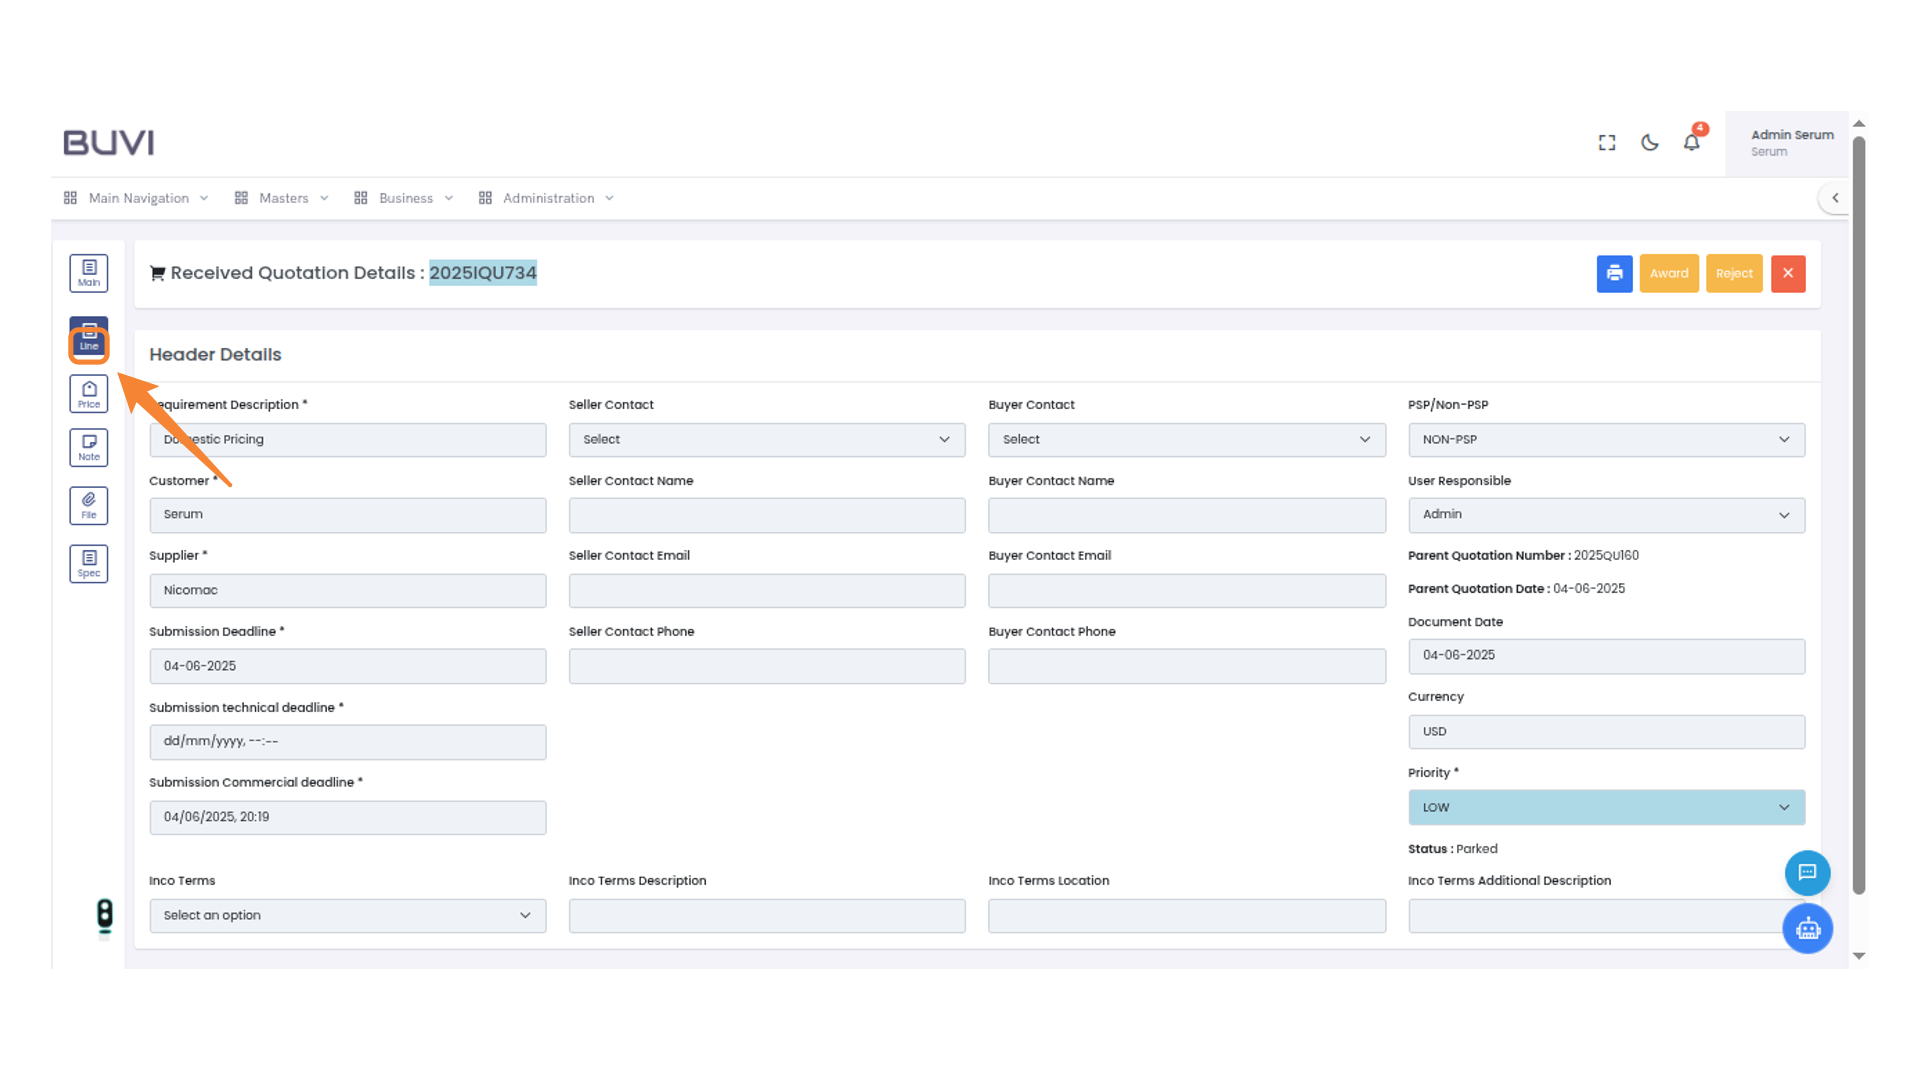
77. Open Quotation Actions
Click the highlighted button to access additional actions for the quotation.

78. Switch to Pricing Tab
Click on 'Pricing' to view and manage pricing details for the quotation.
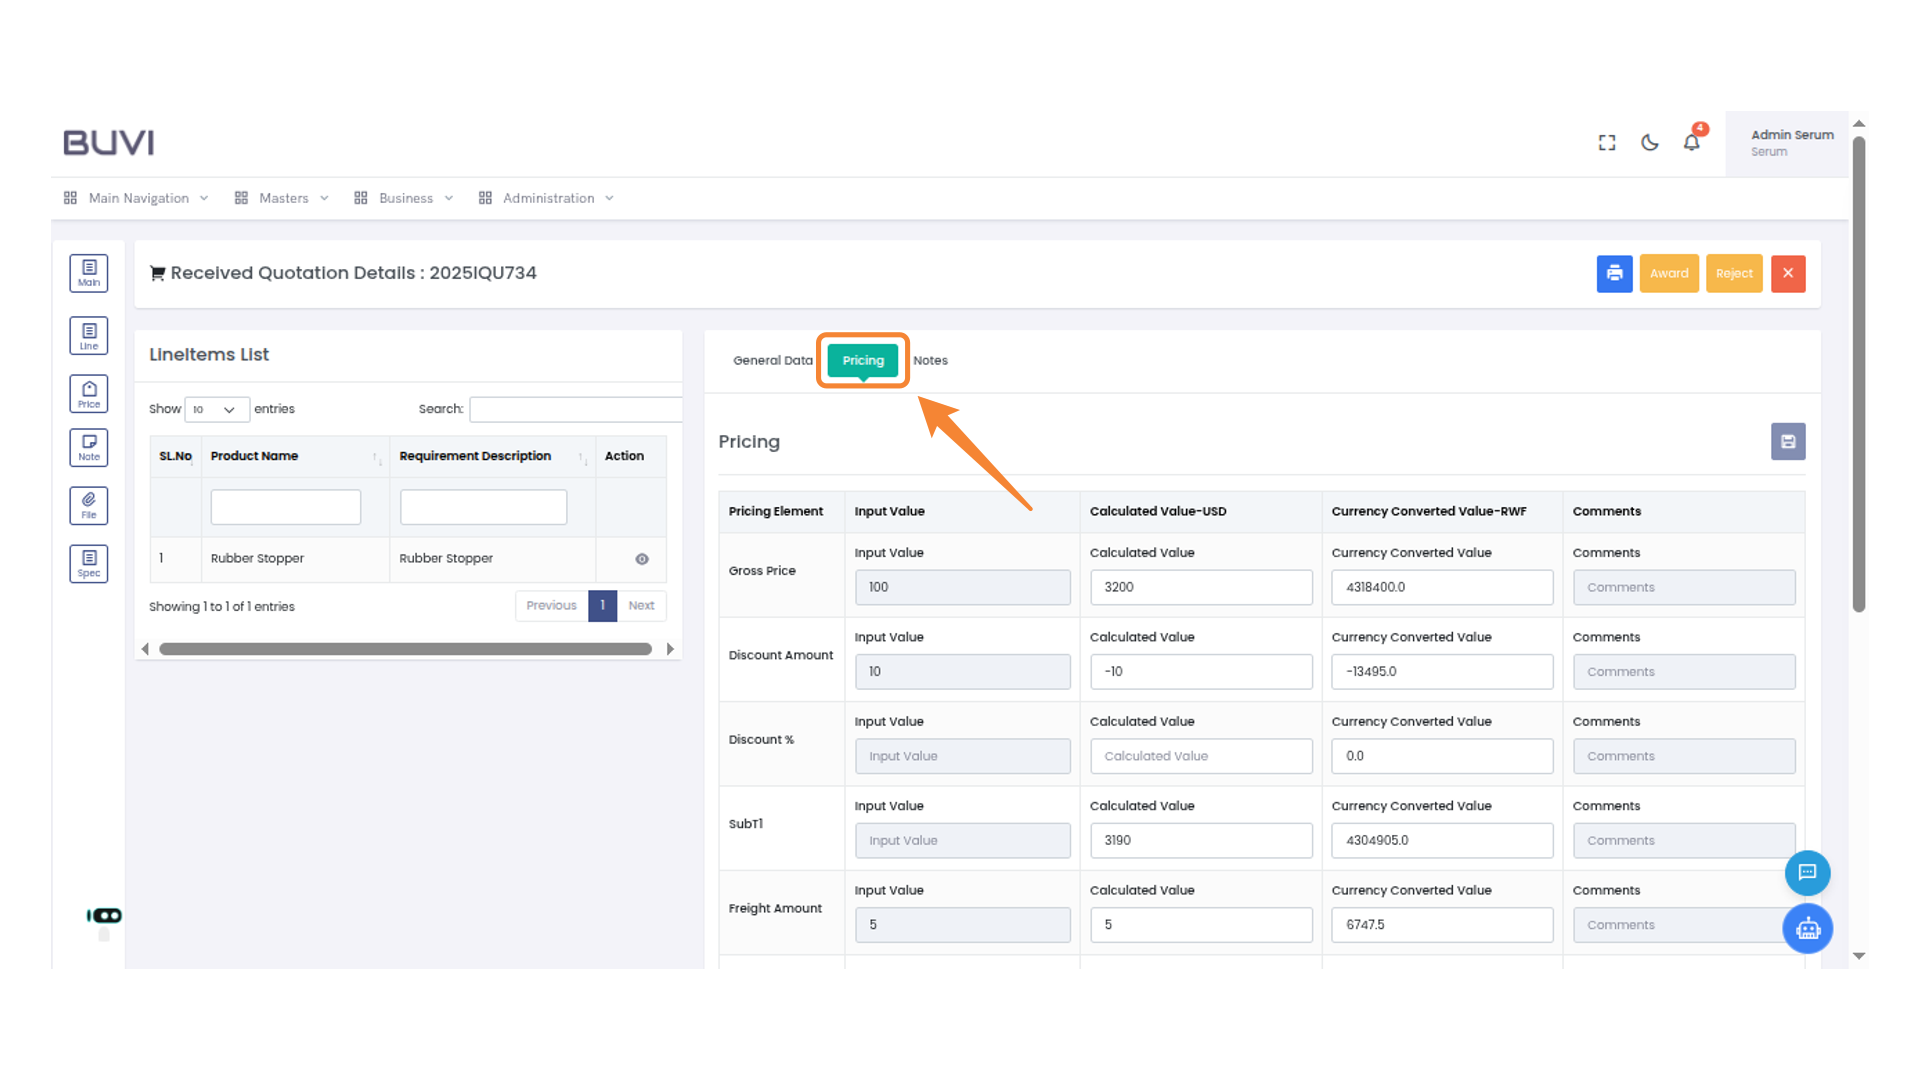
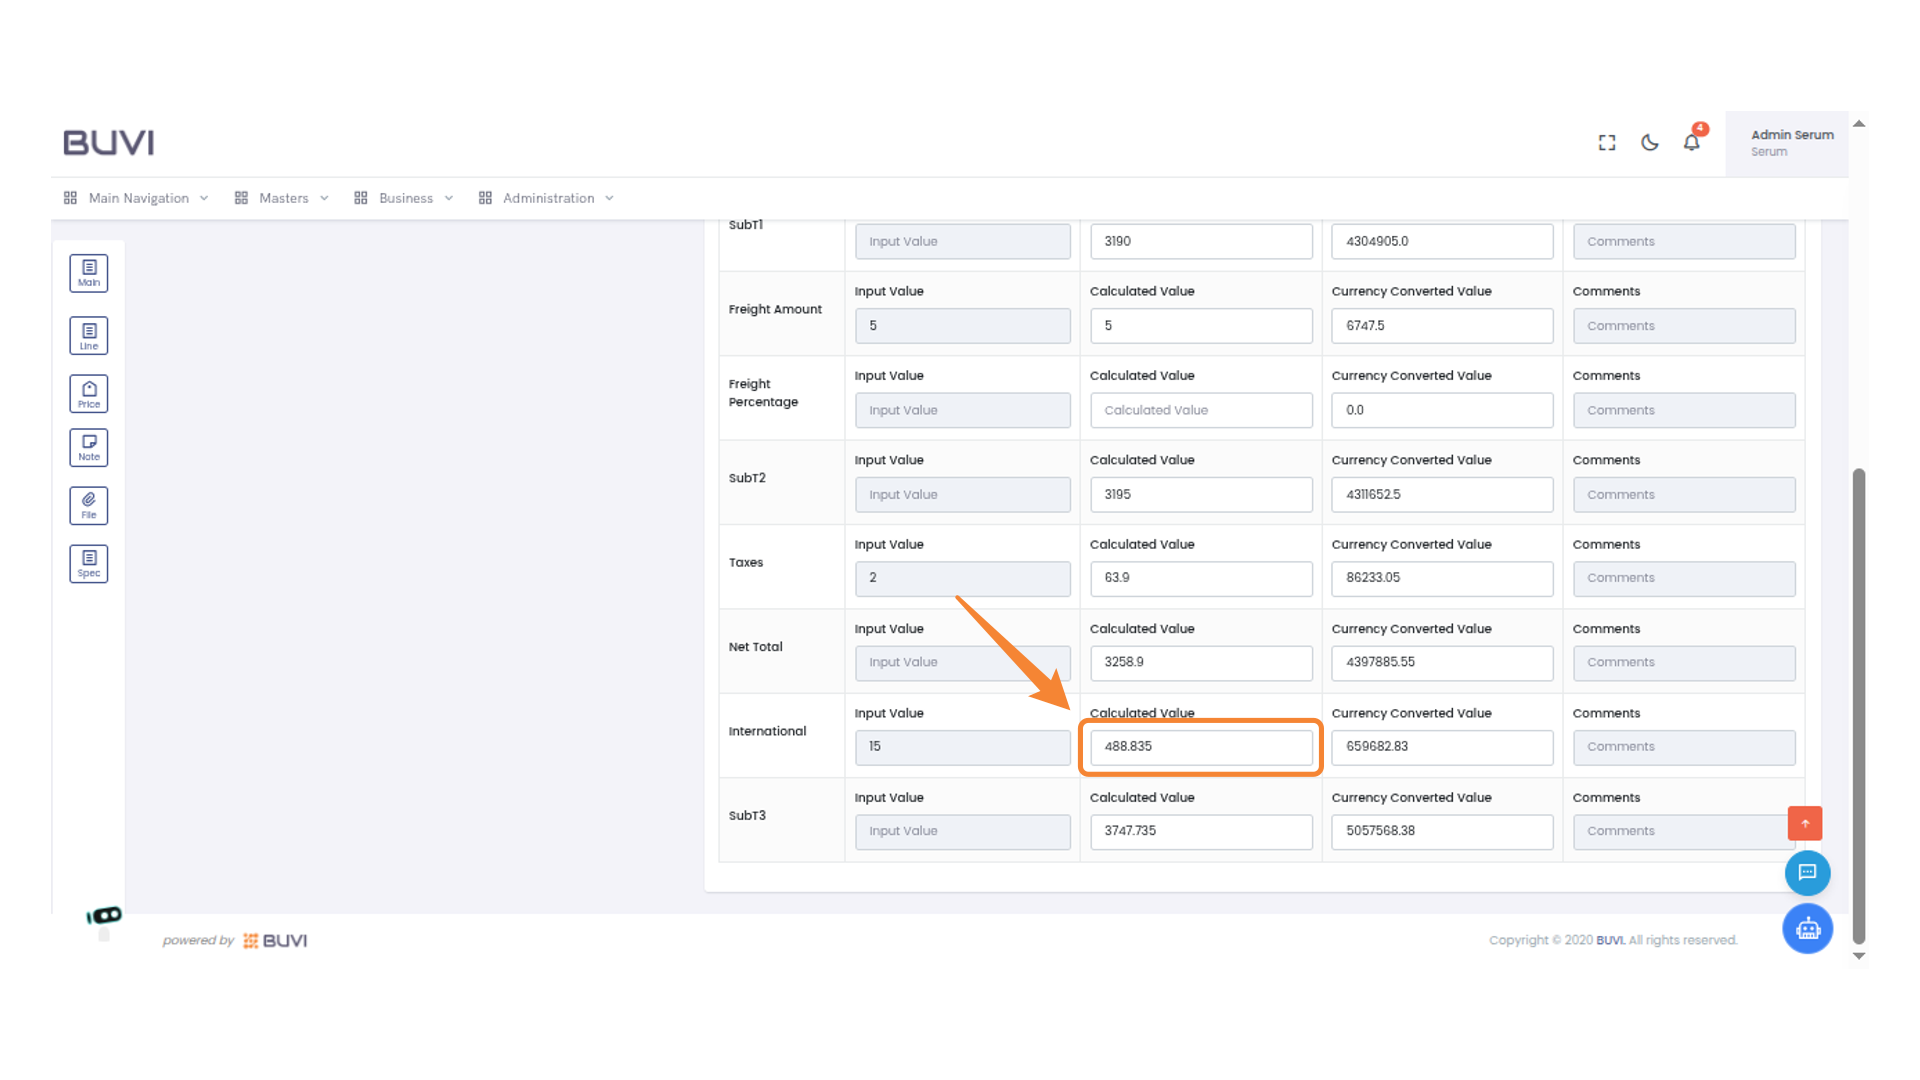
79. View International Calculated Value
View International Calculated Value